Start button at the center of the screen, telemetry on every step, Teams starting on Windows boot. I’m older Windows user now, I’m using Windows since 3.1. I embraced a lot of new things in Windows, but also there is a lot of things I don’t like, especially Windows getting more and more crammed with telemetry and ads. I will run you through my Windows customization and configuration with this series of guides.
Few important bits.
This is going to be a HUGE guide with couple of parts, so I just won’t be able to screenshot all the things – there will be step by step guide on where to go, and where the option is, and sometimes only one or none of the screenshots for some functions. Look at this guide as a checklist.
Next important thing – you don’t have to do everything as I did here – this is my best practice guide, and maybe you like some bits of the system set in different way. Feel free to use this as reference and modify system to your needs and workflow.
I will cover following:
General steps, Personalization, File Explorer, System, Privacy and Security, apps…
We are going to do a quick and high level overview before we start.
Version differences
First of all, Windows versions – there is Windows 11 Home, Pro and Enterprise as main versions (in my mind) and Education, Pro for Workstations…
You can check expanded lists on these links – https://www.microsoft.com/en-us/windows/compare-windows-11-home-vs-pro-versions#tabs1-2
https://www.microsoft.com/en-us/windows/business/compare-windows-11
There are differences between versions – I will mention only what comes I find crucial, just to make you aware (if you are not) that there are differences in functionality between versions.
Home version doesn’t have Bitlocker, Hyper-V, Sandbox, and ability to connect to it via RDP, cannot be connected to AD. There are ways to make some of these features work on Home, but we are not here to discuss that.
Pro version does have all of the features I mentioned above that Home doesn’t have.
Home 11 can have max 64CPU cores and 128GB of RAM, while Pro can have 128 CPU cores and 2TB of RAM. But if you need that kind of power, I would suggest looking at Windows Server (except if you are in “creator” category).
Enterprise version has many advancements when compared to both Pro and Home, but the one we will care the most here is – no bloatware and minimal telemetry. Enterprise version supports up to four CPU physical sockets and 6TB of RAM when compared with other versions.
Which version to select?
I won’t lie – I don’t use Home version at all. I mostly use Pro, and in recent years exclusively Enterprise versions of Windows. There is a matter of price of course. Home is cheapest version, Pro is middle ground, and Enterprise needs to have also Pro key before you can upgrade to it – which means cost of Pro key + cost of Enterprise key.
You can buy these keys on third party sites for few euros or US dollars. I’m not expert at licensing, but I doubt this is valid way of licensing Windows.
Probably, if you are not business user, cost will dictate which license to get. My advice would be Pro at minimum (Bitlocker and Hyper-V are worth the money), and Enterprise if you can get hands on it.
If you are not in company IT, with has specific needs, only reason to go with Enterprise license is cleaner Windows install without bloatware and less telemetry.
And that is exactly why I’m going to use Windows 11 Enterprise for this guide – less bloatware and ads.
If you are looking for clean Windows version without additional software or services – Windows 10 Enterprise LTSC is the one to get – minimal applications and services. I’m yet to test Education version of Windows, but I also heard good things about it in terms of minimalism. Windows 11 Enterprise LTSC is expected in the second half of the 2024 according to Microsoft.
Since 2024, Microsoft will have to enable uninstalling apps in Windows 11 within EU market (EU has its good days sometimes) . So, in the future there will also be options to debloat Windows 11 without third party tools, but the year is still young, and this solution is still not here.
Few words on debloating Windows
I’m interested in clean Windows experience, and Windows is full of bloatware and ads, telemetry is also a thing for Microsoft. Few things I would advise from my experience
- Don’t download and install Windows “Lite” versions from random places on the internet – you never know what’s in them. Stick to official Microsoft sources for your software
- Debloat scripts and apps can (maybe) help you but also can turn your Windows experience into worse than it is
- If you are running all these scripts and apps and cleaning Windows in expectance that your PC will work faster – well, you need a new PC then. There is not much you can gain by debloating in terms of performance
- Just uninstall apps that are not needed (or remove shortcuts) and configure windows settings – to be less intrusive – that would be my advice
- Get your hands on Win 10 Enterprise LTSC (or maybe even Education edition) if you wish relatively clean Windows experience
This is my opinion on the topic – you are free to do and use your software how you best see fit, but if you are looking for Windows without bloatware, ads, telemetry – maybe you should look towards other options – Linux.
Installation
Disks
In the first part – I always have logic – one physical disk = one partition. I don’t partition disks – I add another disk if I need it for something. Again, make this part how it best fits your workflow.
Accounts
During installation process, I don’t want to login with Microsoft account. I want local account.
So, before you start installation, if you PC or laptop has an option in BIOS – disable WiFi and (or) network card. That way installer will offer you to create local account. If you don’t have option to disable your network cards, do the following:
On “Let’s connect you to a network” screen press Shift + F10 – Command prompt window will open. In it type the following command
oobe\bypassnroFinal part of the installer will restart – and next time you’ll be offered to create local account.
If you are upgrading to Windows 11 from unsupported hardware
While on Windows installation you wish to upgrade to Windows 11 – in search type regedit – navigate to HKEY_LOCAL_MACHINES\SYSTEM\SETUP\MoSetup\ right click, create New DWORD (32bit) – name it AllowUpgradesWithUnsupportedTPMOrCPU – set value to 1
Reboot system and try to upgrade to Windows 11 even if you don’t have TPM or other requirements for Windows 11.
Protecting you PC from Boot up
If you have option on your PC and especially laptop – in BIOS usually under Security tab, turn on password lock for BIOS and Boot. That way you will have to enter PIN (or password) every time you power-up boot your PC/laptop. In combination with Bitlocker this will make your PC relatively secure. If it is stolen, laptop with BIOS/Boot password is in most cases unusable for the party that stole it.
First steps
If you skipped intro, I’m going to go with Windows 11 Enterprise for this guide, mainly because it is missing most of the bloatware and ads that other versions have. We will now go through first steps that you should do after you login to Windows installation.
Installing Windows updates and device drivers.
Should be absolutely first steps after installation. I cover Windows updates more in depth in second part, because first I want my Windows install to look nice :)
As for drivers, you should look on the PC/Laptop manufacturer site. Surface devices will pull drivers from Windows Updates, Lenovo has Vantage app in Windows store, Asus has MyAsus
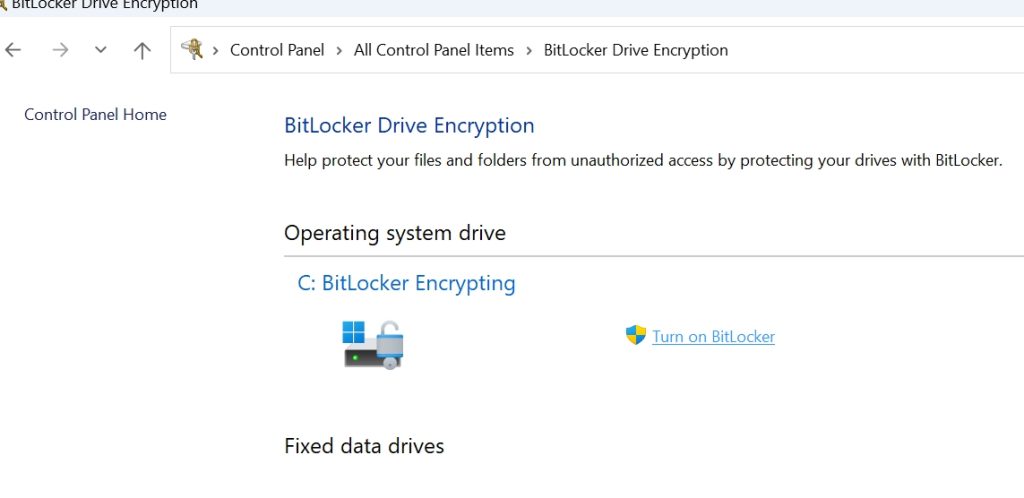
Turn on Bitlocker
Control Panel | Bitlocker Drive Encryption | Turn on Bitlocker
Make sure to Save/Backup Bitlocker recovery in safe place!!!. Somewhere else, and not on the same PC for which the recovery key is. You can also print it and save it again in safe place where you can get to it.
Create Recovery Drive
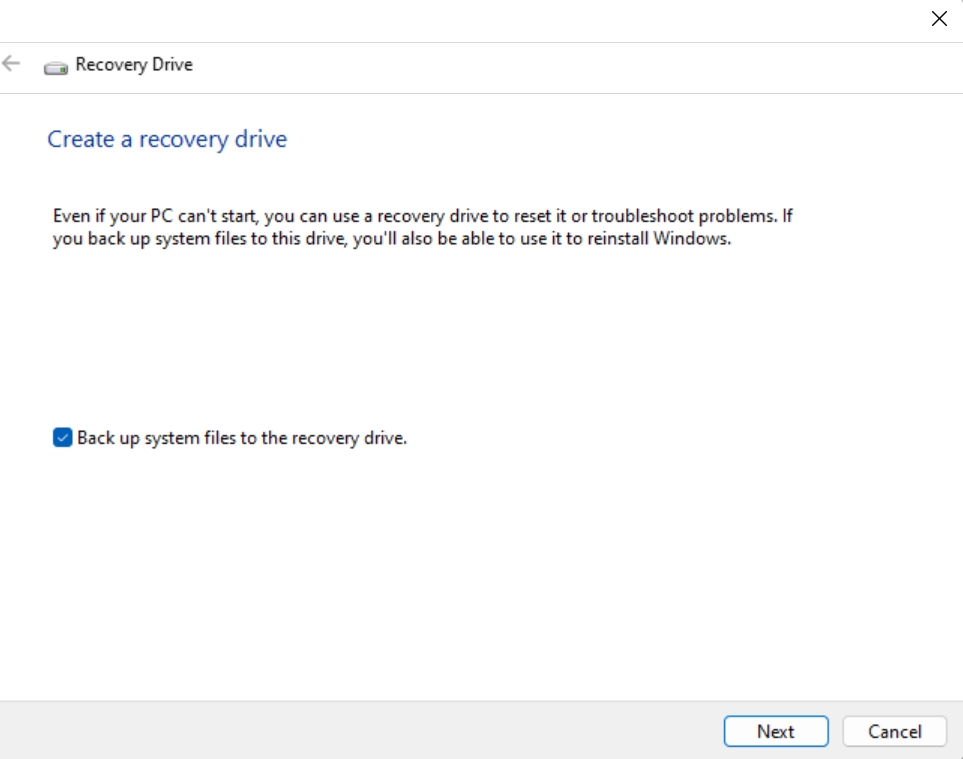
You can prepare Recovery Drive for your PC, in case something goes wrong, you can troubleshoot or reinstall your Windows installation. You will need empty 16GB USB stick for this. Type Recovery Drive in search and follow steps needed to create it. Again, keep this USB somewhere in safe place, where you can find it when you need it.
Personalization
This is what I like to do first, to make Windows fit my needs. Here are things listed that I do first and little tips…
– Delete Edge shortcuts (Taskbar/Start/Desktop). If you like Edge and wish to use it, here is how to configure and debloat Microsoft Edge
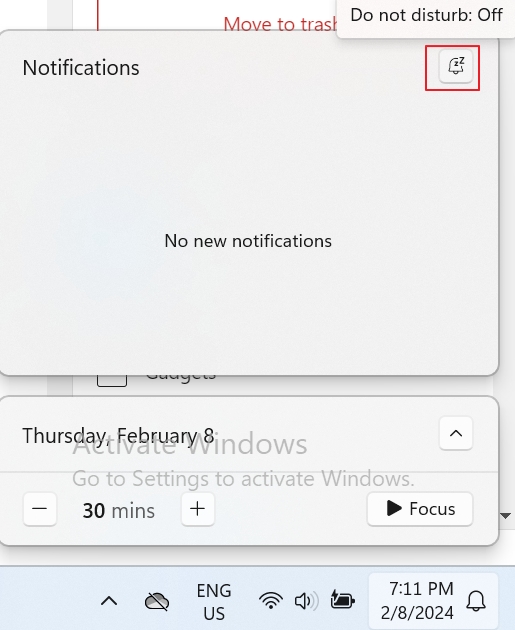
– Turn on/off DO not disturb – click on date/time part on the taskbar right side. Notification pop-up will appear – little bell with zZ is on top of the window – turn it on or off to use or turn of “Do not disturb” option.
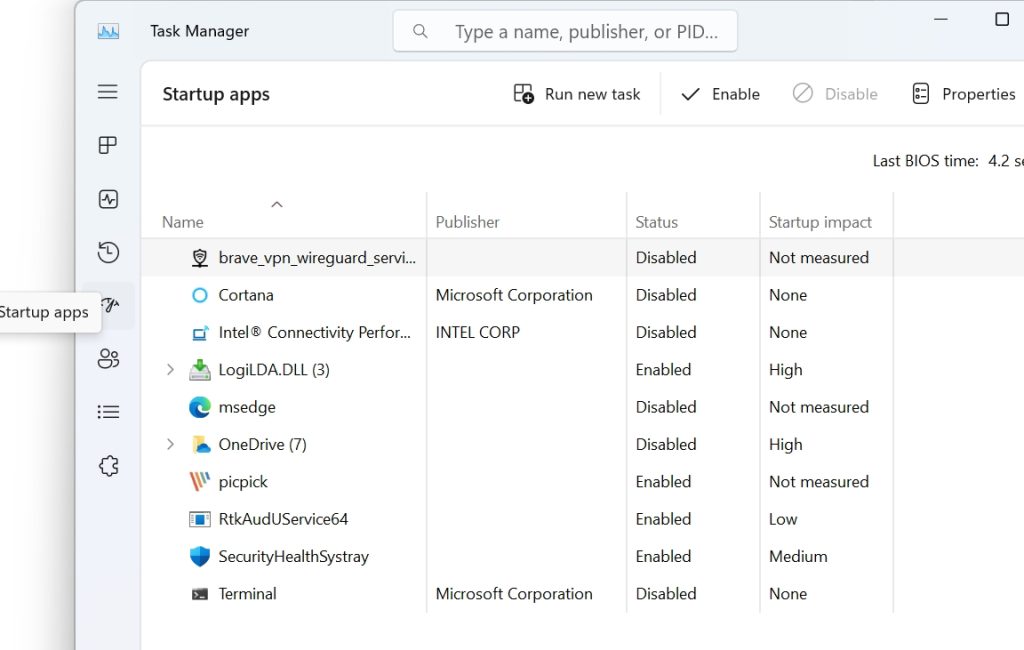
– Disable startup apps – right click on taskbar – select Task Manager / Startup apps tab – disable Microsoft Edge / Teams and OneDrive (if you don’t use it). Maybe you have a few more apps you wish to disable to start with Windows – you can do that here.
– **Taskbar customization** – right click on Taskbar – select “Taskbar Settings” – under Taskbar items I set Search as Search icon only, turn off Widgets and Chat. Other system tray icons – I turn Off Onedrive. Under Taskbar behaviors I set “Taskbar alignment to left”
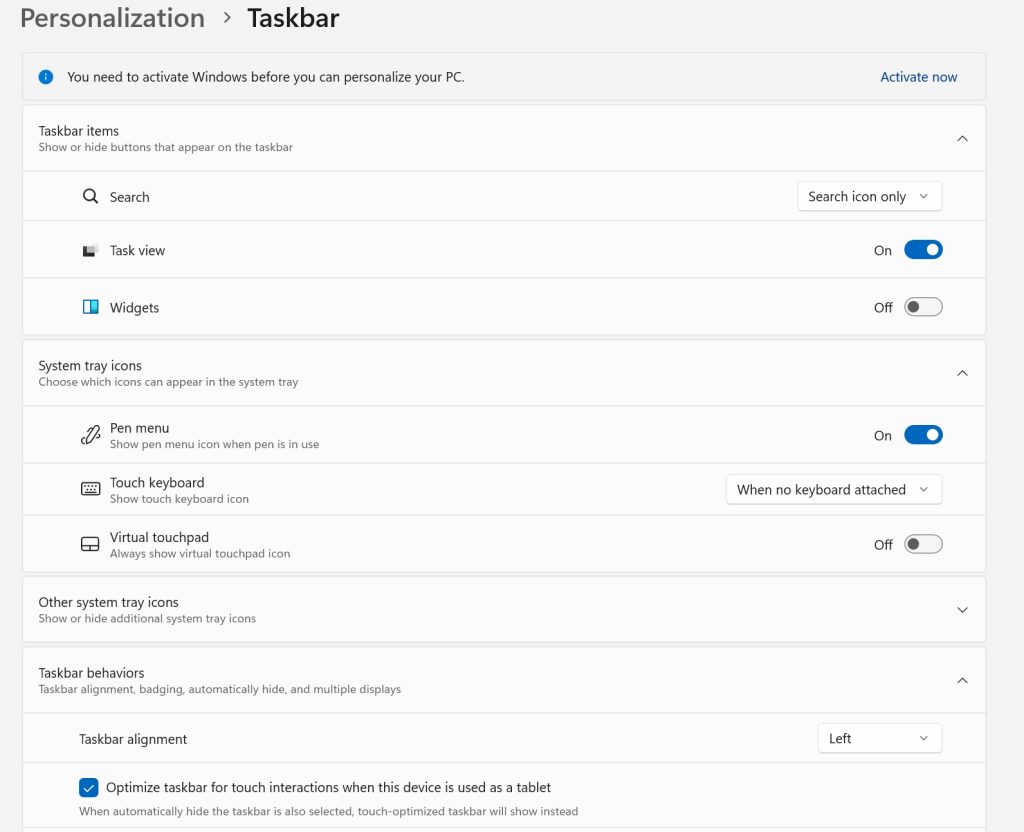
-**Pin apps to taskbar** Start – All apps – right click on app you wish to pin to Taskbar – select more – Pin to taskbar. Also after I open Control Panel for the first time, I right click on the Control Panel icon on Taskbar and select to pin it.
– Settings – System – Notifications – Additional settings – turn off **Show the Windows welcome experience after updates** and Get tips and suggestions when using Windows

– Settings – System – Notifications – Notifications from apps and other senders – turn on/off notifications from apps and select what notifications would you like per app
– Settings – System – Notifications **Turn on do not disturb automatically** – define do not disturb period if you have schedule in which you like to focus.
– Settings – Personalization – Background – define wallpaper/slideshow or something you prefer
– Settings – Personalization – Themes -I like darker themes so I select Glow theme here (Win 11 22H2)
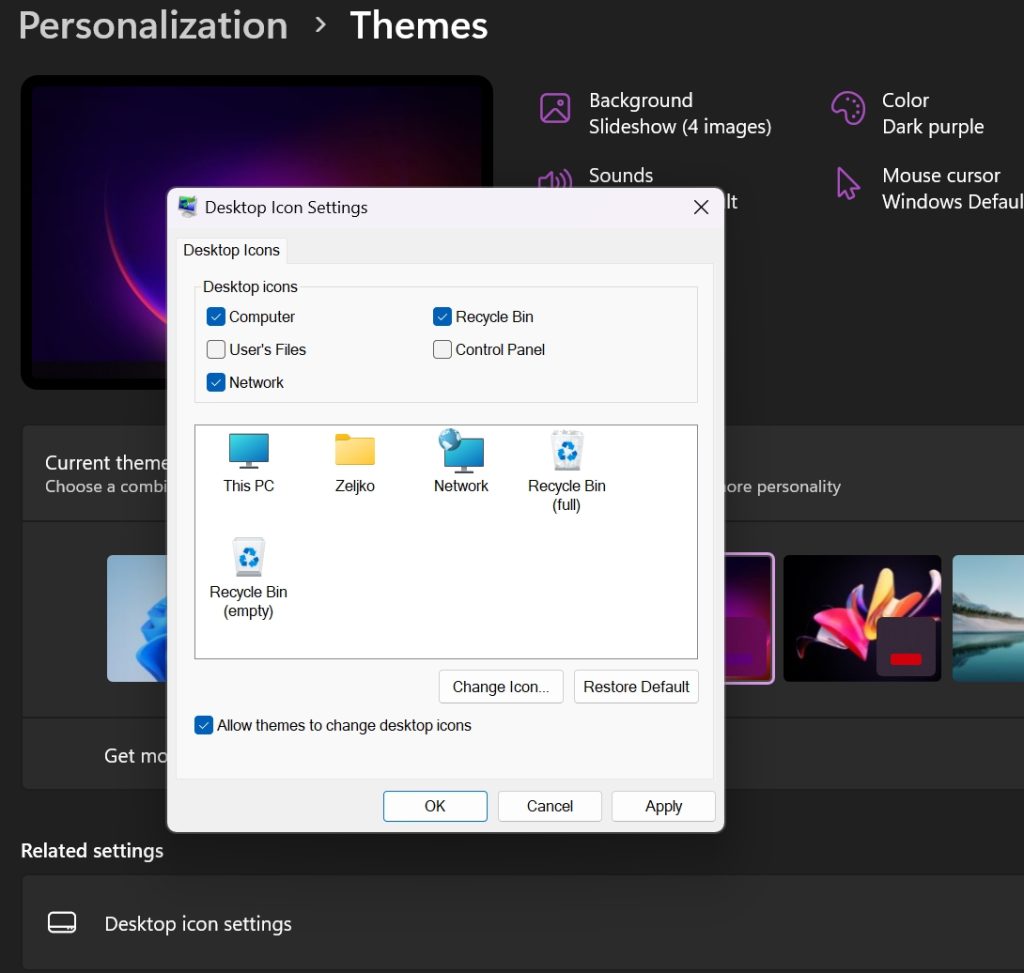
– Settings – Personalization – Themes – Desktop icon settings – I like to set Desktop icons – check on Computer, Network and Control Panel (old habit)
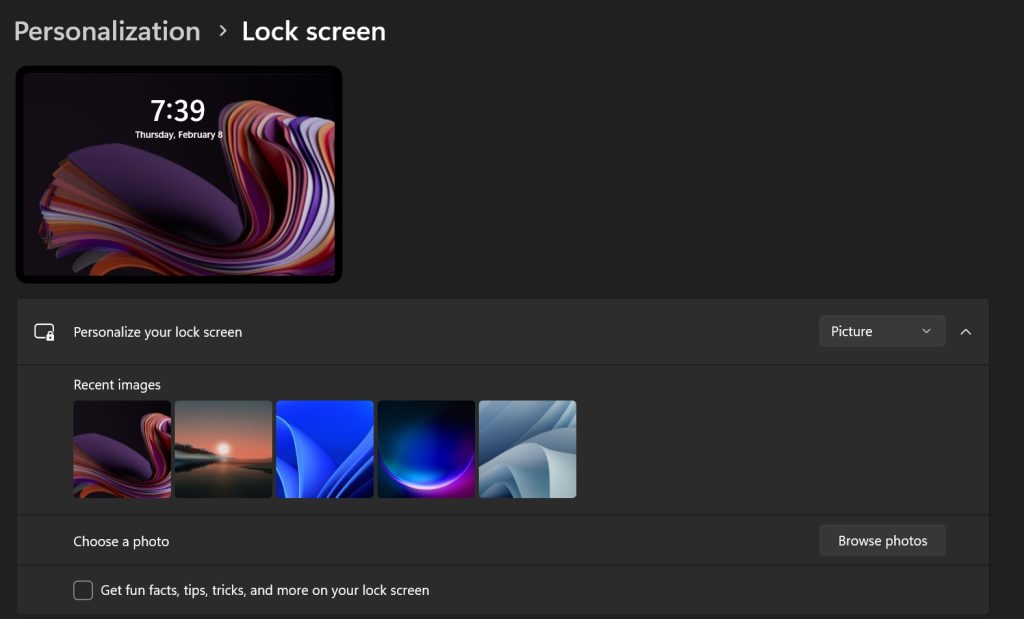
– Settings – Personalization – Lock screen – Personalize your lock screen – I usually set it to my Gallery or single Picture. I love Windows spotlight but I hate small ad bubbles. I also turn off Get fun facts, tips, tricks and more on your lock screen.
– Settings – Personalization – Lock screen – Lock screen status – None
– Settings – System – Multitasking – Title bar window shake – on **When you grab windows title bar and shake it, all other windows will be minimized**

– Settings – Personalization – Start – Layout – More pins.
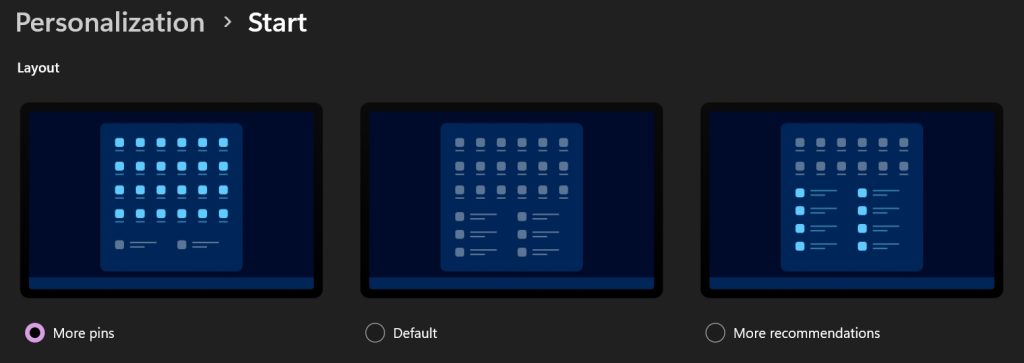
**To pin app to Start, go to Start – All apps – Right click on App you wish to pin – click – Pin to Start**
– Settings – Personalization – Start – Show recommendations for tips, shortcuts,new apps, and more – off
– Settings – Personalization – Start – Show recently opened items in Start, Jump Lists and File Explorer – off

**if you aim to remove Recommended area from Start menu it just won’t happen, even if you turn off all Recommendation options, Recommended section will just sit empty – and not be removed.**
– Settings – Personalization – Start – Folders – you can add folders to appear on Start next to Power button – I select Settings / Network and File Explorer

– Start – Pinned apps – if you drag one app on top of another you can create folder with apps and group apps with similar purpose into app folders (same as in Android/iOS)
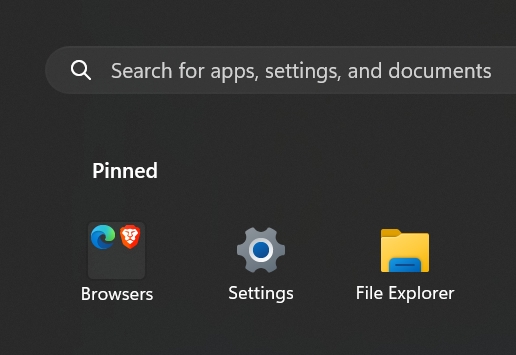
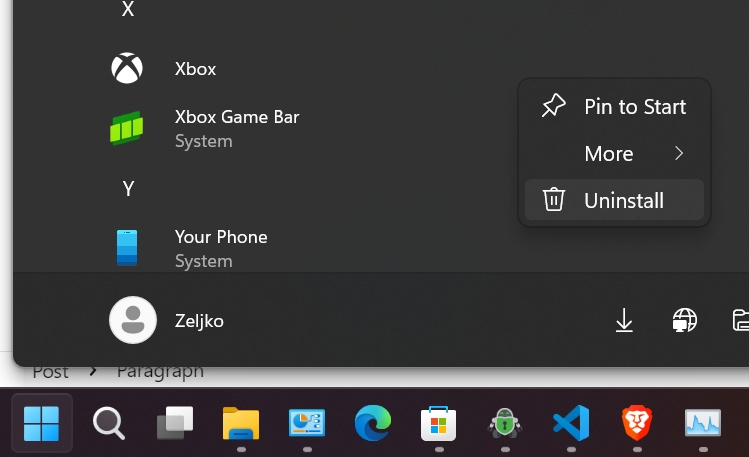
UNINSTALL apps you don’t use – Start – All Apps – right click on app – select Uninstall
This is it for the first part, I don’t want text to be too long, so I will break this into few parts.
Windows Configuration / Tips and Tricks – Part 1
Windows Configuration / Tips and Tricks – Part 2
Windows Configuration / Tips and Tricks – Part 3
Windows Configuration / Tips and Tricks – Part 4
Windows Configuration / Tips and Tricks – Part 5
Windows Configuration / Tips and Tricks – Part 6