reMarkable gave an option with Paper Pro to connect to the device with SSH. In order to connect to the Paper Pro via SSH, we need first to enable Developer Mode. After Developer Mode is enabled, we will connect our Paper Pro with USB cable to PC, and then access it via SSH.
Prerequisites for this guide:
Developer Mode
Developer Mode needs to be enabled or Remarkable Paper Pro – I already wrote about that here.
I will also use Windows 11 To connect to the device. MacOS and Linux have Terminal and SSH, so same commands I’ll use here are valid for MacOS and Linux.
Putty or WSL on Windows 11
On Windows 11 you can access SSH via small app called Putty, or you can enable WSL (Windows Subsystem for Linux) on Windows. I will use WSL in this guide, since it is very practical. Procedure on adding WSL in Windows changed a bit since i wrote the guide, but here you can find my guide on how to enable WSL in Windows 11.
USB Cable for connection between PC and Paper Pro
You got one in the box with Paper Pro, so use it to connect your Paper Pro with PC.
IP address on the reMarkable Paper Pro
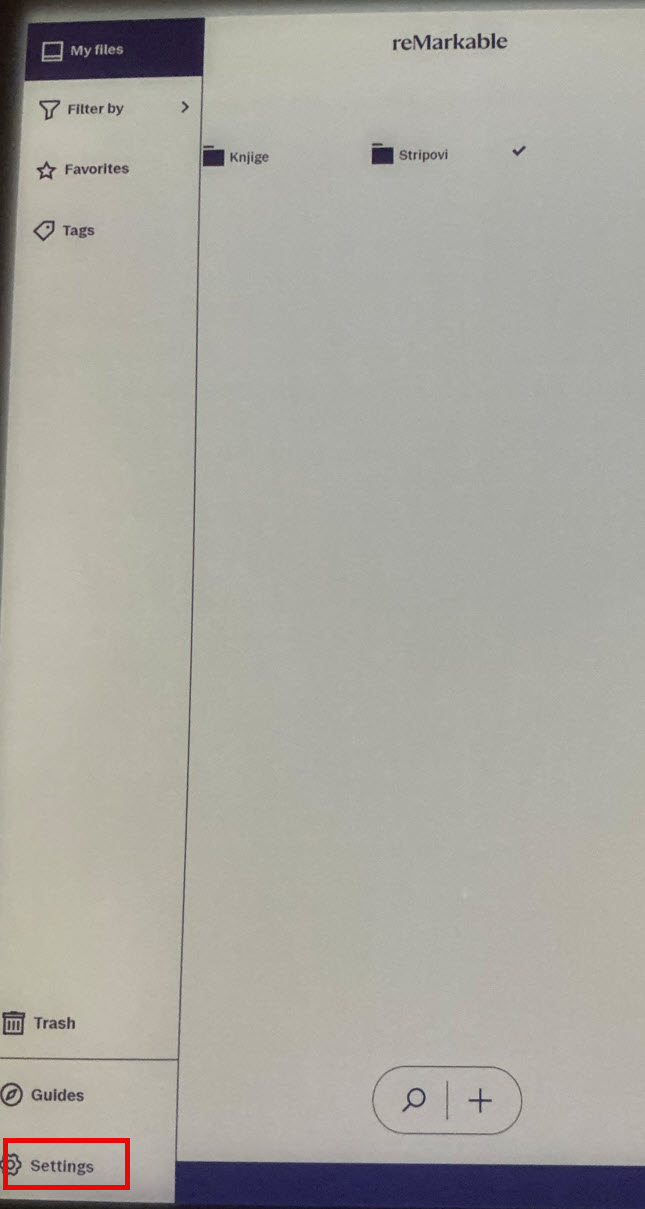
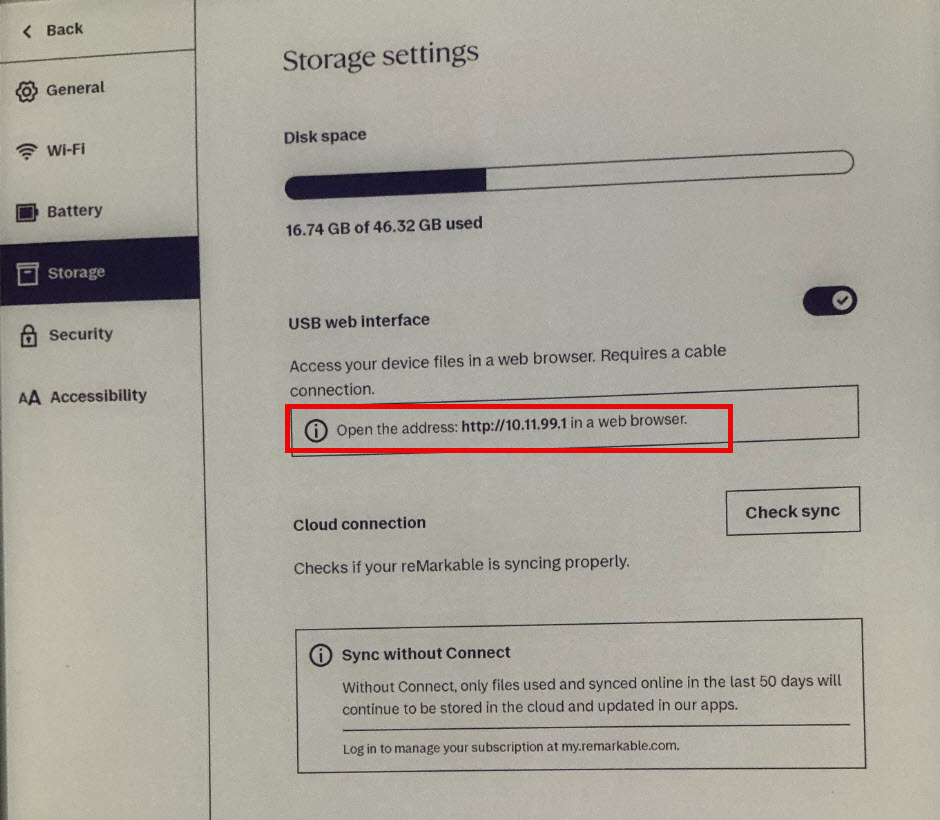
In order to find IP address of your reMarkable Paper Pro (it is 10.11.99.1, but maybe it will change in future). Go to Settings on your Paper Pro
Select Storage Menu, and click toggle next to USB web interface

As I already said – 10.11.99.1 is the address of the Remarkable Paper Pro. You can leave the toggle on to check web interface if you wish.
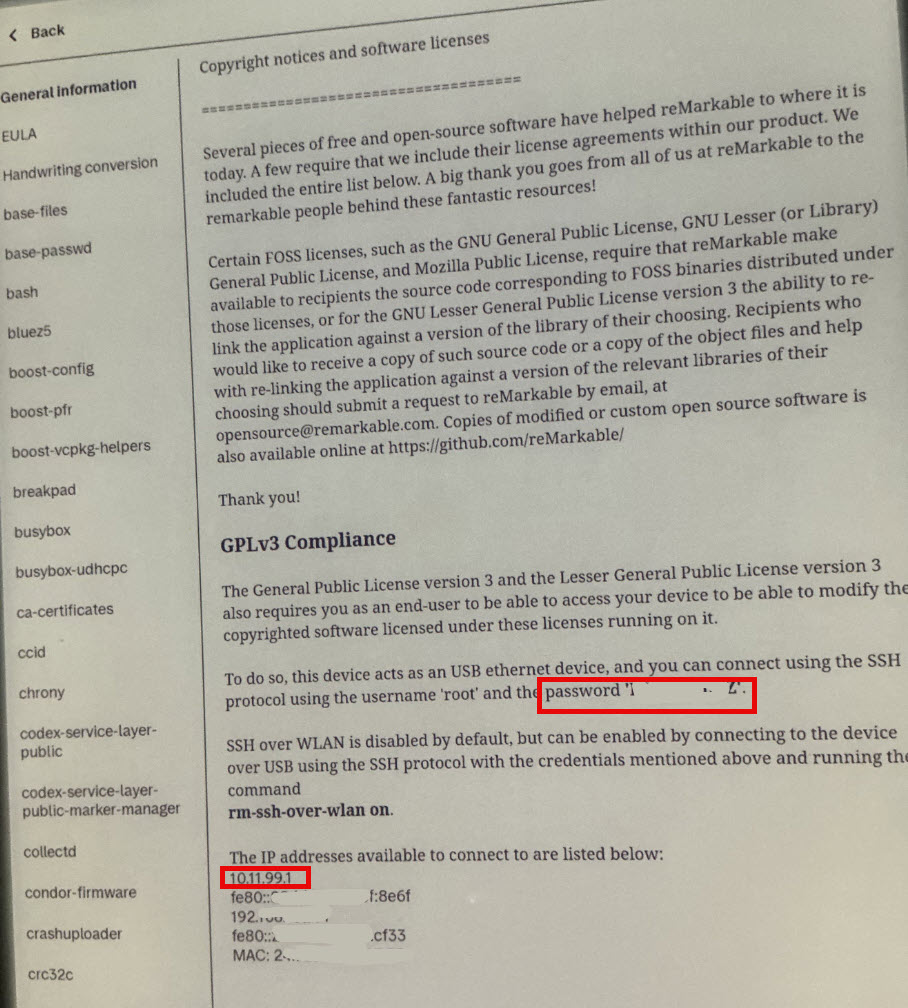
Password for the root user
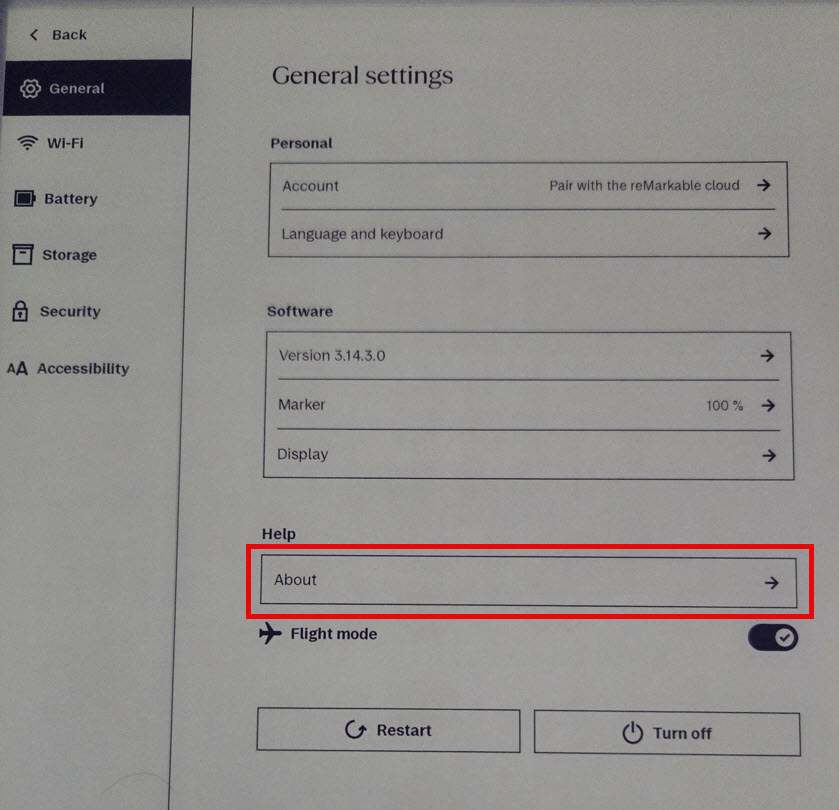
While we are in the Settings, we will navigate to the General menu, and under Help, select About
Select Copyright and licenses
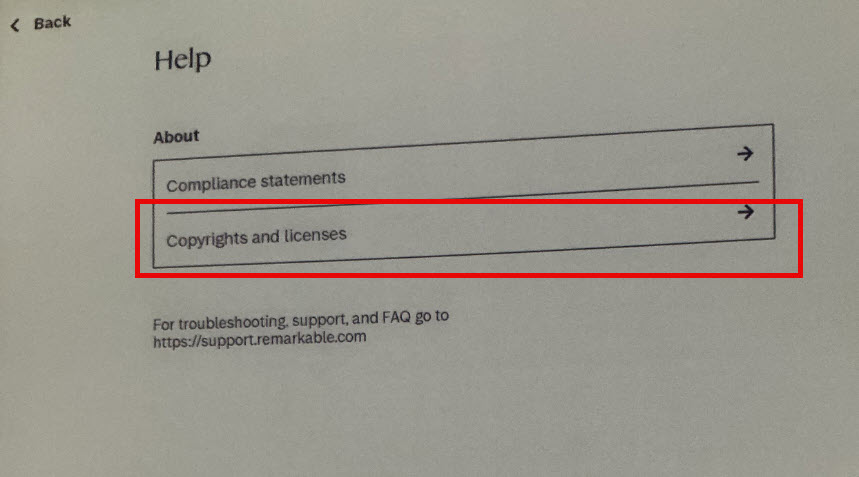
On the first screen that opens, look for GPLv3 Compliance section – there will be your password, which you will use connecting to SSH, and IP address can also be seen here.
Ok, now we have all the ingredients to make our SSH connection to reMarkable Paper Pro.
Connecting via SSH to reMarkable Paper Pro
I will open WSL on my Windows 11 install. Terminal will open, in terminal I will type following command:
ssh root@10.11.99.1First time you’ll be asked to accept Paper Pro key – select Yes, and then enter password from the section above.

If you did everything right, you should be logged in into your Paper Pro

Optional – enable SSH via WiFi
If you want to connect to your reMarkable Paper pro with SSH via WiFi, connect to it with USB, establish SSH connection and type in following command:
rm-ssh-over-wlan onYou need to be on the same WiFi network for this to work, and for you to be able to SSH into your Paper Pro with WiFi.

To connect to your reMarkable Paper pro via WiFi after we executed command mentioned above – on the Paper Pro, go to Settings – General – Help section click on About – Copyright and licenses – at the bottom of the screen under “The IP addresses available to connect to are listed below” find IP address to connect to your reMarkable Pro. From your PC or Mac, type in following to connect to your reMarkable Pro (change 192.168.1.171 with IP address you found on your reMarkable)
ssh root@192.168.1.171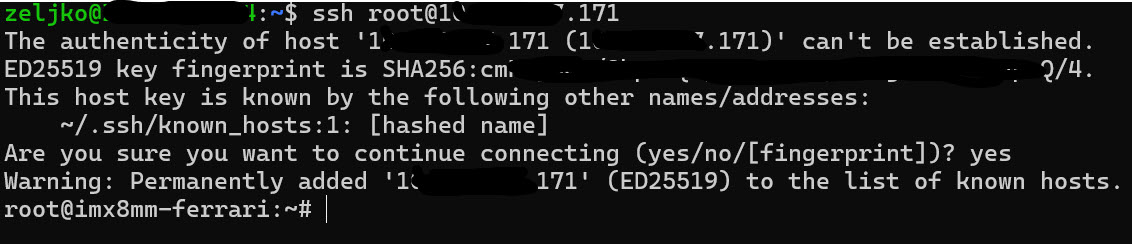
To turn SSH access off via WiFi type in following command:
rm-ssh-over-wlan offWe are done, if you wish, you can follow along to the next part, but it is not mandatory.
Connect to reMarkable SSH with public key and without password
This part is optional, but you can follow along to make connecting to your Paper Pro via SSH easier. It will be handy especially if you convert, transfer a lot of documents – you won’t have to enter your password each and every time.
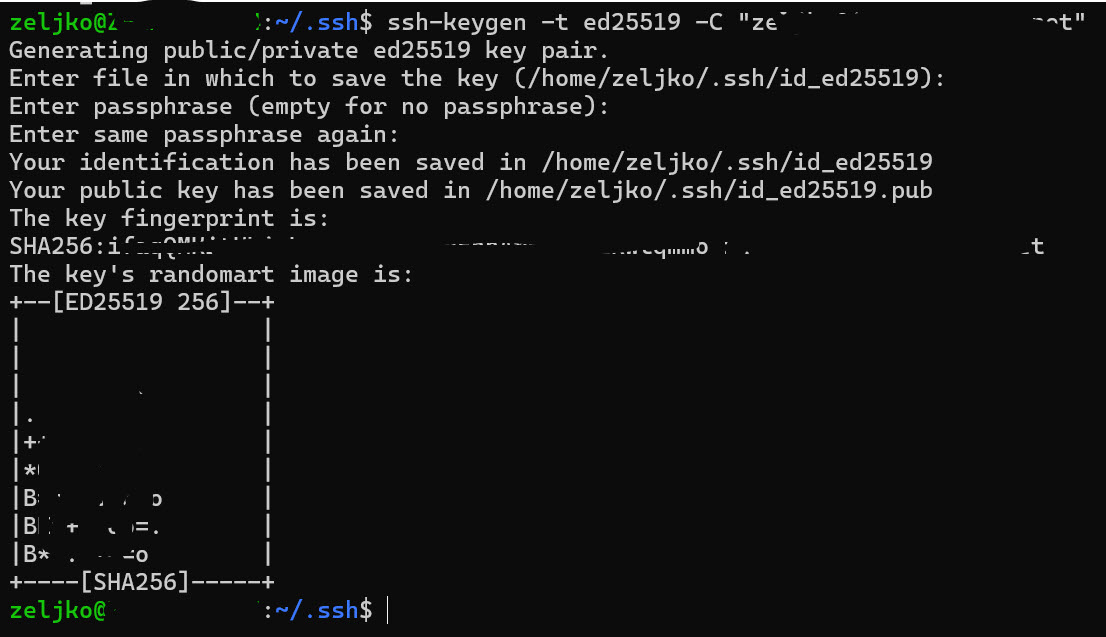
On your Windows 11 in WSL, MacOS or Linux, we will need to create SSH keys which we will use to connect and establish trust with Paper Pro, so we don’t have to enter password anymore. Type in following (change youremail to your mail)
ssh-keygen -t ed25519 -C "youremail@youremailprovider.com"I will select default location, for this test without keyphrase.
We will navigate to .ssh folder and then copy content of id_ed25519.pub file
cd ~/.ssh

cat id_ed25519.pub
You will need to copy entire line you got after entering cat id_ed25519.pub command

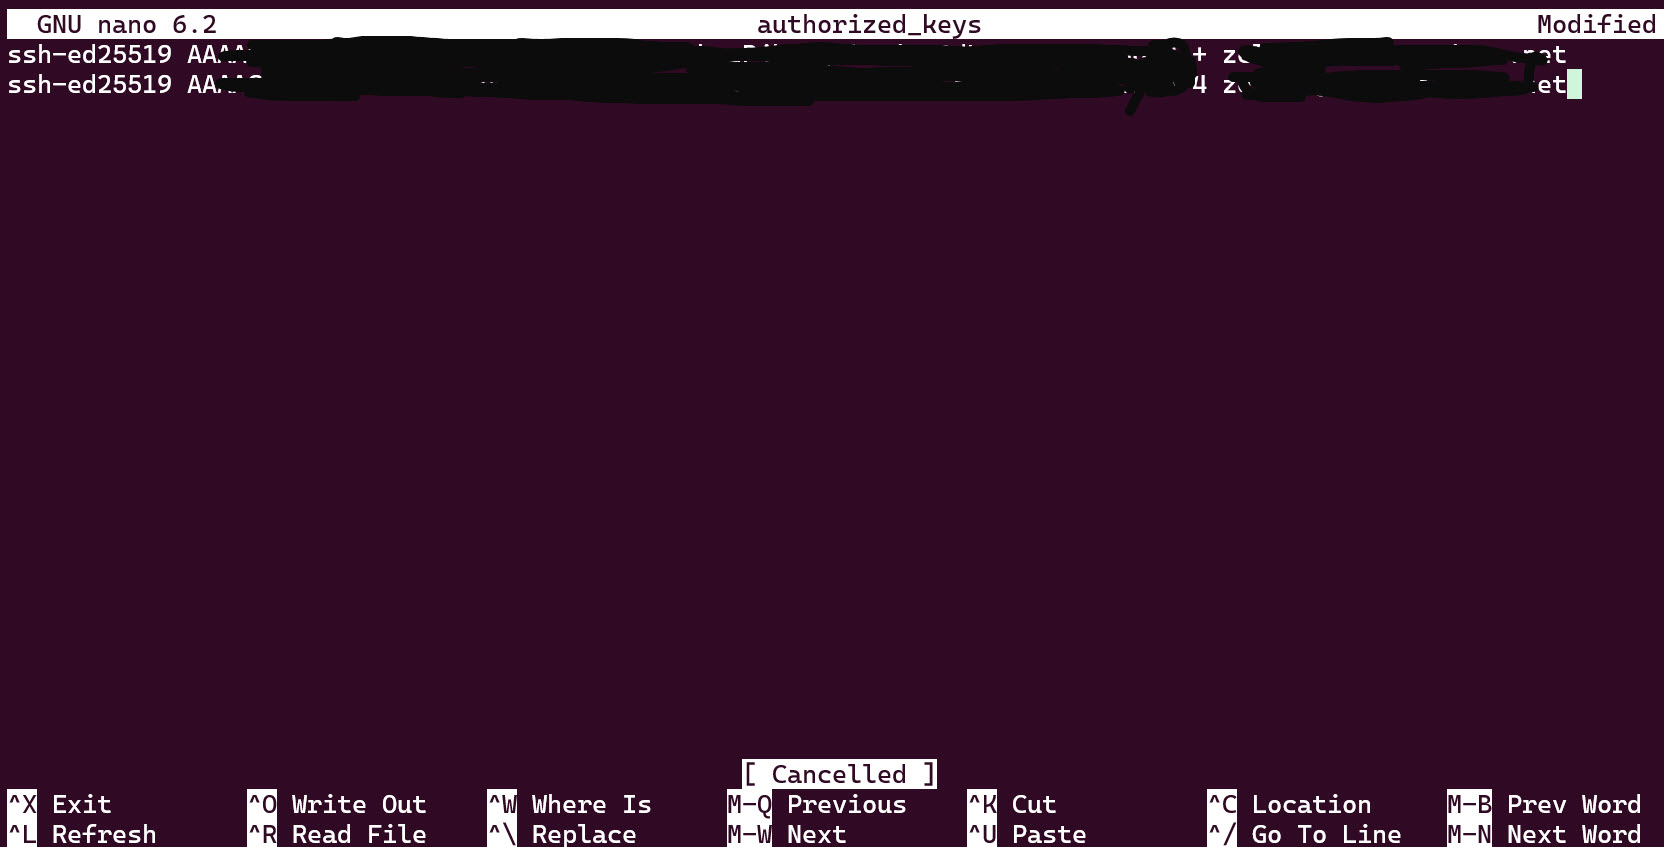
Now, we are going to connect to reMarkable, navigate to .ssh folder on it, create file named authorized_keys and in that file copy value we got above.
ssh root@10.11.99.1

cd ~/.ssh/

nano authorized_keys
I already have one key in that file for another PC, so I entered this one in second line. After you are done press CTRL+X to save, confirm with Y and exit text editor.
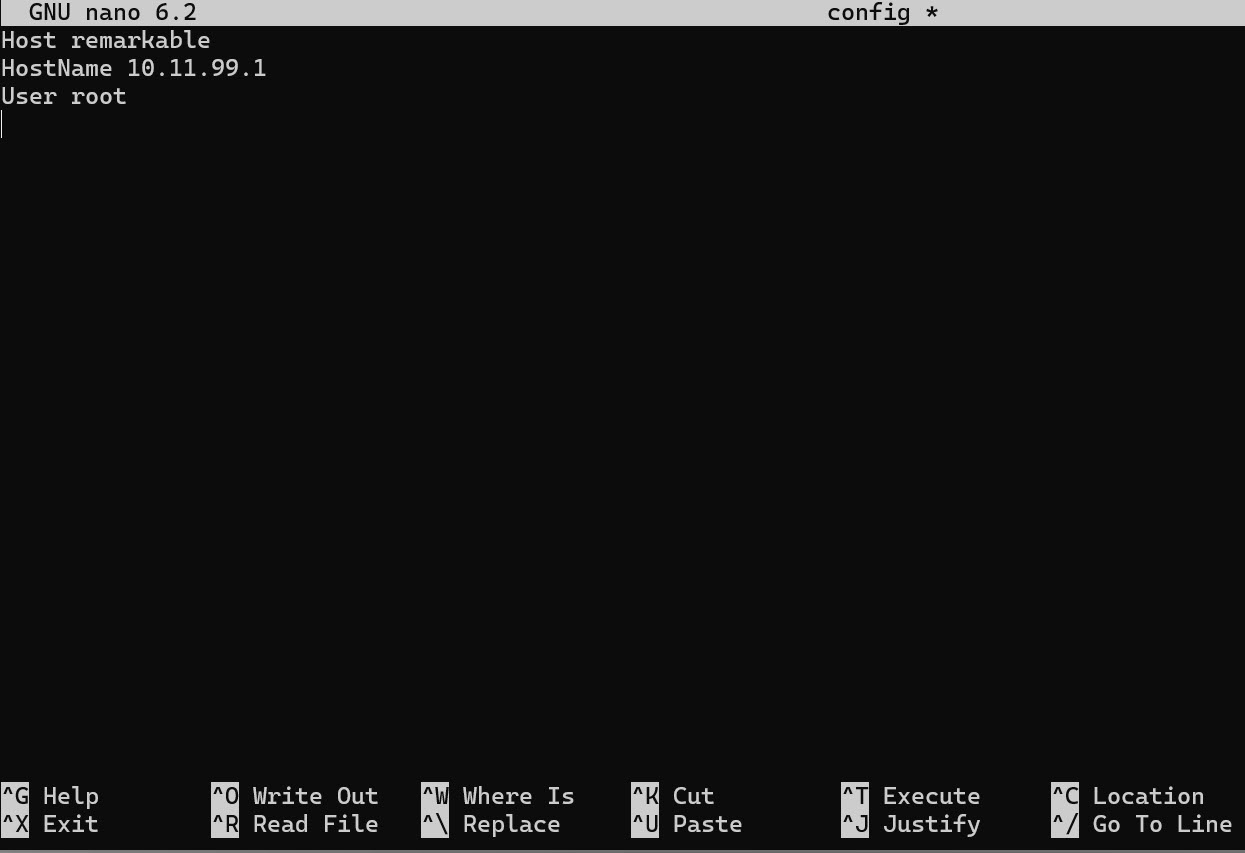
Now, back to our Windows 11 and to .ssh folder. We will create new file named config, and enter name for our remarkable, IP and username. This way, we will be able to access remarkable with only a name in the future.
This is done on Windows 11, MacOS or Linux, whichever you use to connect to reMarkable.
cd ~/.ssh

nano config
Host remarkable
HostName 10.11.99.1
User root

In the config file enter three lines I mentioned above, press CTRL+X to save, enter Y and exit.
Now, if we did all the steps above correctly, we should now be able to connect from our Windows 11 to reMarkable by simply typing following
ssh remarkableAnd there it is, we connected to reMarkable by typing name (no need for ip address anymore) and without password, since we exchanged public SSH keys between remarkable and Windows 11.

That is it, we are now connected via SSH to our Paper Pro.
reMarkable Paper Pro guides
Remarkable Paper Pro – how to enable Developer Mode
How to connect to reMarkable Paper Pro via SSH
How to transfer files to reMarkable Paper Pro (without cloud)
How to backup (and restore) files on reMarkable Paper Pro (without cloud)
How to change is sleeping screen on reMarkable Paper Pro