We already went through installation and simple disk configuration and now we will enable iSCSI target on configured disk.
I use iSCSI a lot for lab purposes, and this is currently number one reason I use TrueNAS for.
Lets head to configuration right away…
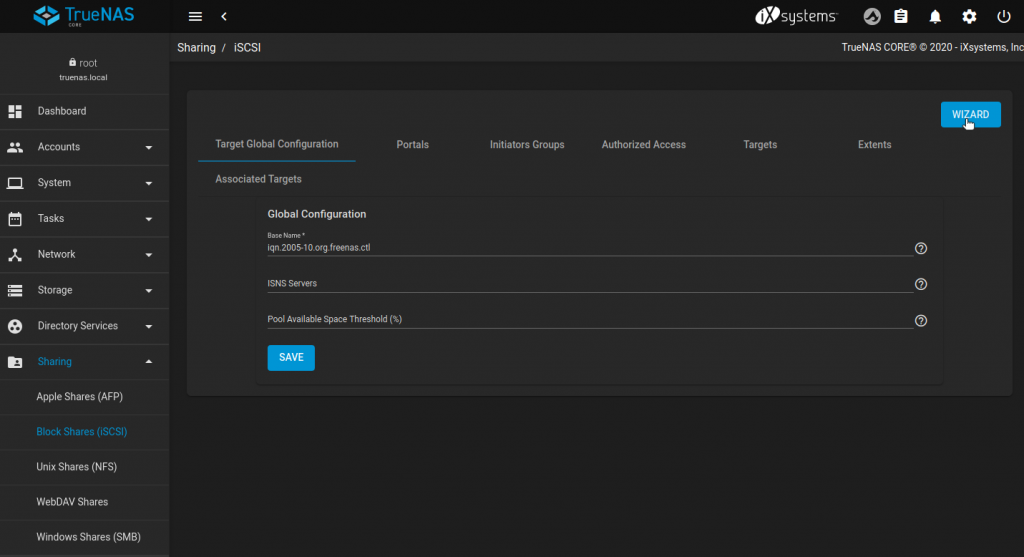
From the left menu select Sharing | Block Shares (iSCSI) | click on Wizard in top right part of the screen.
Under name enter name for your iSCSI target – I entered iscsitarget
Extent Type – Device
Device – Create New
Sharing Platform – I selected Modern OS, you will select primarily based on your needs. My iSCSI initiator is Ubuntu, and I if you are interested, you can read about configuring initiator here
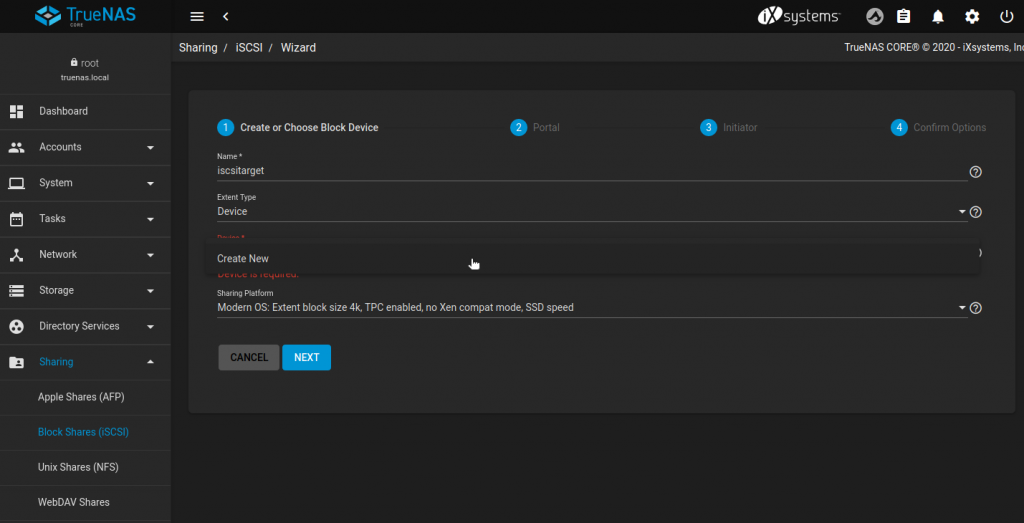
Since I selected Create New under Device field, there are few things I need to enter – Pool/Dataset – I selected already created Pool1, I also entered 40GB for size of yet to be created iSCSI target.
When you are done with this screen, select Next

On Portal screen you will again select Create New, I will leave authentication as None. I will select IP address on my only network card and leave port at 3260. Next

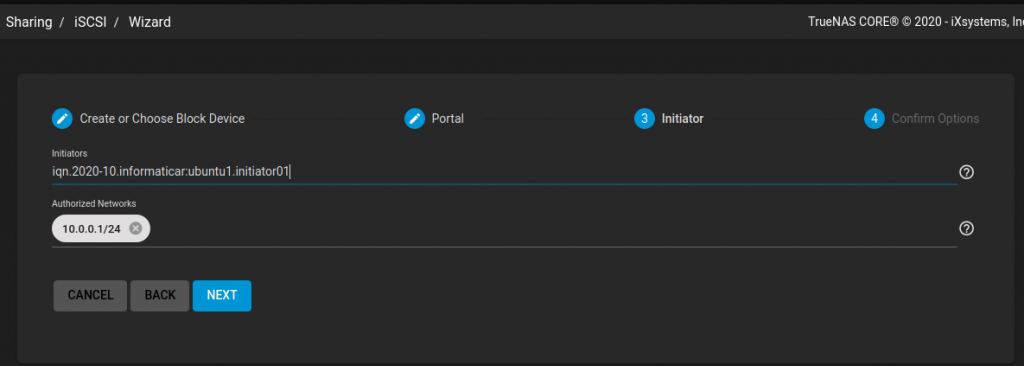
Next screen will ask you for initiator addresses that will access this iSCSI target.
I will enter my Ubuntu iSCSI initiator name (I already put link to iSCSI initiator guide above) and I will also enter 10.0.0.1/24 as my authenticated network, since that is my local network.
Next
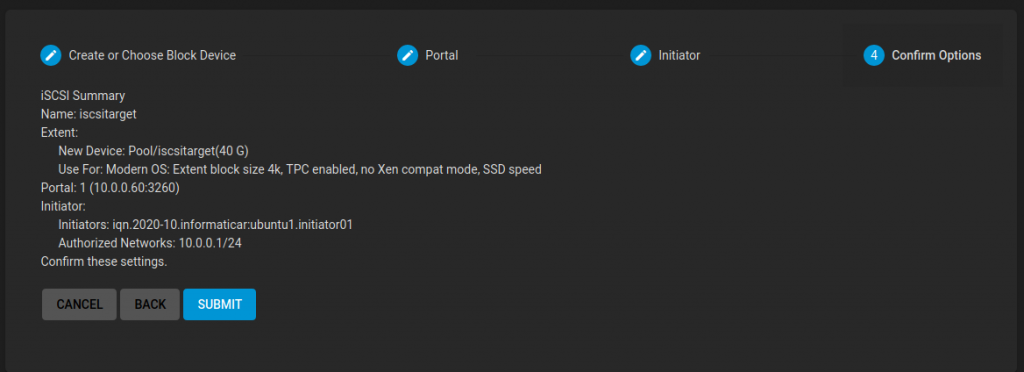
If you are ok with your settings, select Submit.
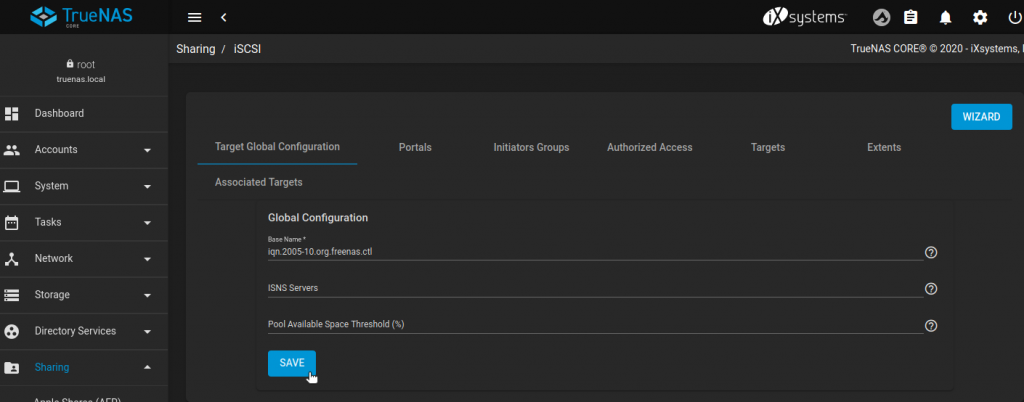
Circle will spin few times and you will be back on main iSCSI screen, select Save.
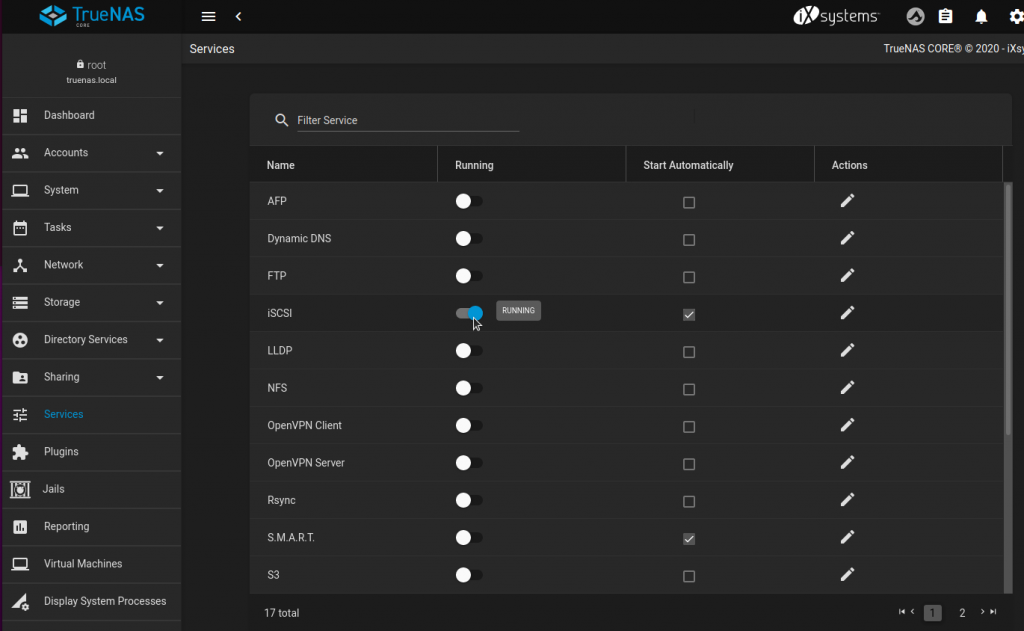
If the wizard does not offer to start iSCSI service for you, head on to Services in the left side menu, select iSCSI and turn switch to Running.
That is it, part in which I test iSCSI target is covered in Ubuntu iSCSI initiator guide I already mentioned few times here works beautifully.