Microsoft recently introduced Windows 8 Developer Preview. It`s free for everyone to download and give it a try. You want to try it, but don`t know how? Maybe you just don`t want to ruin your computer with multiple OS installations. Solution is simple, install it as virtual machine, and here is a step by step tutorial how to do it. Part 1 will be covering creation of virtual machine…
First you need virtualization application. Download Virtualbox. Virtualbox is simple, quick and free virtualization solution. It installs as an application on your operating system, and in it you can install and test Windows 8 Developer Preview as guest operating system.
Also you can install and play with lots of other supported guest operating systems in VirtualBox – list is here. Procedure for installation of any other guest system in Virtualbox is same as this for Windows 8 Developer Preview that I`ll show to you.
Installation of Virtualbox is simple, next -> next procedure.
Also you need to download Windows 8 Developer Preview. Download it here.
When your Windows 8 Developer Preview download is completed and Virtualbox installed, we can start with Windows 8 Developer Preview virtual machine creation and after that installation.
Virtual Machine creation:
Start Virtualbox | Choose New
Wizard will appear. | Next
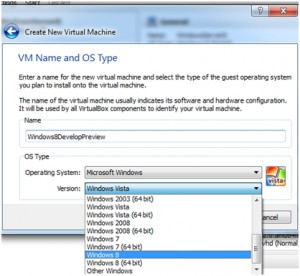
Name: Choose a name for your virtual machine. | OS Type | Operating System: Choose Microsoft Windows. | Version: Choose Windows 8 or Windows 8 (64-bit ) according to version you downloaded. | Next
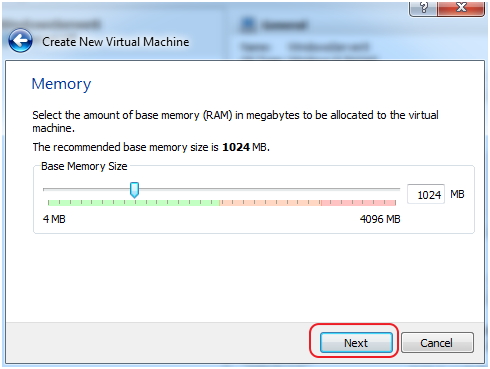
Memory | 1024MB RAM is minimum recommended for 32bit version, while 64bit version needs at least 2GB of memory. | Next
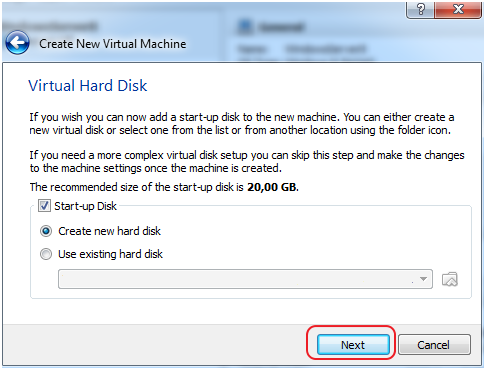
Virtual Hard Disk | Choose Start-up Disk check box. | Create new hard disk |Next
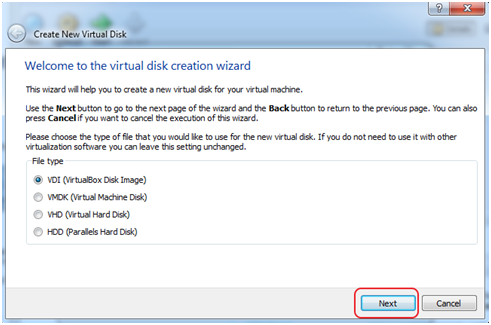
Virtual disk creation wizard starts | Choose VDI | Next
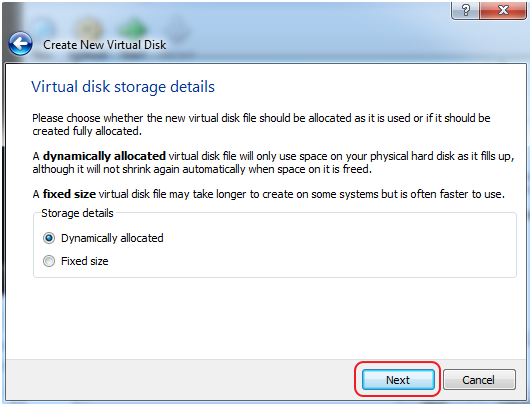
I suggest you choose Dynamically allocated, but it`s up to you on this one. | Next
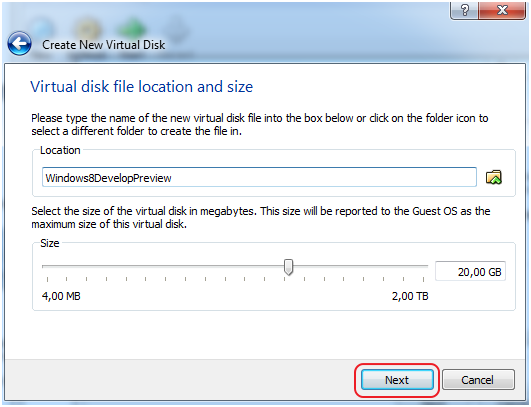
You can choose location for your virtual disk ( if you want to have your virtual disk on some other partition/disk…) also you can leave it as Virtualbox suggests. | Size: 20GB is minimum recommended |Next
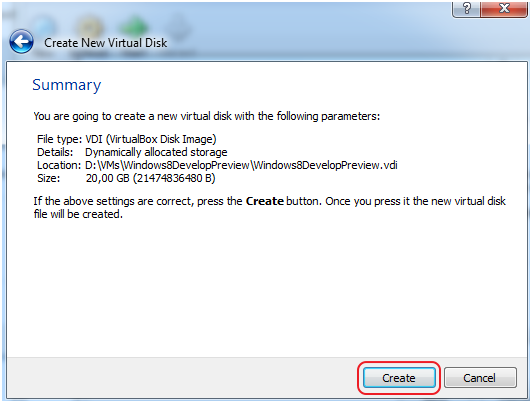
Review your virtual disk settings | Create
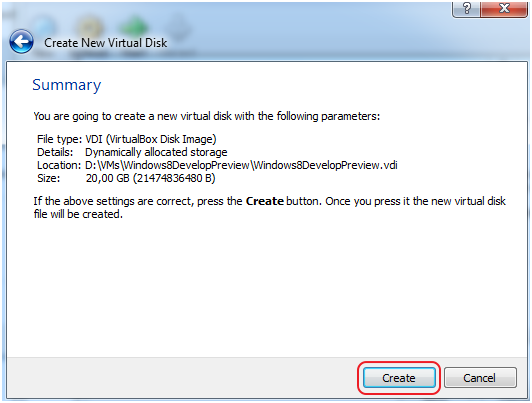
Right after that screen you`ll get another one showing your new virtual machine settings. Review it | Create
This was the last step and we successfully created virtual machine which will be hosting our installation of Windows 8 Developer Preview.
Now, lets move on to Part 2: Installation of Windows 8 Developer Preview which covers installation of Windows 8 Developer Preview onto newly created virtual machine.
