Maybe title sounds a bit awkward, Nakivo works just fine, we will be going through recovery procedures of the Nakivo backups we created in earlier guide. This will be guide for Hyper-V VMs.
We will try to recover single file from our File Server, recover deleted user to AD, bring back table to SQL, and talk about Exchange recovery.
Before we begin
Here are described all the requirements so that we can recover our items properly – https://helpcenter.nakivo.com/display/NH/Feature+Requirements
Also, in depth documentation about granular recovery can be found here – https://helpcenter.nakivo.com/display/NH/Granular+Recovery
I covered all the prerequisites for successful recovery in my “How to create backup job with Nakivo” post. There you will find all you need to set inside VMs for the recovery to work perfectly (windows settings, user settings, firewall settings, installations…) Be sure to check that backup guide out, it will enable you to do stress free recovery.
Also, in post where I describe Nakivo installation, you can find info what you need to set on Hyper-V host for everything to work perfectly.
Prerequisites
I had a huge problem with Nakivo B&R 10.3 where I couldn’t get recovery to work inside my LAB (lab was freshly deployed, only for Nakivo testing).
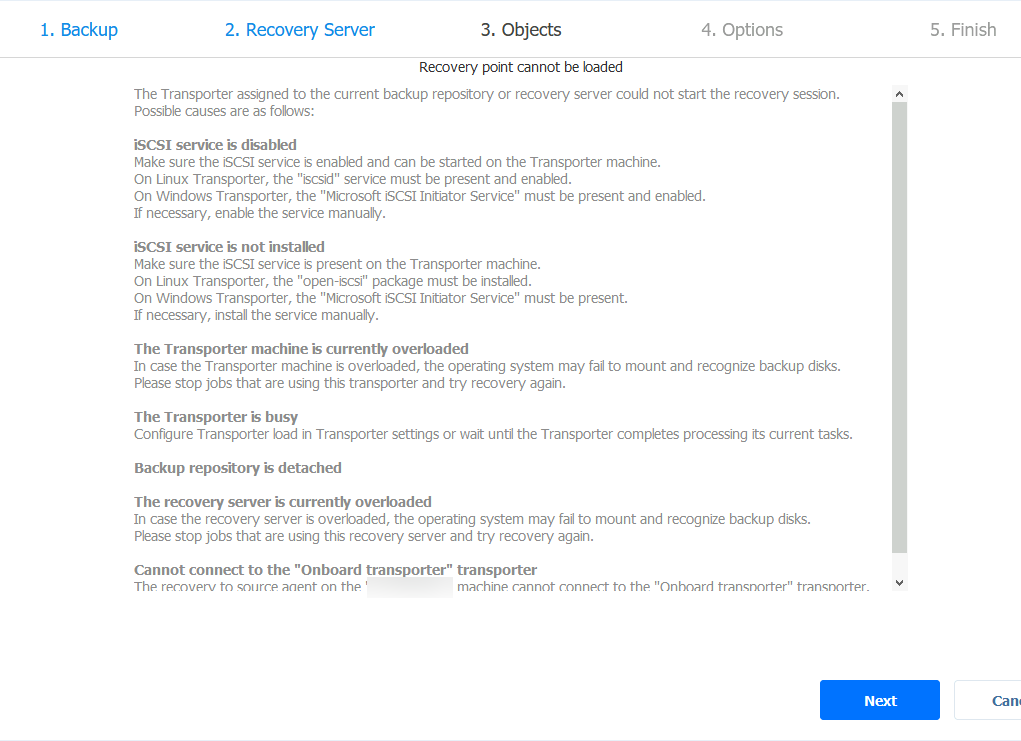
Backup jobs would go fine, but recovery for EVERYTHING would stuck at step 3.Objects with following error “Recovery point cannot be loaded”. that is the error I would get on the Director machine (machine where the Nakivo is deployed, central location).
Reasons for the error that are screenshoted below are:
ISCSI service is disabled
ISCSI service is not installed
The Transporter machine is currently overloaded
The Transporter is busy
Backup repository is detached…
This was literally nightmare – I went through documentation many times, looked through every setting on Hyper-V host on which machines I backup are located, I looked through every VM I’m backing up, and whatever I tried – nothing, same mistake.
There is one thing I haven’t checked… When you deploy your first Hyper-V host inside Nakivo – Nakivo adds firewall exception to that Hyper-V host so that it can communicate with it.
But guess what, it doesn’t add any firewall rules to the machine it is installed on!!! I installed Nakivo with account that has administrative privileges, but anyway, it haven’t touched firewall on the machine it is residing on.
So, before we continue – on the machine where the Nakivo installation is (in my case that machine is called Backup1) add following TCP ports to the Inbound rules on firewall
9445
9446
9448-10000
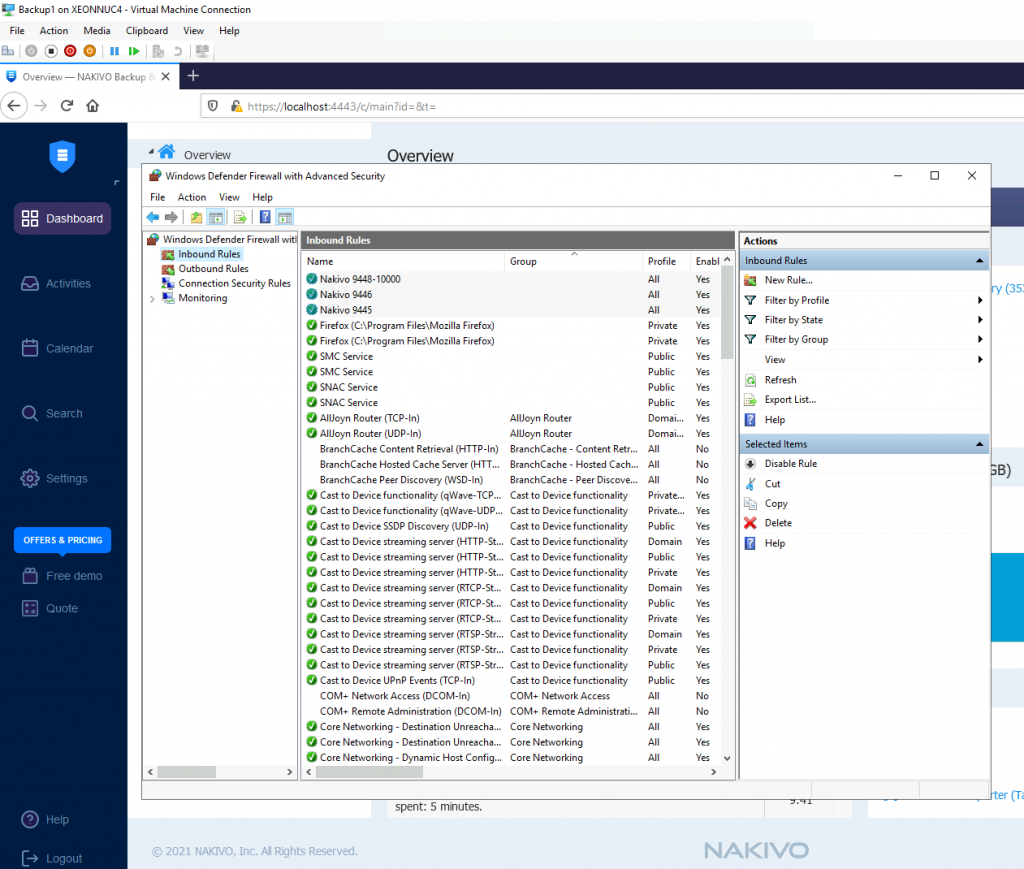
Now, your recover procedures should work
Be sure also to follow my Nakivo backup guide, so your granular recovery works perfectly.
Recovery procedures
Ok, in this section I will show you how to recover deleted user for AD, deleted file from file server, deleted table from SQL DB, and a few words about Exchange.
I will not go through entire procedure for every case, because procedure is more or less the same, I will just point out differences. Like with backup process for Nakivo I wrote about – I will cover entire procedure with Active Directory, and highlight differences for other recovery procedures.
Active Directory
To test my recover procedure for Active Directory, I deleted user named “Obrisi Me” (Delete Me in english) from AD.
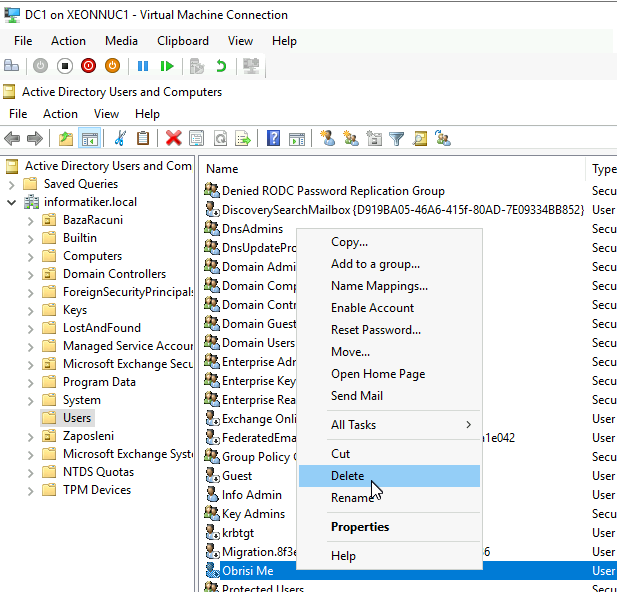
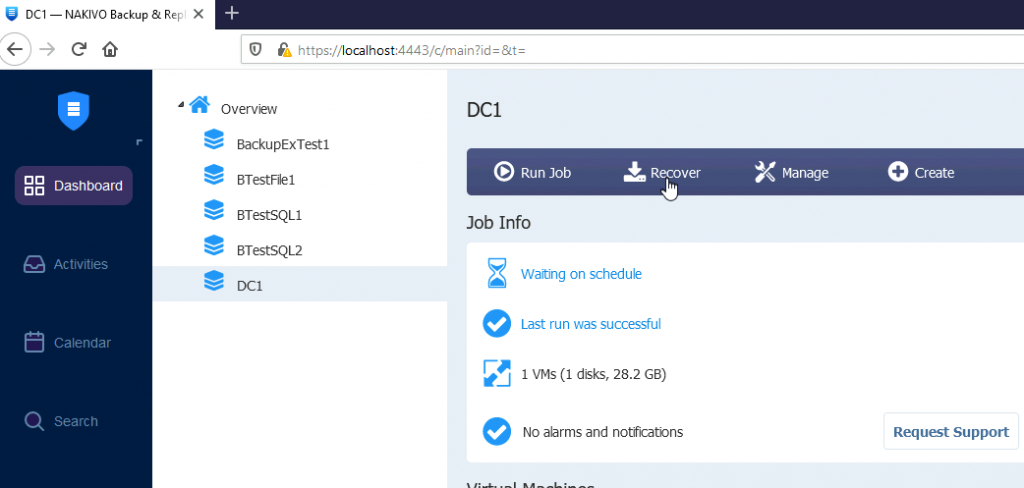
Ok, let’s say now that we did this by accident. We will now go to our Nakivo Web Management and select DC1 backup from Dashboard and click on Recover
Now, since we want to recover AD object I will select Microsoft Active Directory objects
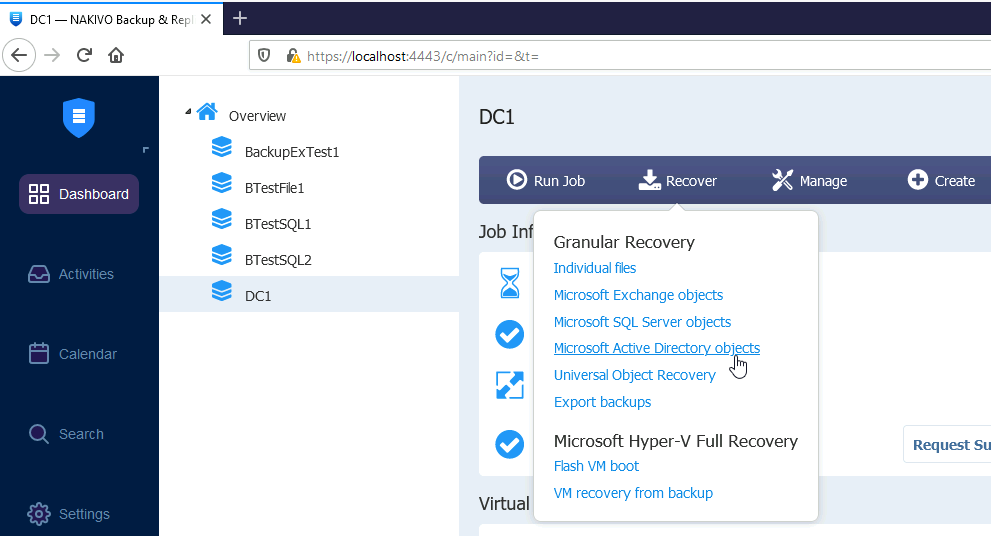
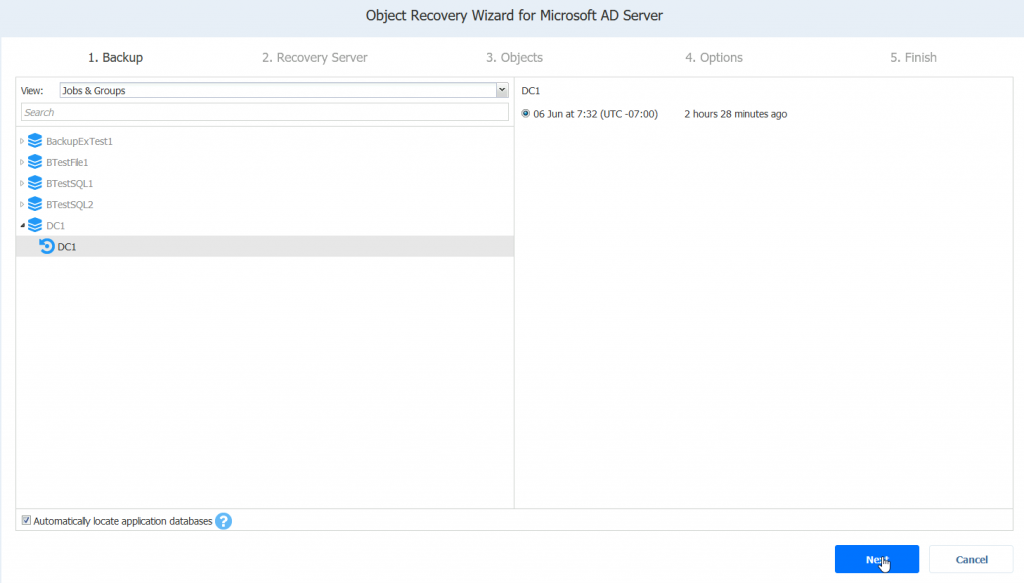
I will select backup I created and select Next
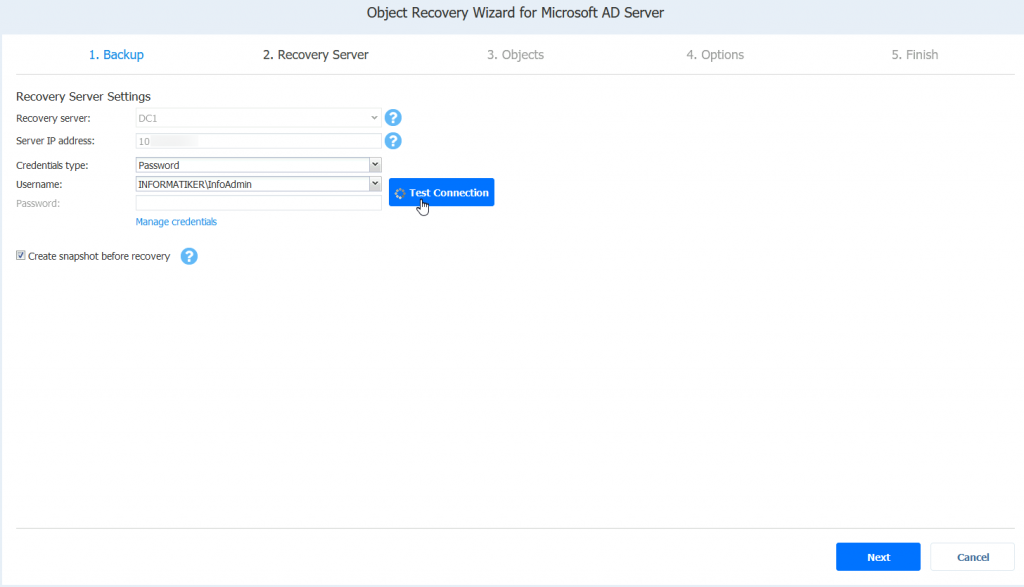
IP address of the DC1 should be automatically filled in, select user that has rights to the AD (in my case that is InfoAdmin) and select Test Connection (please select Test Connection for every recovery you do).
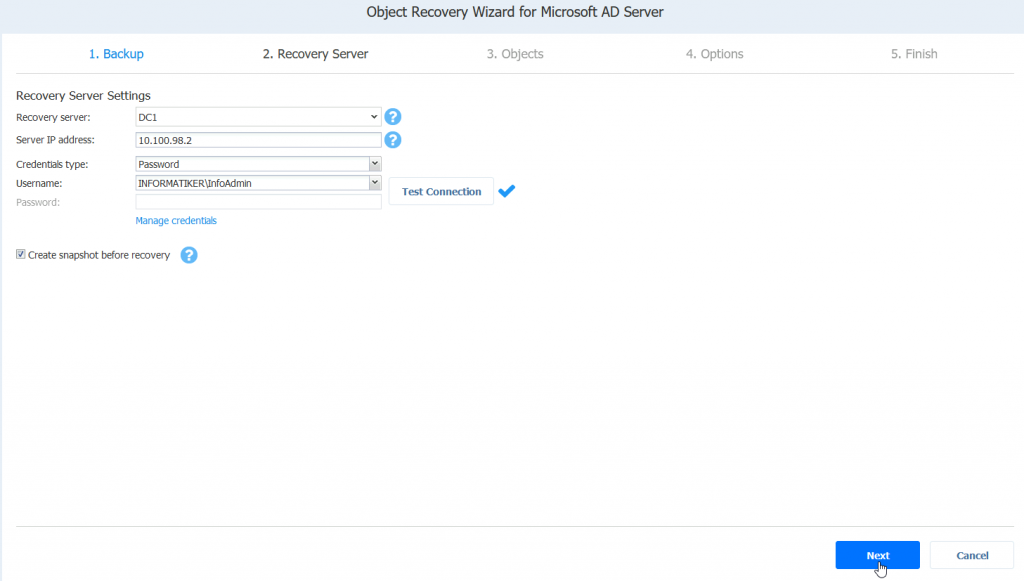
Connection is successful, Next
Next screen will take a while, let’s hope that after it we don’t get bunch of errors
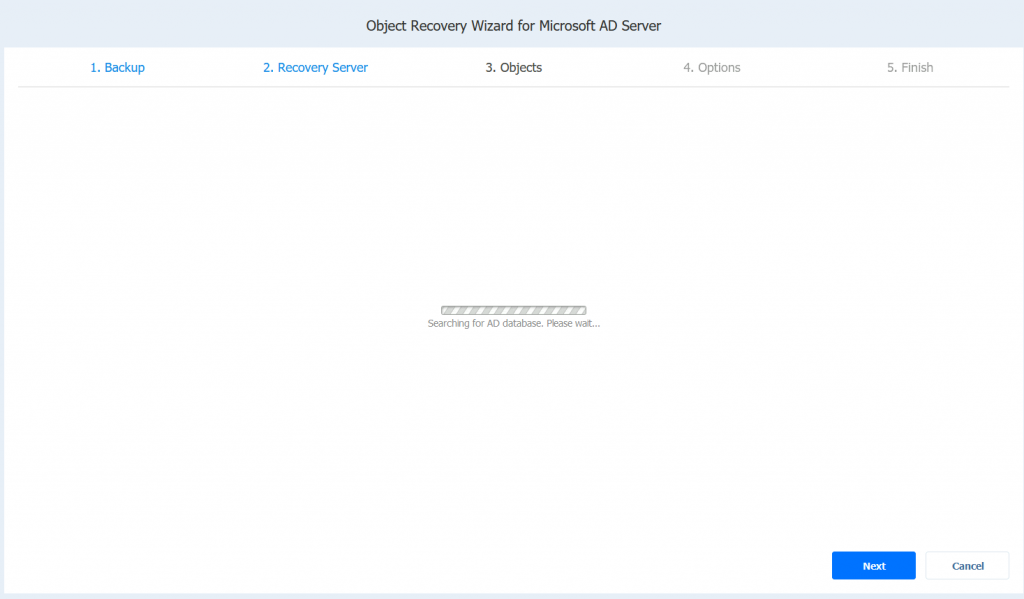
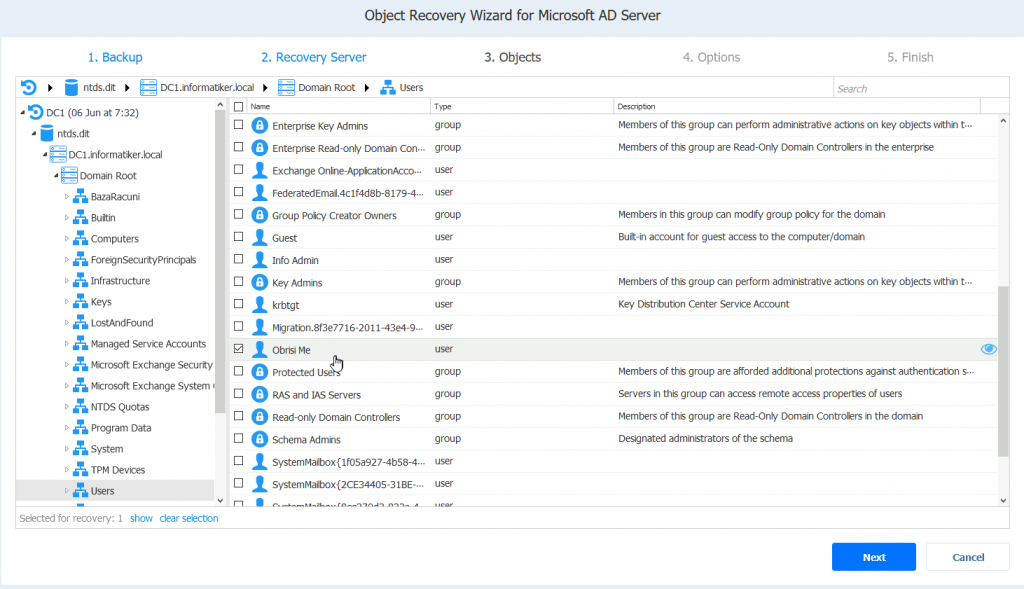
If everything is ok, you should see ntds.dit displayed. Expand it to DC1.informatiker.local (here will be named of your DC and domain) | Domain Root | Users | and here it is, I found user Obrisi Me inside my backup. I will select it and click on Next
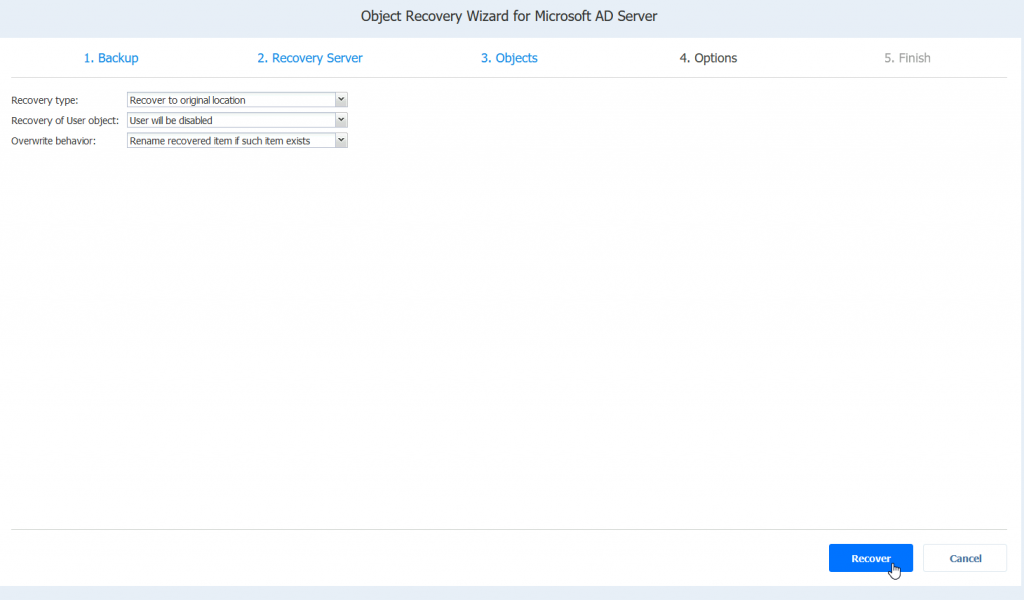
I will recover user to original location, it will be disabled after recovery, and renamed if the user already exists. Recover
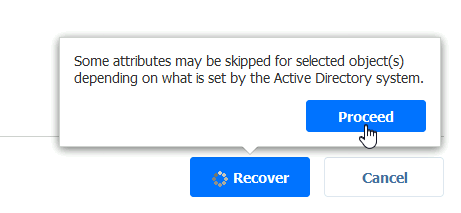
Proceed
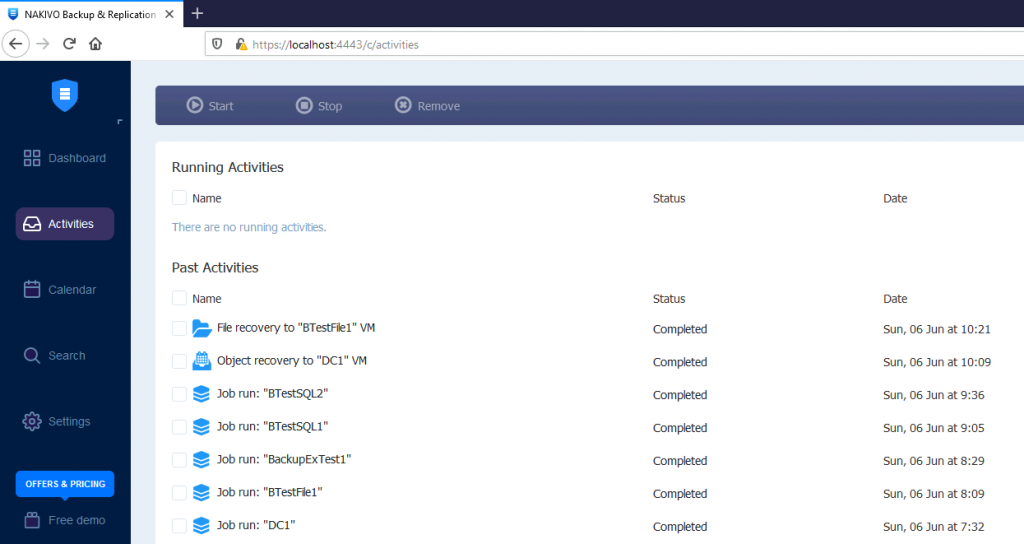
We can now close the recover screen, and select Activities from the main menu
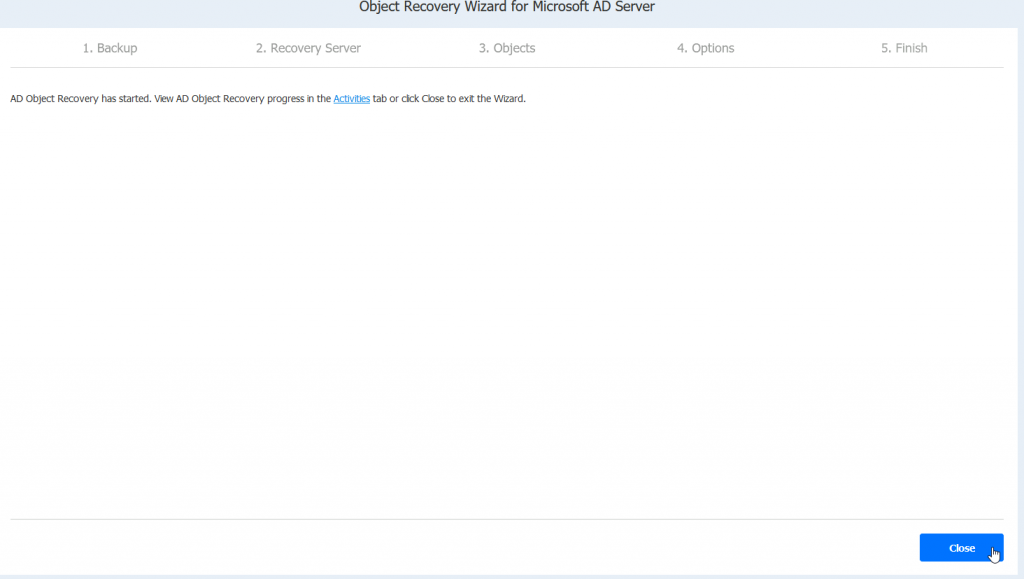
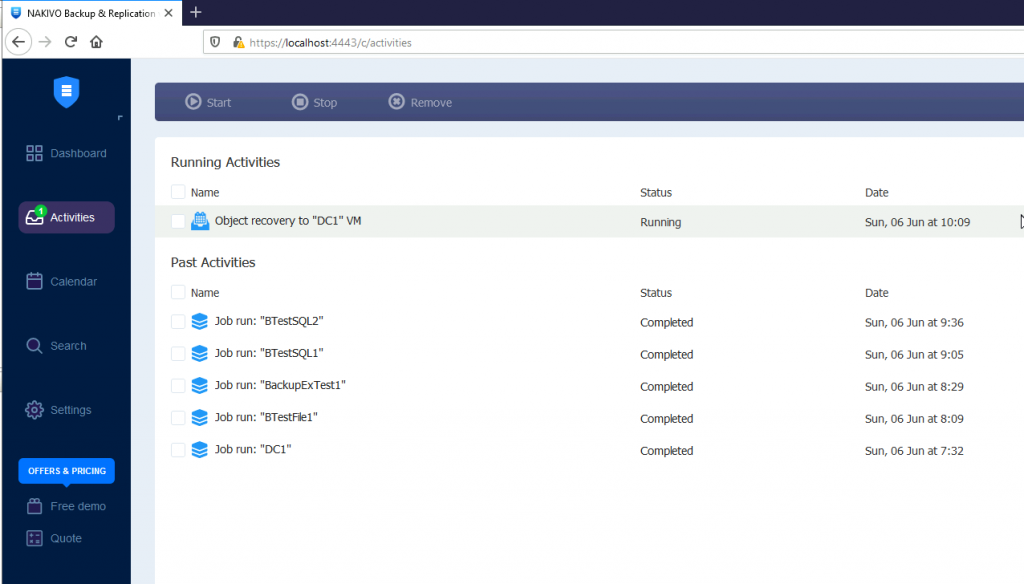
In Activities we can see that object recovery is running process
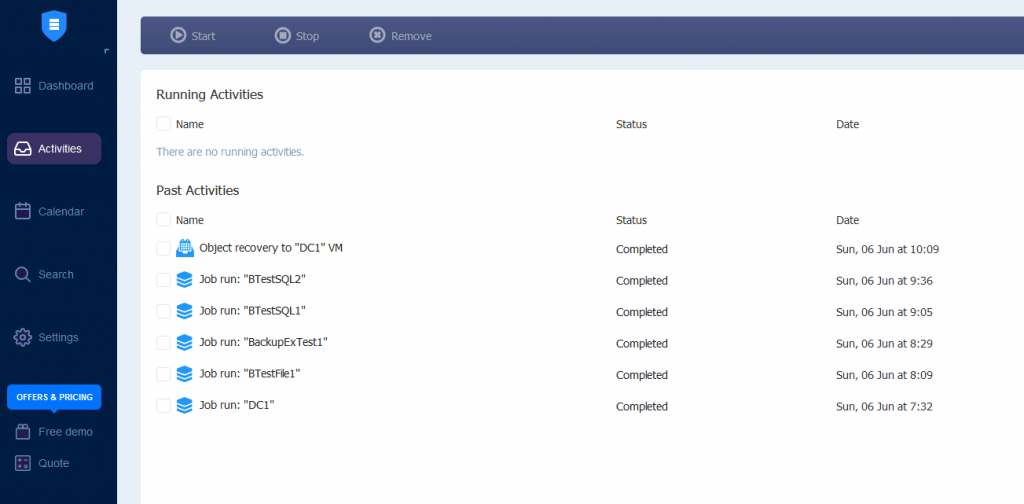
Soon it was completed.
Let’s check AD again
User is recovered
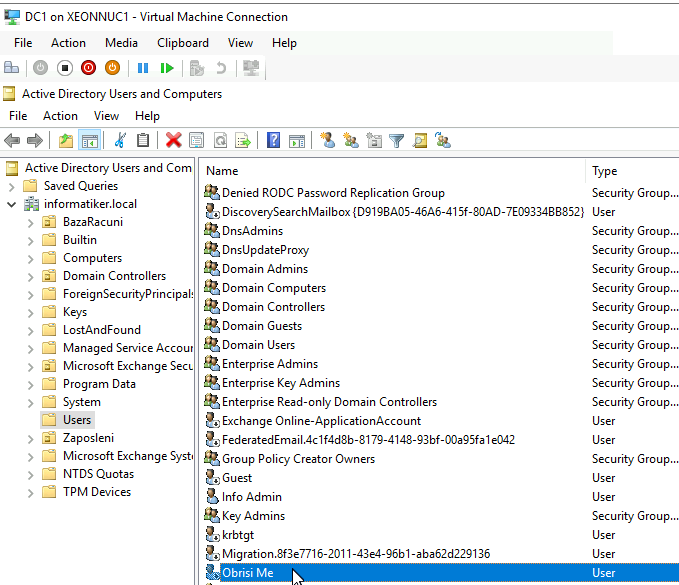
Success!
File Server
From the File Server BTestFile1 from D:\Docs\IT I deleted file named ITDoc2.txt
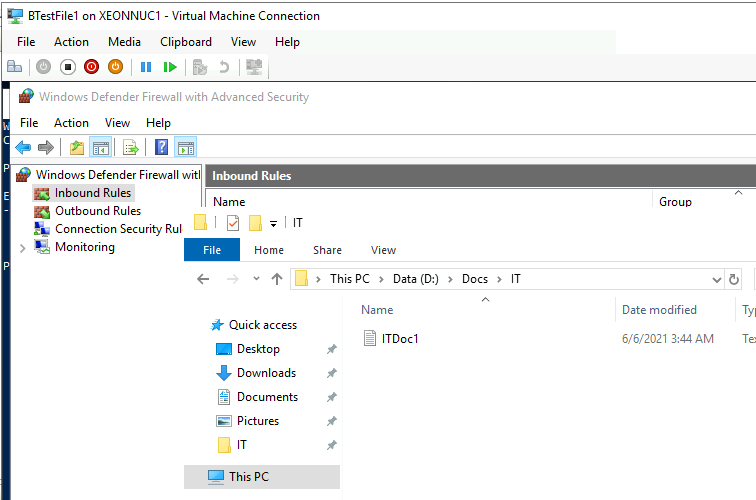
Let’s recover it
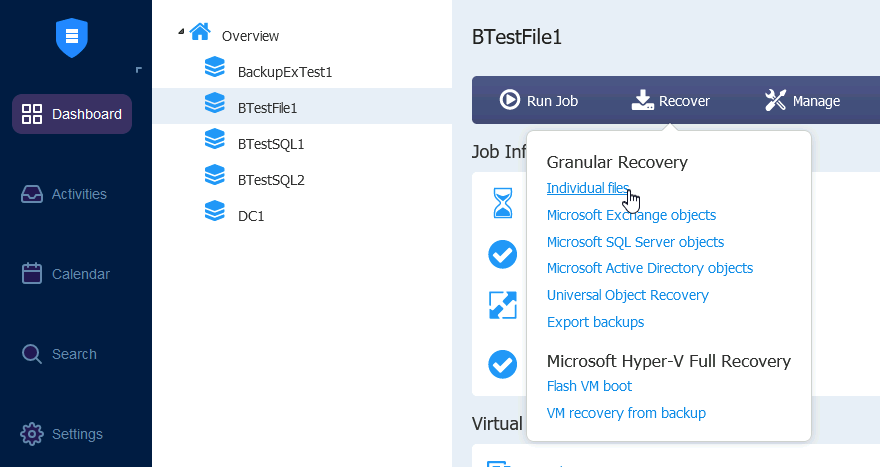
Again, procedure is more or less the same as with Active Directory, only this time from Recover we will select Individual files for BTestFile1 backup
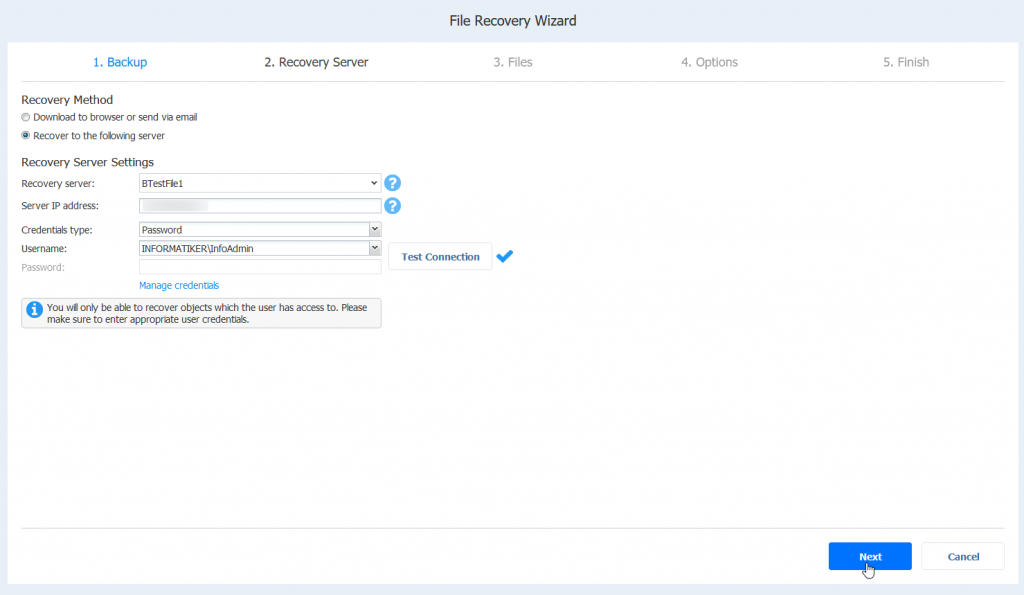
Also, a bit different part is that, under step 2. Recovery Server, under Recovery Method we now have option to download the file through browser, or send it through email, or recover it to the server. We will recover it to the original server.
Also, make note, that you can only recover objects to which your user has access to.
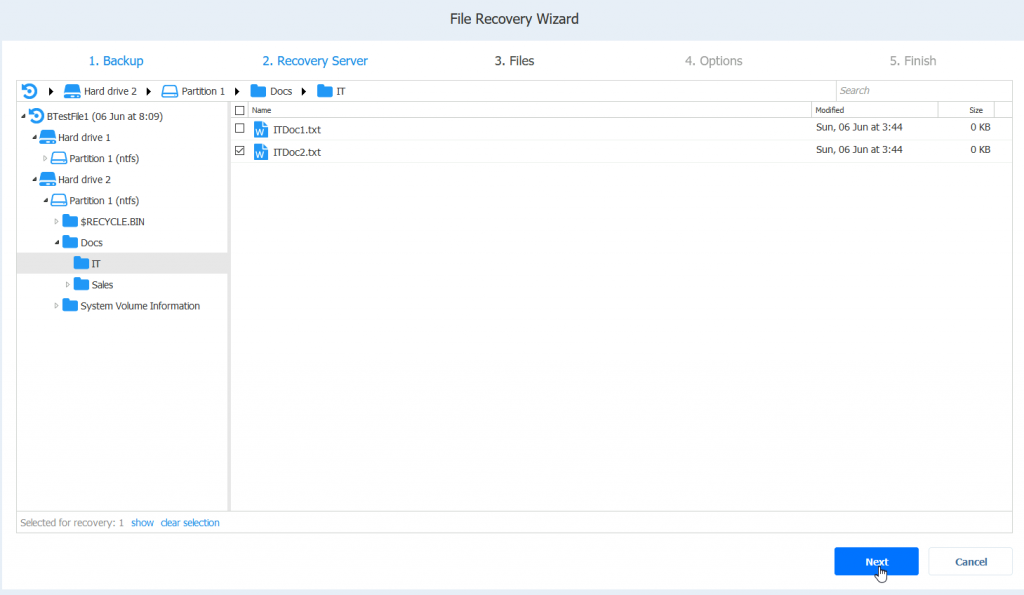
This time, step 3 is Files. I will select File named ITDoc2.txt that I deleted.
Ok, recovery was able to open the backup, with no errors, success! I selected ITDoc2.txt and selected Next to finish recover procedure.
After some time, recovery procedure was successfully completed
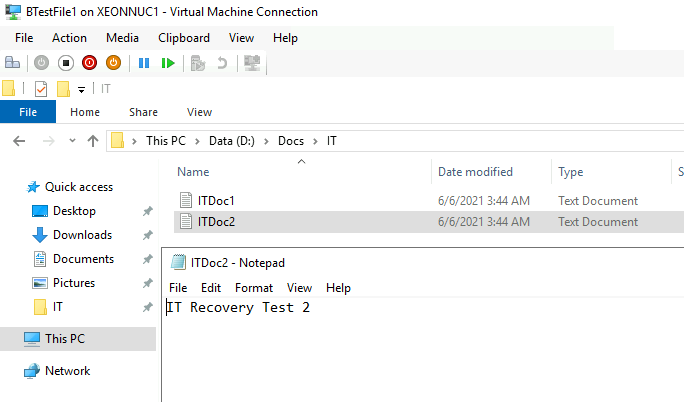
I can now see my file back in original location with content I made in it.
SQL Server
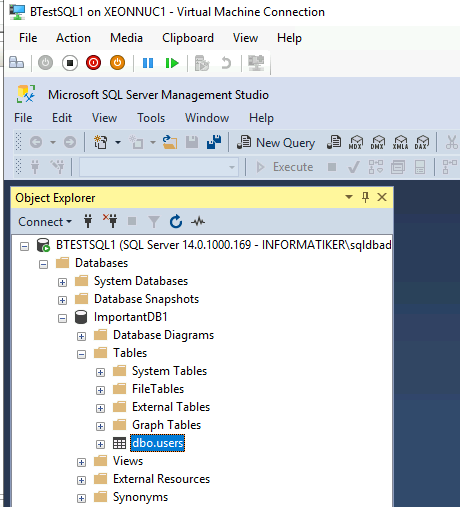
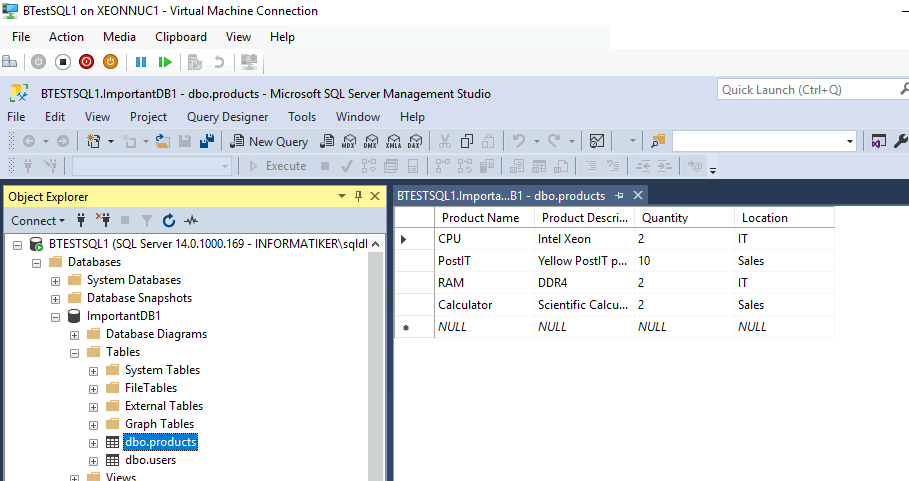
In my database named “ImportantDB1” I have two tables – users and products.
I deleted products table by mistake.
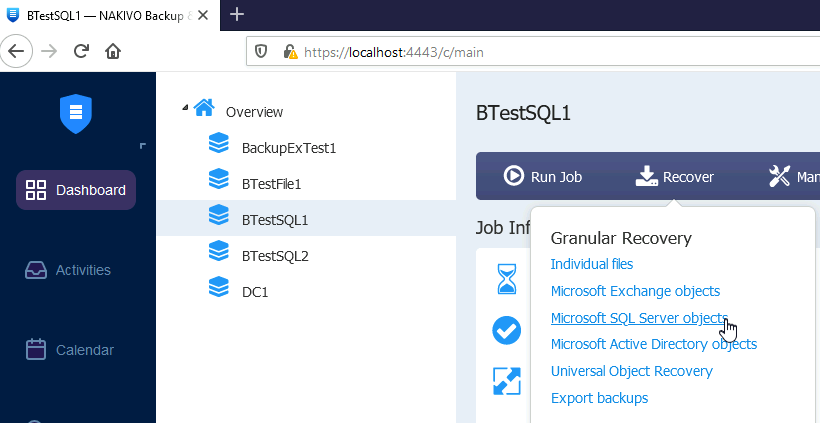
In Nakivo I selected my BTestSQL1 and under Recover I selected Microsoft SQL Server objects
This time under step 2 I will select sqldbadmin1 user. After user connection is tested, I can also access my SQL instance.
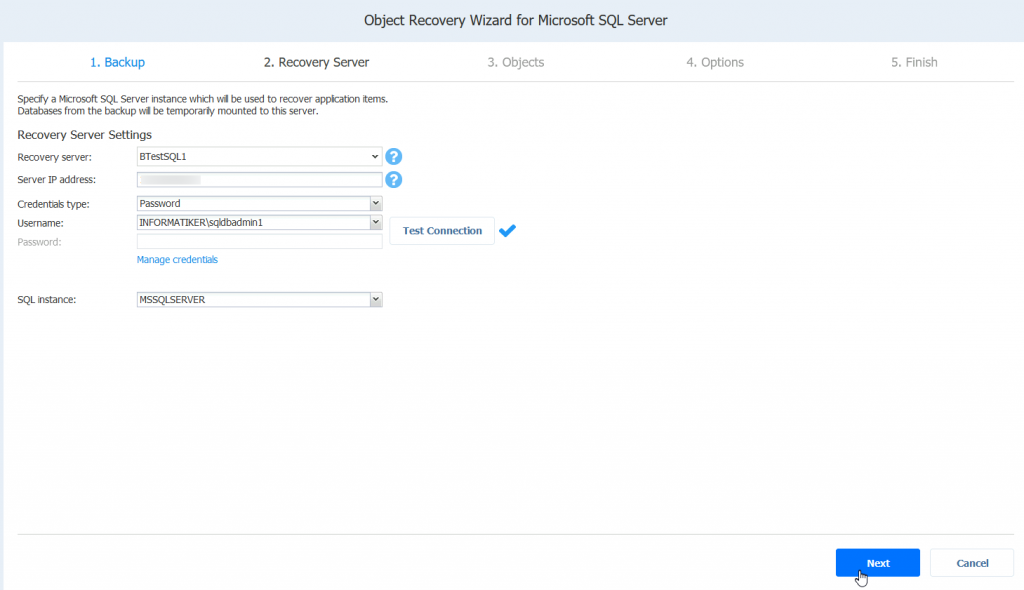
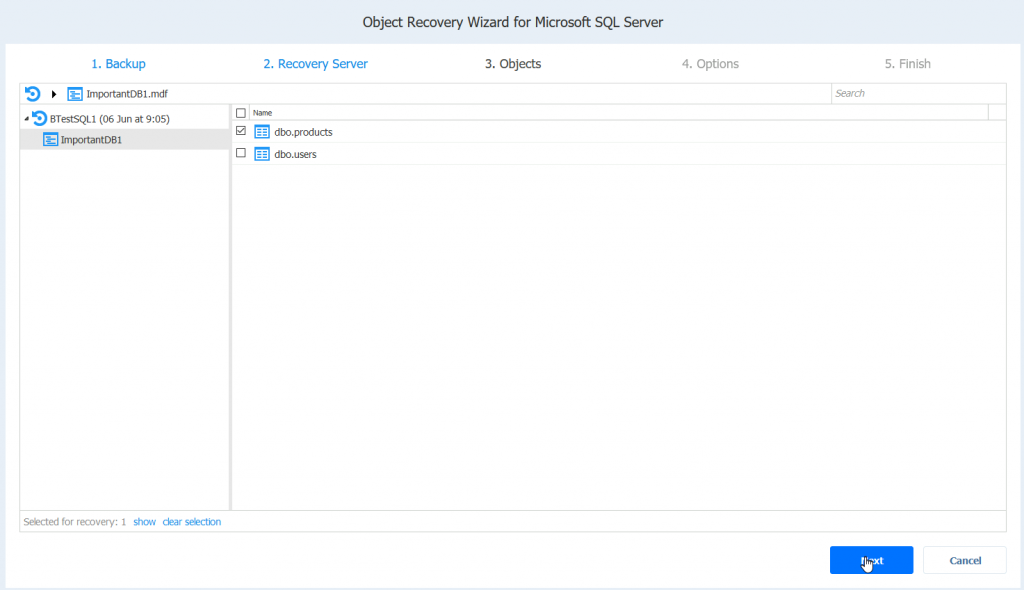
Lucky day for me, I have products table in my backup
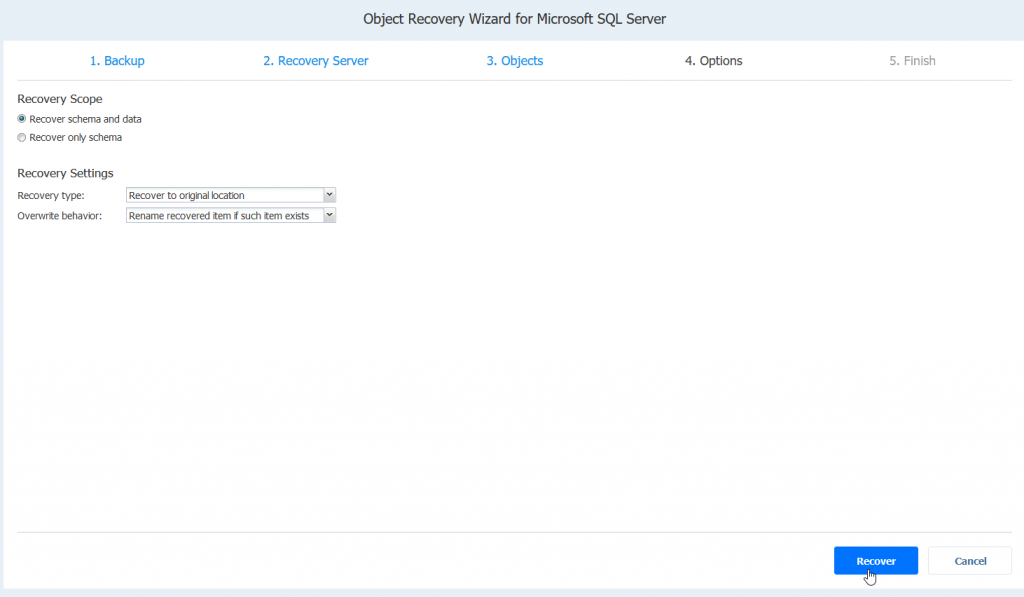
I want to recover schema and data
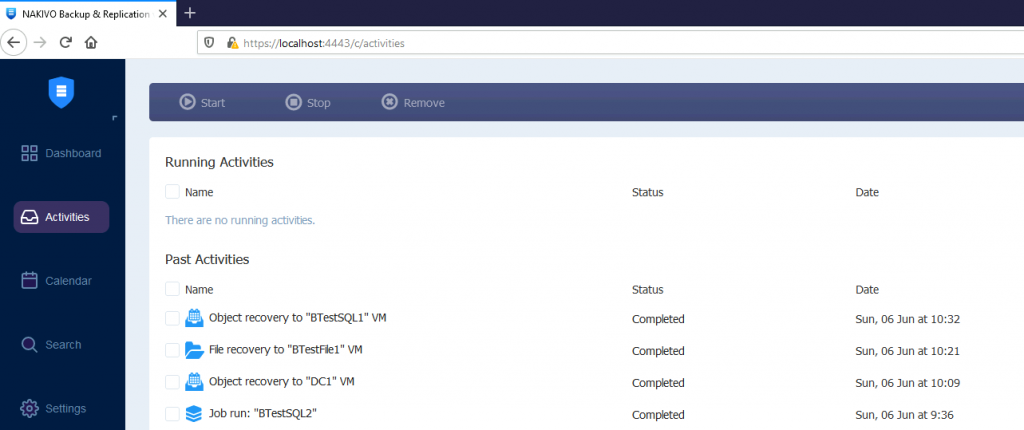
After some short period of time, recover job was finished with success.
Let’s check our SQL installation
Table dbo.products is back with all the data in it!!!
What if your Database is on different drive?
However, there is one issue with SQL and Exchange recovery. It works as described above only if you have database and logs in default locations made by SQL installation.
In my case, I don’t keep DBs on the system disk inside default SQL directories in production environments. Everything is on the separate drives. There are many good reasons not to store DBs in default locations on system drives.
However, if you repeat above procedure with let’s say, DB on D:\ drive, you will get following screen
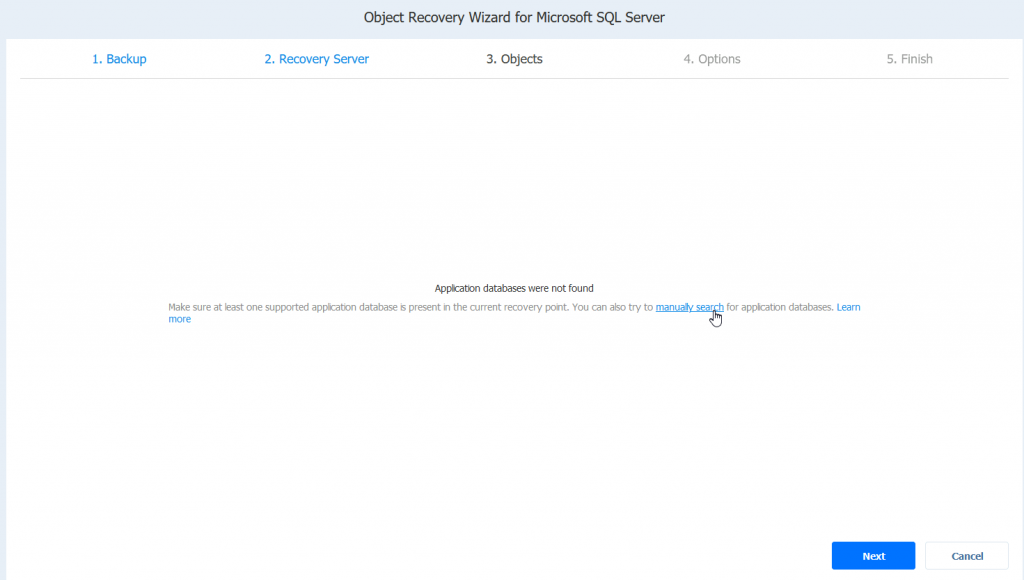
“Application databases were not found”
Looks scary at first.
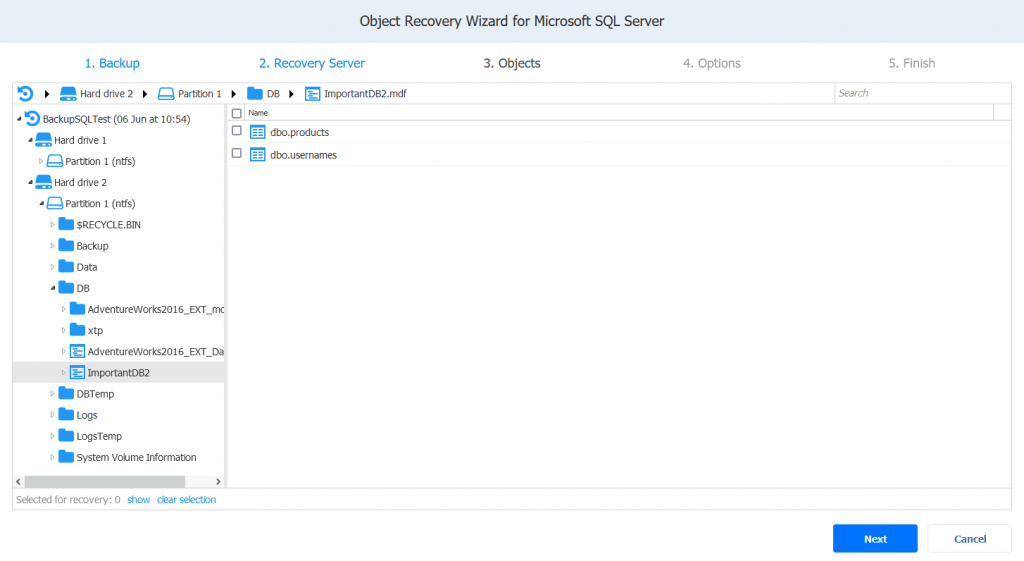
If you click on manually search you will get your drives and you can navigate to your DB location.
After you click on manually search, you will be able to browse your drives to location where the database is, select it and see the content of it.
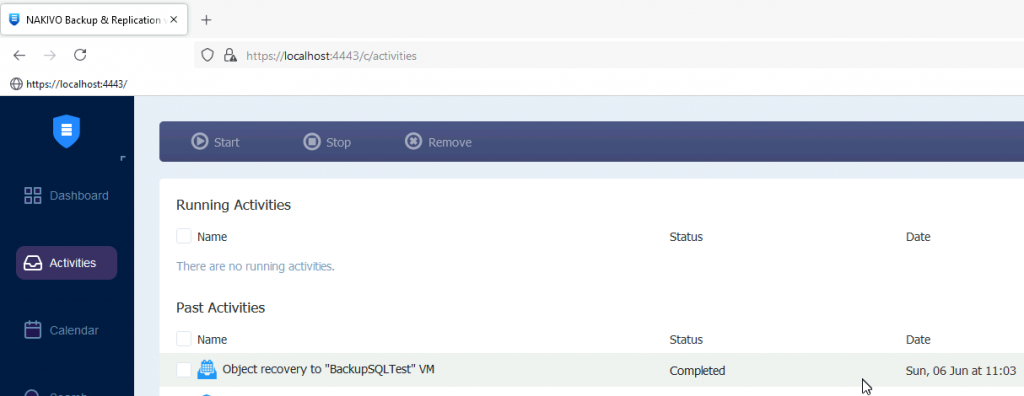
I deleted table named usernames, and it was recovered successfully.
Exchange Server
I was very vague about Exchange server, and that is on purpose, because I usually don’t use backup software for granular recovery of Exchange items.
I have retention policy inside Exchange defined, and I recover through that retention policy.
I just don’t like to mess with Exchange DB too much in general, especially with large (almost 1TB) databases.
I work with Exchange for cca 15 years, daily. I went through Exchange 2007,10,13,19, and I know how painful can be when Exchange DB breaks and stops. And there are days when that DB can break if you look at it the wrong way.
Ofcourse I have Exchange backup policy in place, but it is only for the case something very bad happens. I don’t use backup software to recover users or items from Exchange.
However, I you wish, you can recover you Exchange the same way we did for SQL, File…
Select you Exchange VM backup (BackupExTest1 in my case) and from Recover select Microsoft Exchange objects.
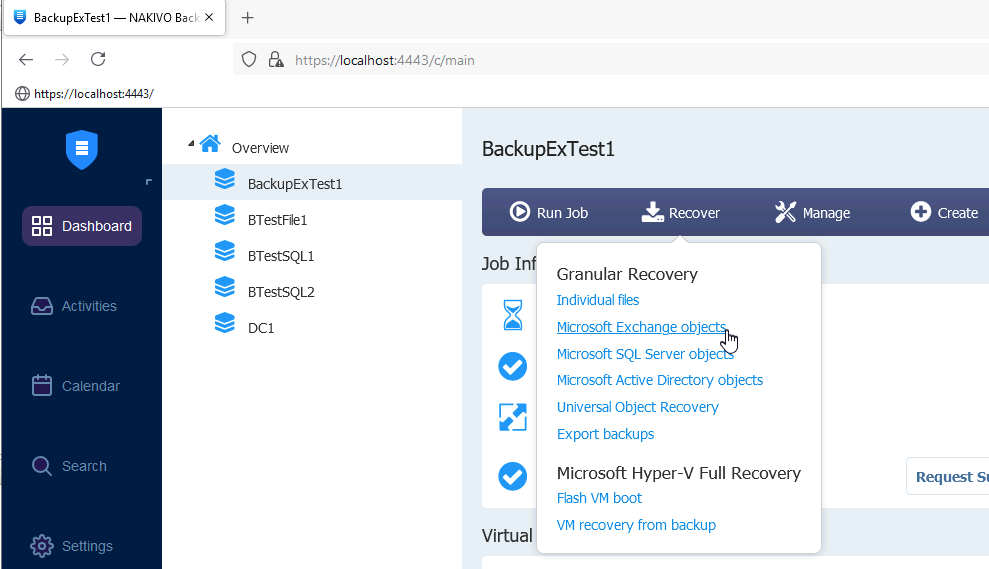
Everything else is more or less said in SQL, File recovery procedures, when you reach step 3. Objects in recovery phase of the Exchange server, you will see your Mailbox database and users you created.
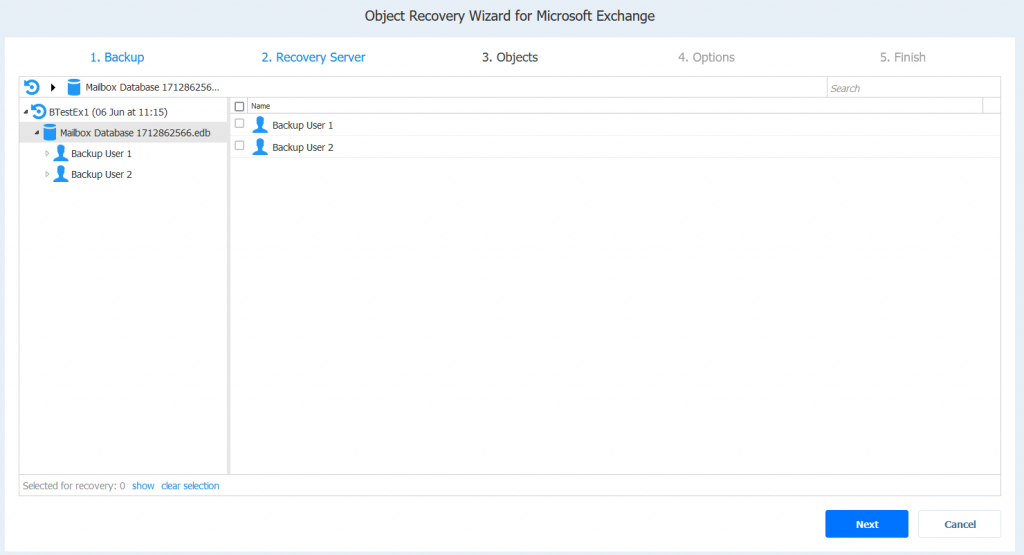
Although, after I select for example Backup User 1, I should see his inbox and all the email correspondence – I get this
“Database cannot be opened”
I’m doing this as a domain enterprise admin, I have Get-ADUser RSAT powershell enabled on both Nakivo backup server and Exchange itself. InfoAdmin has full access rights on Backup User 1 mailbox – but still – nothing.
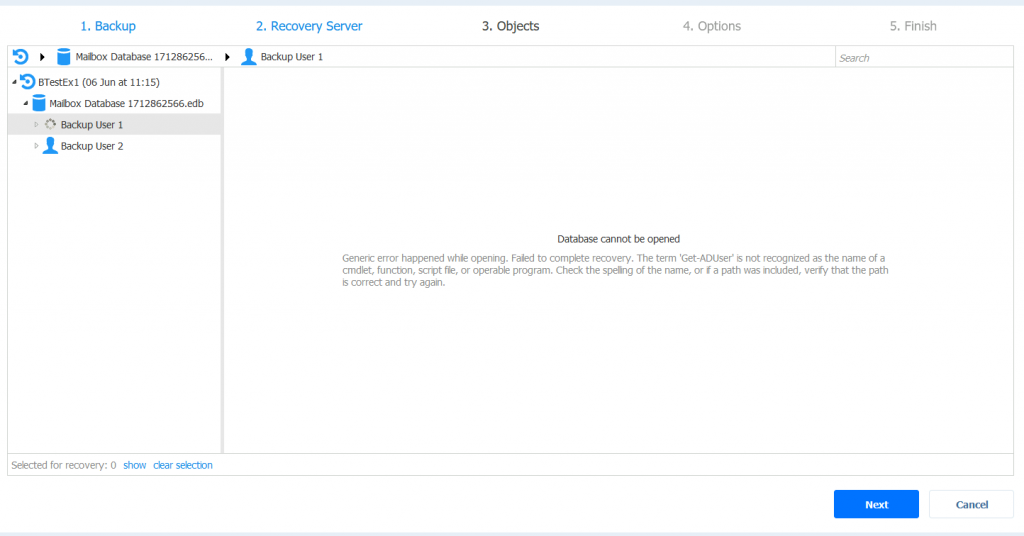
If I find solution (this is not a big deal for me) I will update this guide. You are also free to let me know, if you know how to resolve this.
If you have Exchange Databases on other than default locations
Simply look at SQL example, it is same principle, manually search, select your DB and recover what you need (if it works for you).
Aaand, with Exchange fiasco, we are ending this Nakivo recovery guide.
Conclusion
I had a few problems which I described in this article with Nakivo Recovery on Hyper-V. Although I religiously followed documentation (maybe I skipped somewhere) I still wasn’t able to get recovery running straight away in general. Internet wasn’t much of a help, and I ‘m too cheap to spend my support tickets on something I assume should be “simple”. So, I lost a few hours to troubleshoot and resolve the issues myself.
Exchange granular recovery issue remains, but I’m not concerned with that one, since I’m not using it and in my experience it doesn’t work that good with other backup products too (even Microsoft own DPM).
Once I had recovery going and problems resolved, it was overall good and straight forward experience – and I have to say I’m very pleased with the Nakivo as the solution, despite few little mishaps. It works really well once you set it up correctly.