In part five, we will be going through Private Key Archive and Recovery. Backup is most crucial thing, and we should implement it on this piece of architecture. We will go through Certificate Templates which will enable us to use Private Key Archival.
Let’s start right away, if there is something you don’t understand, please go back to previous four parts of this guide, links are at the bottom of this guide.
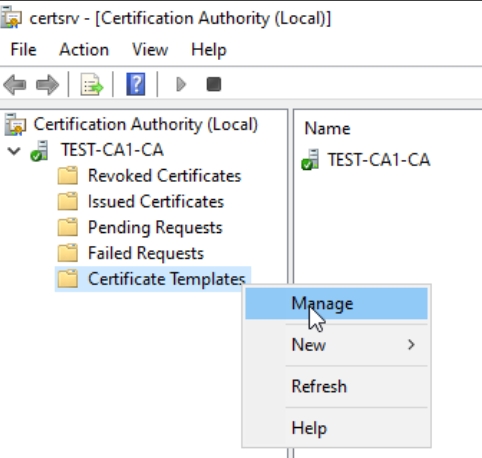
On CA1 server open certsrv.msc, expand server and right click on Certificate Templates and click Manage
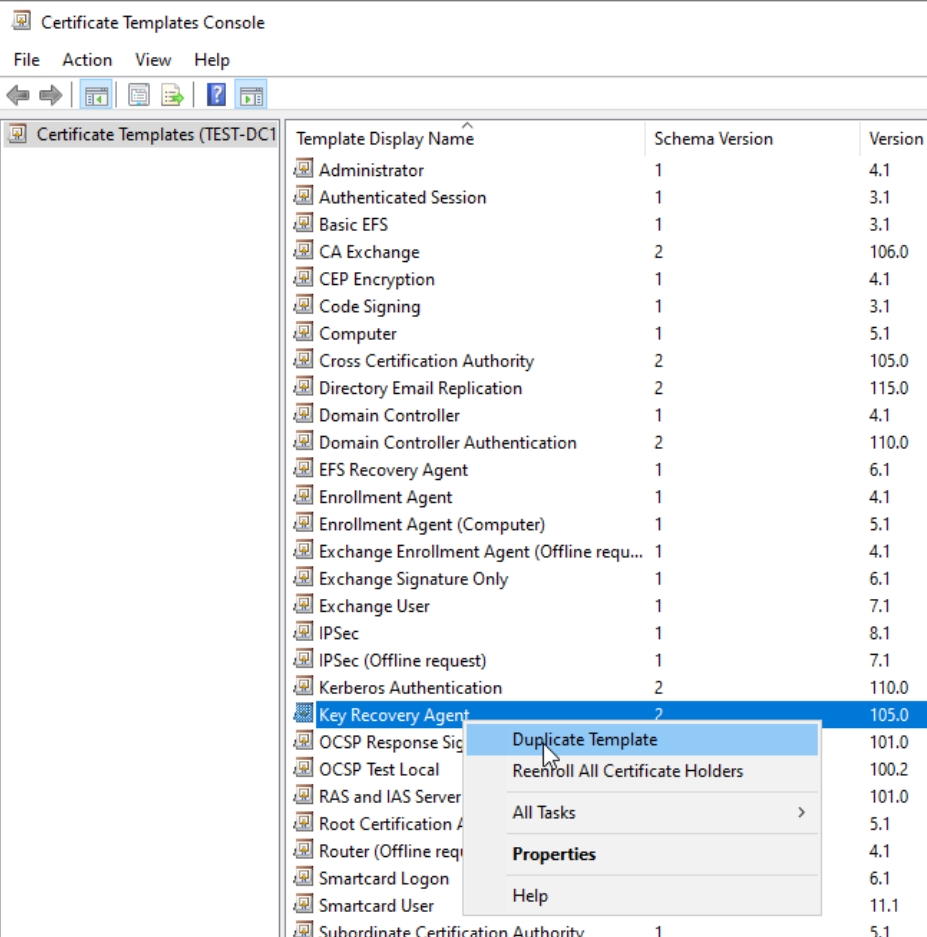
New window will open with Certificate Templates, select Key Recovery Agent, right click on it and select Duplicate Template
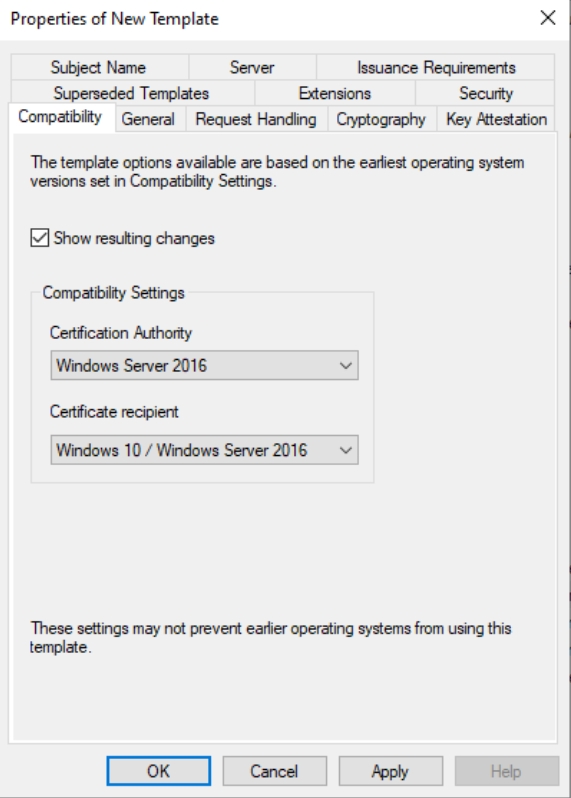
New window will open, and on Compatibility tab, under Compatibility Settings, for Certification Authority select Windows Server 2016 and Certificate recipient select Windows 10/Windows Server 2016
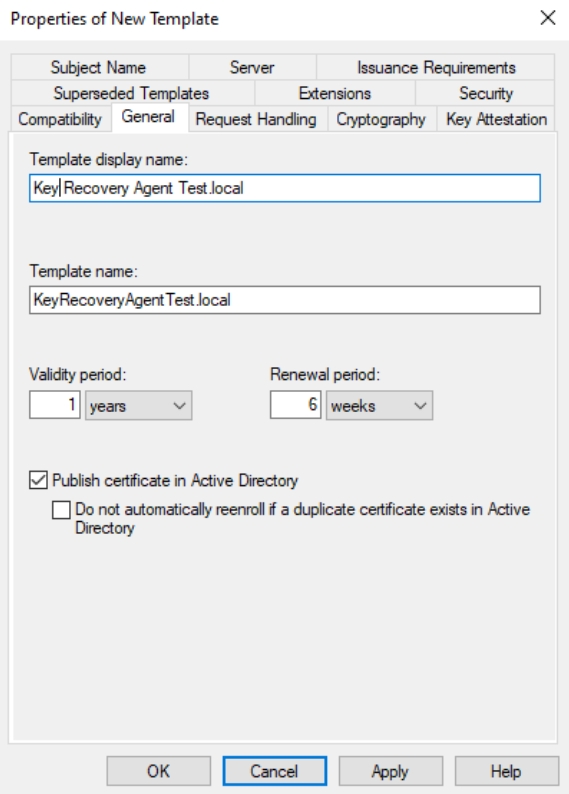
On General tab enter template name, select Validity period of 1 year and select Publish certificate in Active Directory.
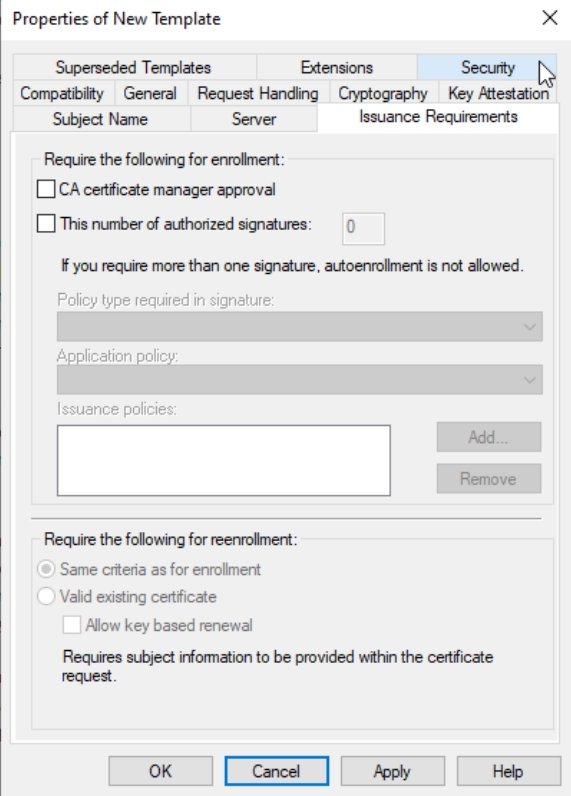
Next tab is Issuance Requirements – uncheck CA certificate manager approval
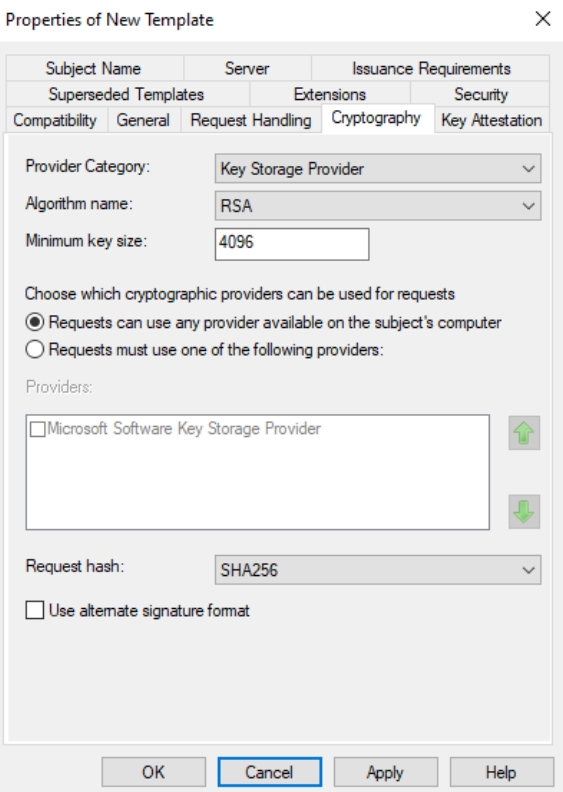
Cryptography tab should have Key Storage Provider, RSA, 4096 and SHA 256 set
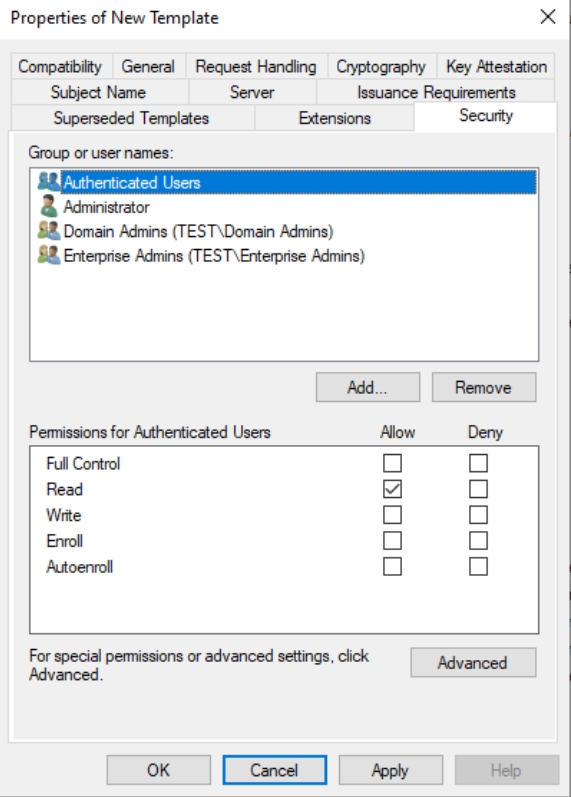
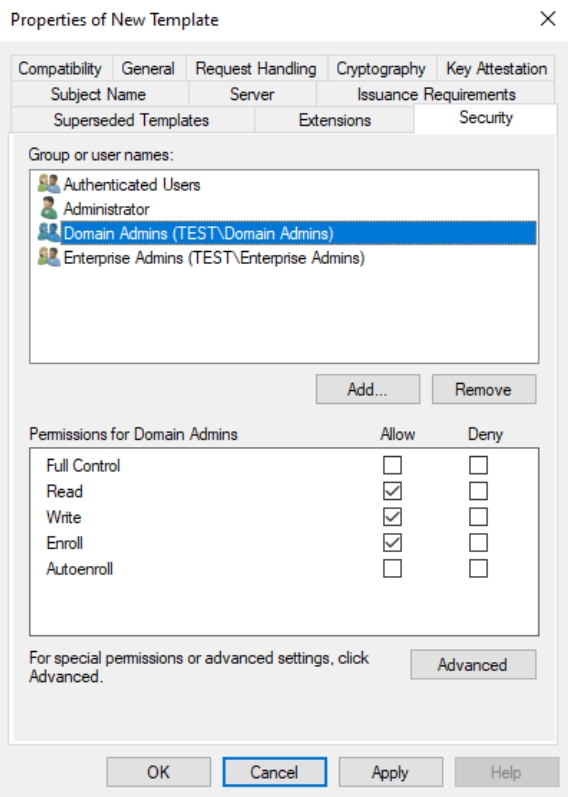
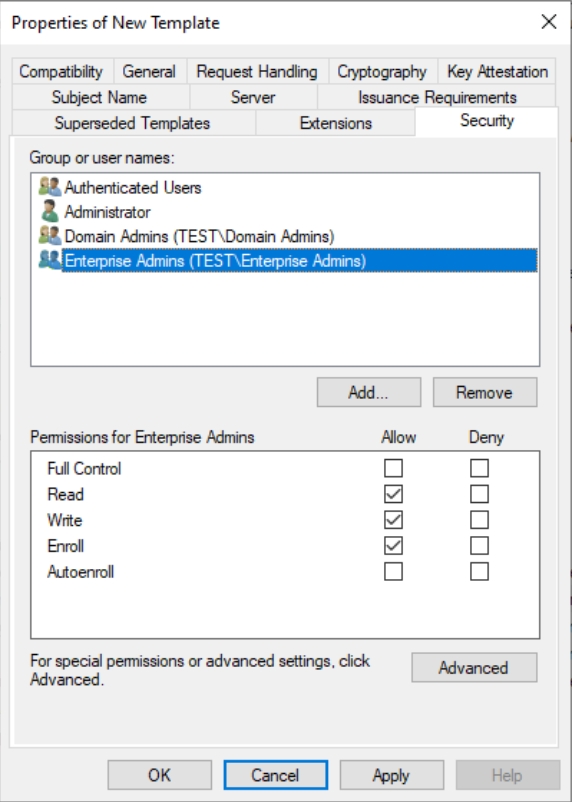
Security tab – Authenticated Users should have Read permission, Domain Admins Read, Write,Enroll and Enterprise Admins Read, Write, Enroll. Click Apply and OK to close
We can also close Certificate Templates
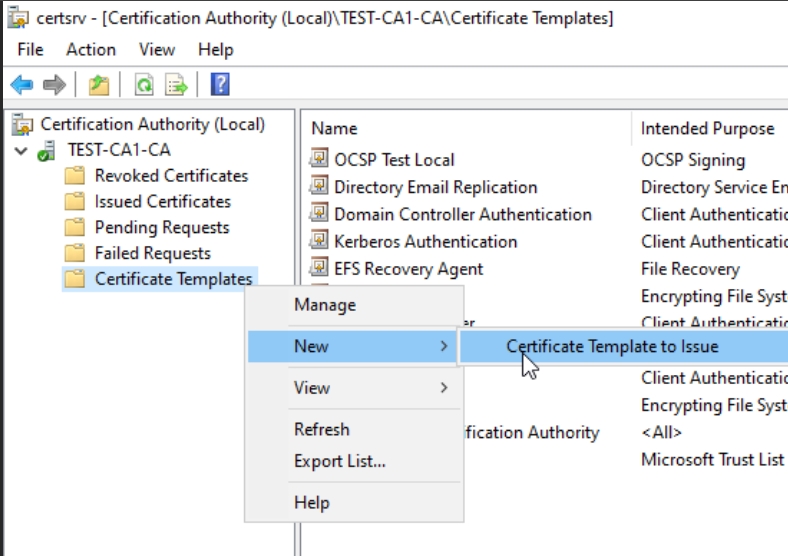
In Certificate Authority console, now right click on Certificate Templates folder and select New – Certificate Template to Issue
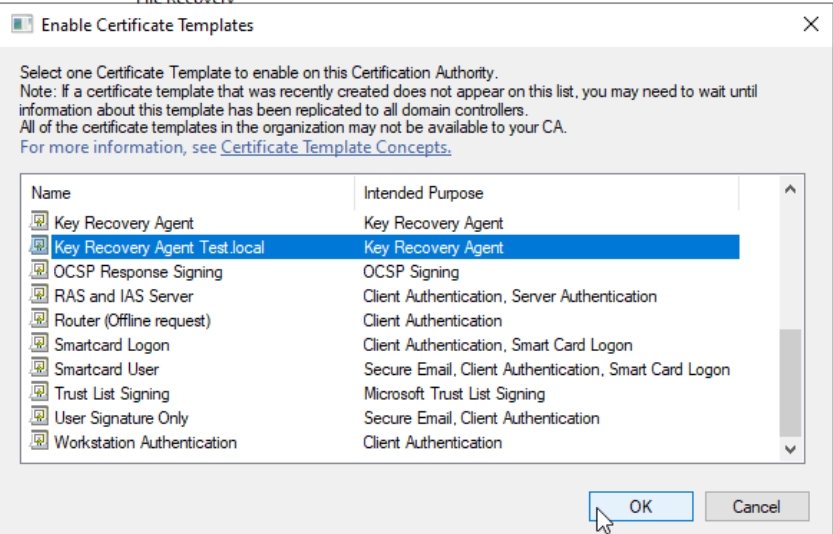
Select Template we just created and press OK
Template will now appear in Certificate Templates window.
We can close Certification Authority console.
Deploy the Key Recovery Agent Certificate
We will now request Key Recovery Agent certificate. Go to certmgr.msc for Current User Account on CA1. You should be logged in as Domain Administrator on the CA1 before we proceed. This is not advisable in Production environments, you should use dedicated account for Key Recovery.
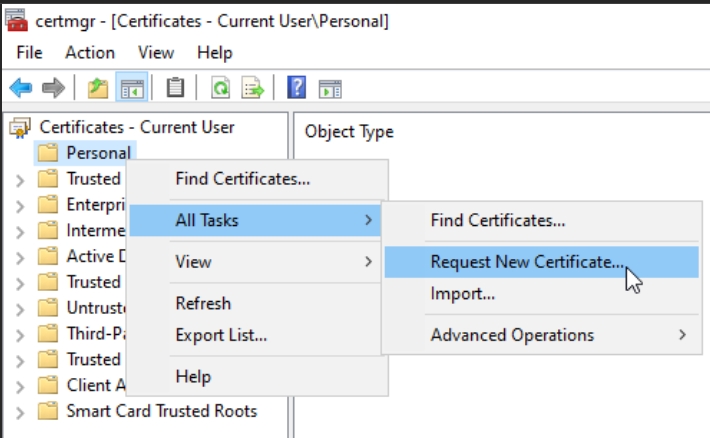
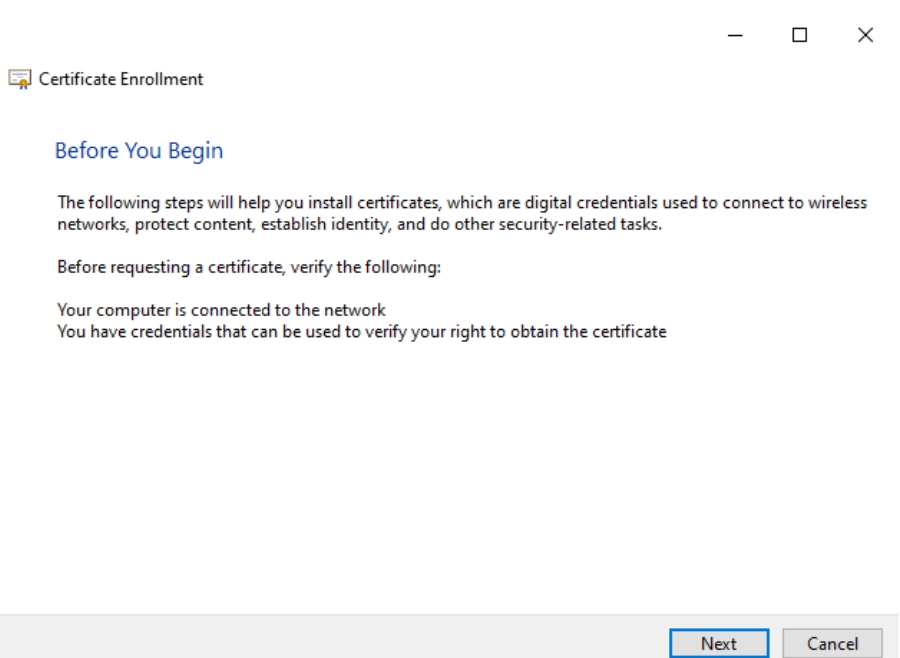
Right click on Personal – All Tasks – Request New Certificate
Next
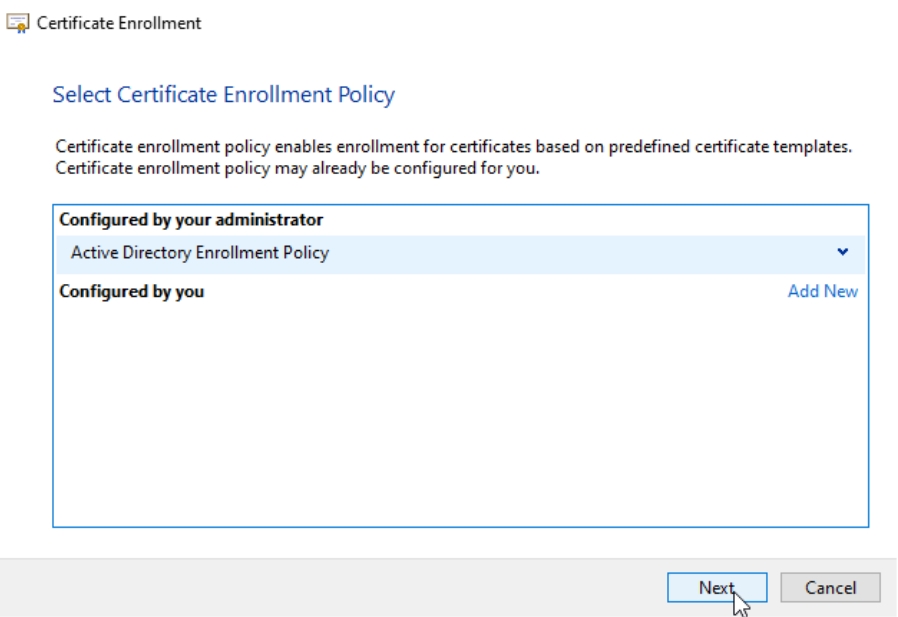
Active Directory Enrollment Policy should be selected – Next
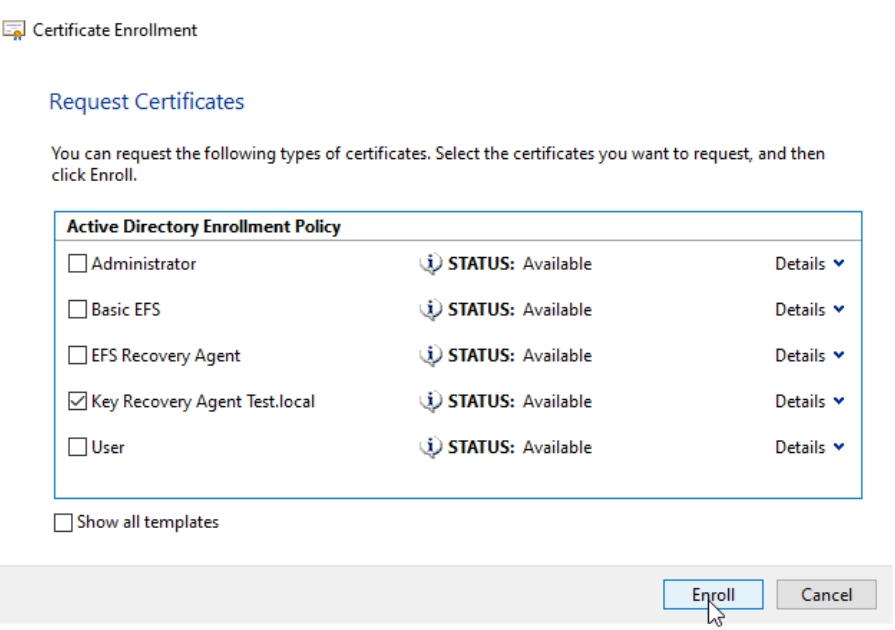
Select Key Recovery Agent Test.local (template you created) and click on Enroll – wait and click on Finish.
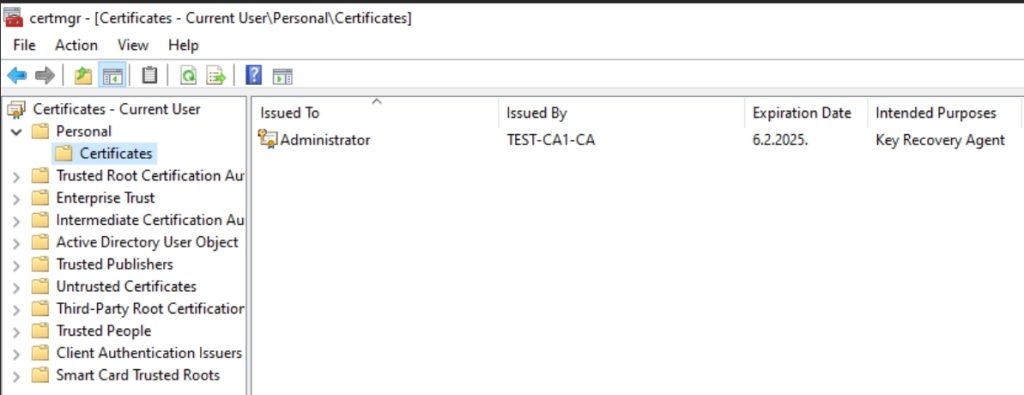
You should now have that certificate
Configure Certificate Authority for Key Recovery
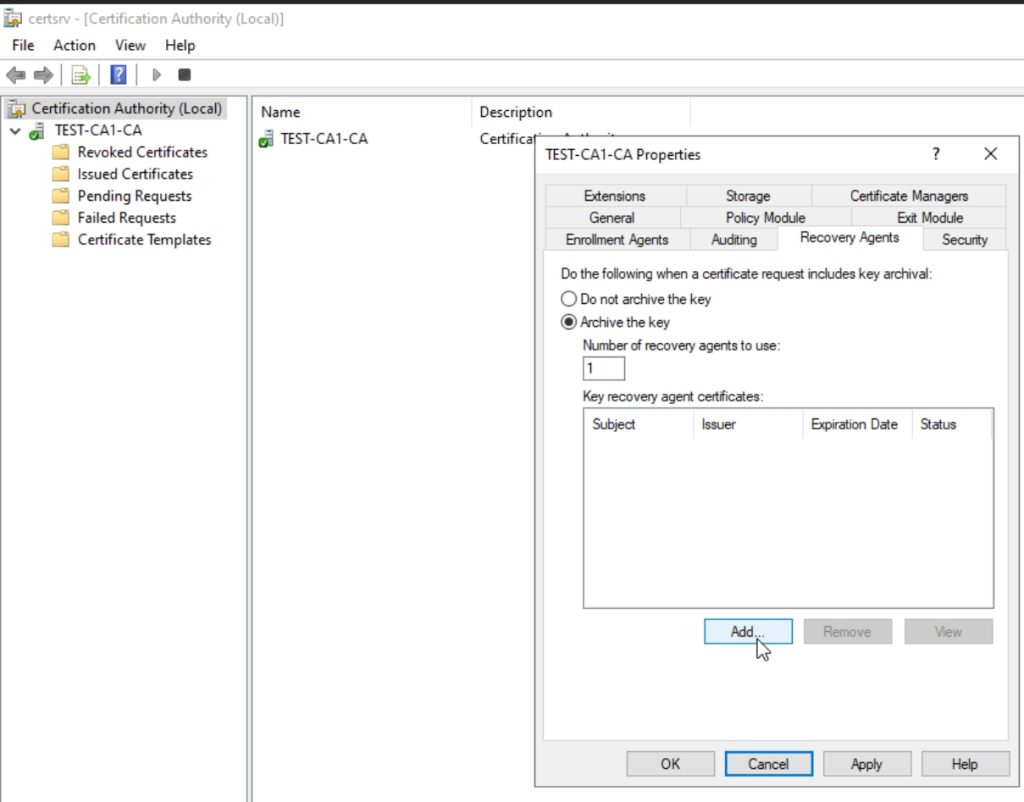
Now we will open Certification Authority (certsrv.msc) on CA1 server. Right click on server and select Properties – click on Recovery Agents tab and select Archive the key, leave 1 as number. Click on Add
Just click on OK
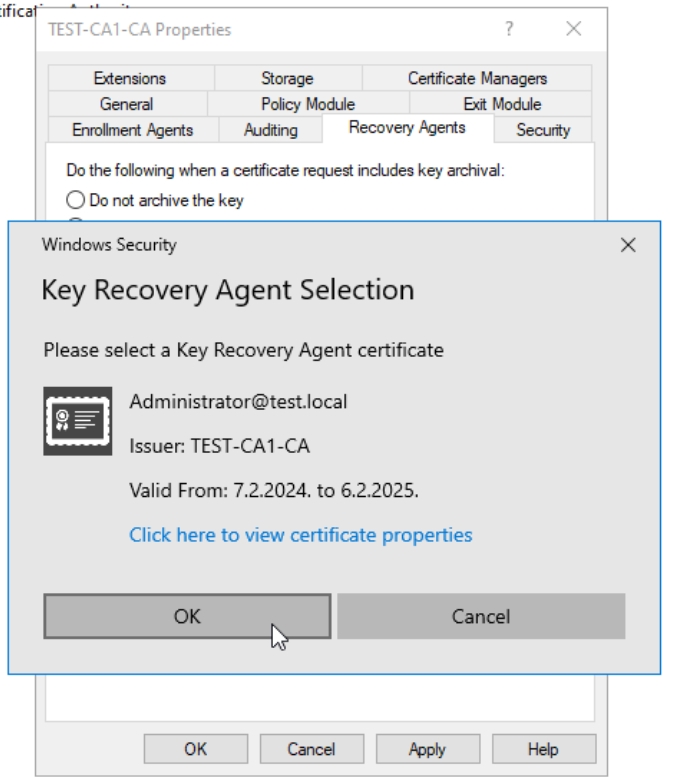
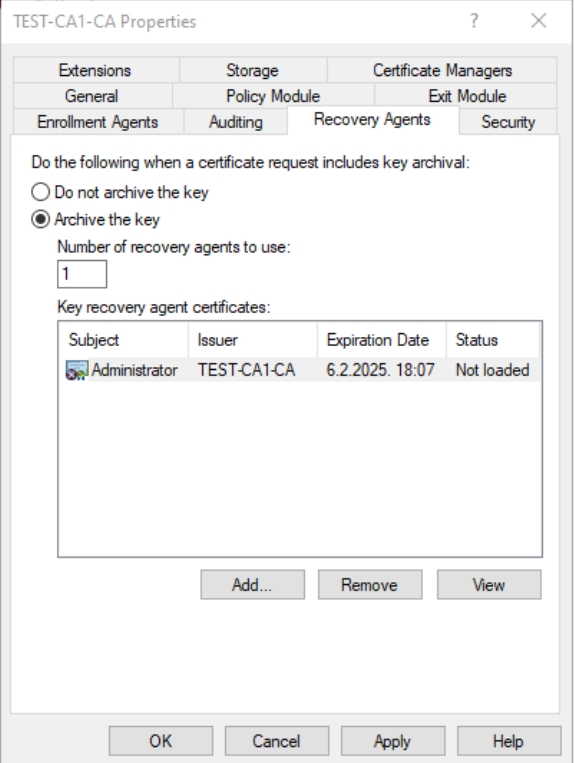
Now, key will appear, but still won’t be loaded. Click Apply, you will be prompted to restart Active Directory Certificate Services – click Yes. Status will change to loaded, you can press OK.
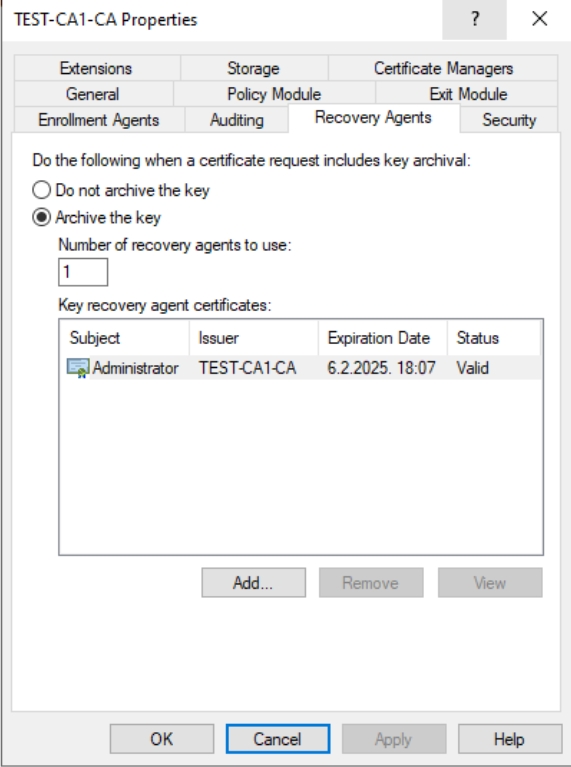
Now, key is valid after AD CS restart. OK
And that is that for this part, we are done.
Other parts of the series can be found on the links below
Implementing Two-Tier PKI on Windows Server 2022 – Part 1
Implementing Two-Tier PKI on Windows Server 2022 – Part 2
Implementing Two-Tier PKI on Windows Server 2022 – Part 3
Implementing Two-Tier PKI on Windows Server 2022 – Part 4
Implementing Two-Tier PKI on Windows Server 2022 – Part 5 – you are here
Implementing Two-Tier PKI on Windows Server 2022 – Part 6
Implementing Two-Tier PKI on Windows Server 2022 – Part 7