I got a chance to evaluate reMarkable Paper Pro for business usage. Some of the colleagues are more paper oriented, so we went on and got an eink devices for some of our larger projects and to test them out and see how the devices fit our business workflows. I’m also huge fan of reading and writing on eink, so I was excited to test the devices out. One of them is a new reMarkable Paper Pro. Let’s quickly see what it can do, and how we can enable Developer mode on it.
This is more of a quick technical/usage review, and not in depth writing, latency, screen, pencil evaluation or Paper Pro. Have that in mind. There are great eink oriented channels that will give you all that info. I’ll try to evaluate reMarkable Paper Pro from everyday usage standpoint.
What can Remarkable Paper Pro do?
reMarkable Paper Pro is an eink device, primarily oriented on note taking (and reading). Main idea behind device is to be your physical notebook replacement, and minimize digital distractions to let you focus on your work/task at hand. It mimics feeling on paper, and should help businesses, students and creatives in their daily tasks.
Main take from all written above is that this devices is – minimalistic – in terms of features and functions. Have that in mind, and compare what you need with what Remarkable Paper Pro can do, so you won’t get disappointed. Remarkable Paper Pro is a writing tool, and that is main purpose of it.
Tech specs – compared to other eink writing devices
reMarkable Paper Pro is a huge step up when compared to reMarkable 2. It has beautiful color 11.8″ screen, with rich colors (by eink standards).
It has backlight – which is really huge. I understand philosophy behind screens without backlight (better writing experience), but not all of us have great eyes, and using devices without backlight can be a struggle when light conditions are not optimal.
It has also 64GB of storage, so now you can finally store serious amounts of documentation on the device (compared with 8GB on reMarkable 2). It also has 1.8Ghz four core CPU with 2GB of RAM. Device feels snappy.
Battery is 5.000mAh, and with this screen size, backlight and colour screen it is safe to say you won’t get two weeks of claimed battery life if you use it daily. Depending on your usage, you will probably get two or few more days or realistic battery life. Marker also requires charging, so have that in mind. It is charged by just being attached to the Paper Pro. But still – needs charging.
Operating system on the Paper Pro is custom Linux.
reMarkable Paper Pro is 650€ with Marker. Marker Plus will cost you extra 50€. Folio will set you back from 100 to 200€ extra depending on material. If you wish to purchase keyboard – it will be extra 250€. Overall, not cheap for this type of device.
When you compare it with devices like Boox Note Air3C – Boox has extra MicroSD slot, more RAM, faster CPU. Color screen is somewhat darker on Boox, colors are not great as on Paper Pro.At the time of writing Boox Note Air3C was 550€ with pen and magnetic cover. It is worth mentioning that Boox has its own set of challenges, but that is topic for some other time.
Who is it for?
If you are looking for a device that can replace your notebook and wish to retain writing feel of a paper with minimal distractions – this device is for you. It can also read PDF and ePUB files, so, it can also be ebook reader. But, if you like to open many other ebook formats, and like to heavily customize your reading experience (like having dark background in ebooks) Paper Pro is maybe not best choice.
I will also say that Paper Pro is most usable when integrated with desktop/mobile app provided by reMarkable. It is also most elegant to use if you pair it with reMarkable cloud service (3€ per month).
It is also for tech enthusiasts who like to tinker with their devices (Linux is in the background). reMarkable 2 had great community support, and I hope Paper Pro will develop great community in time.
Who Paper Pro is not intended for?
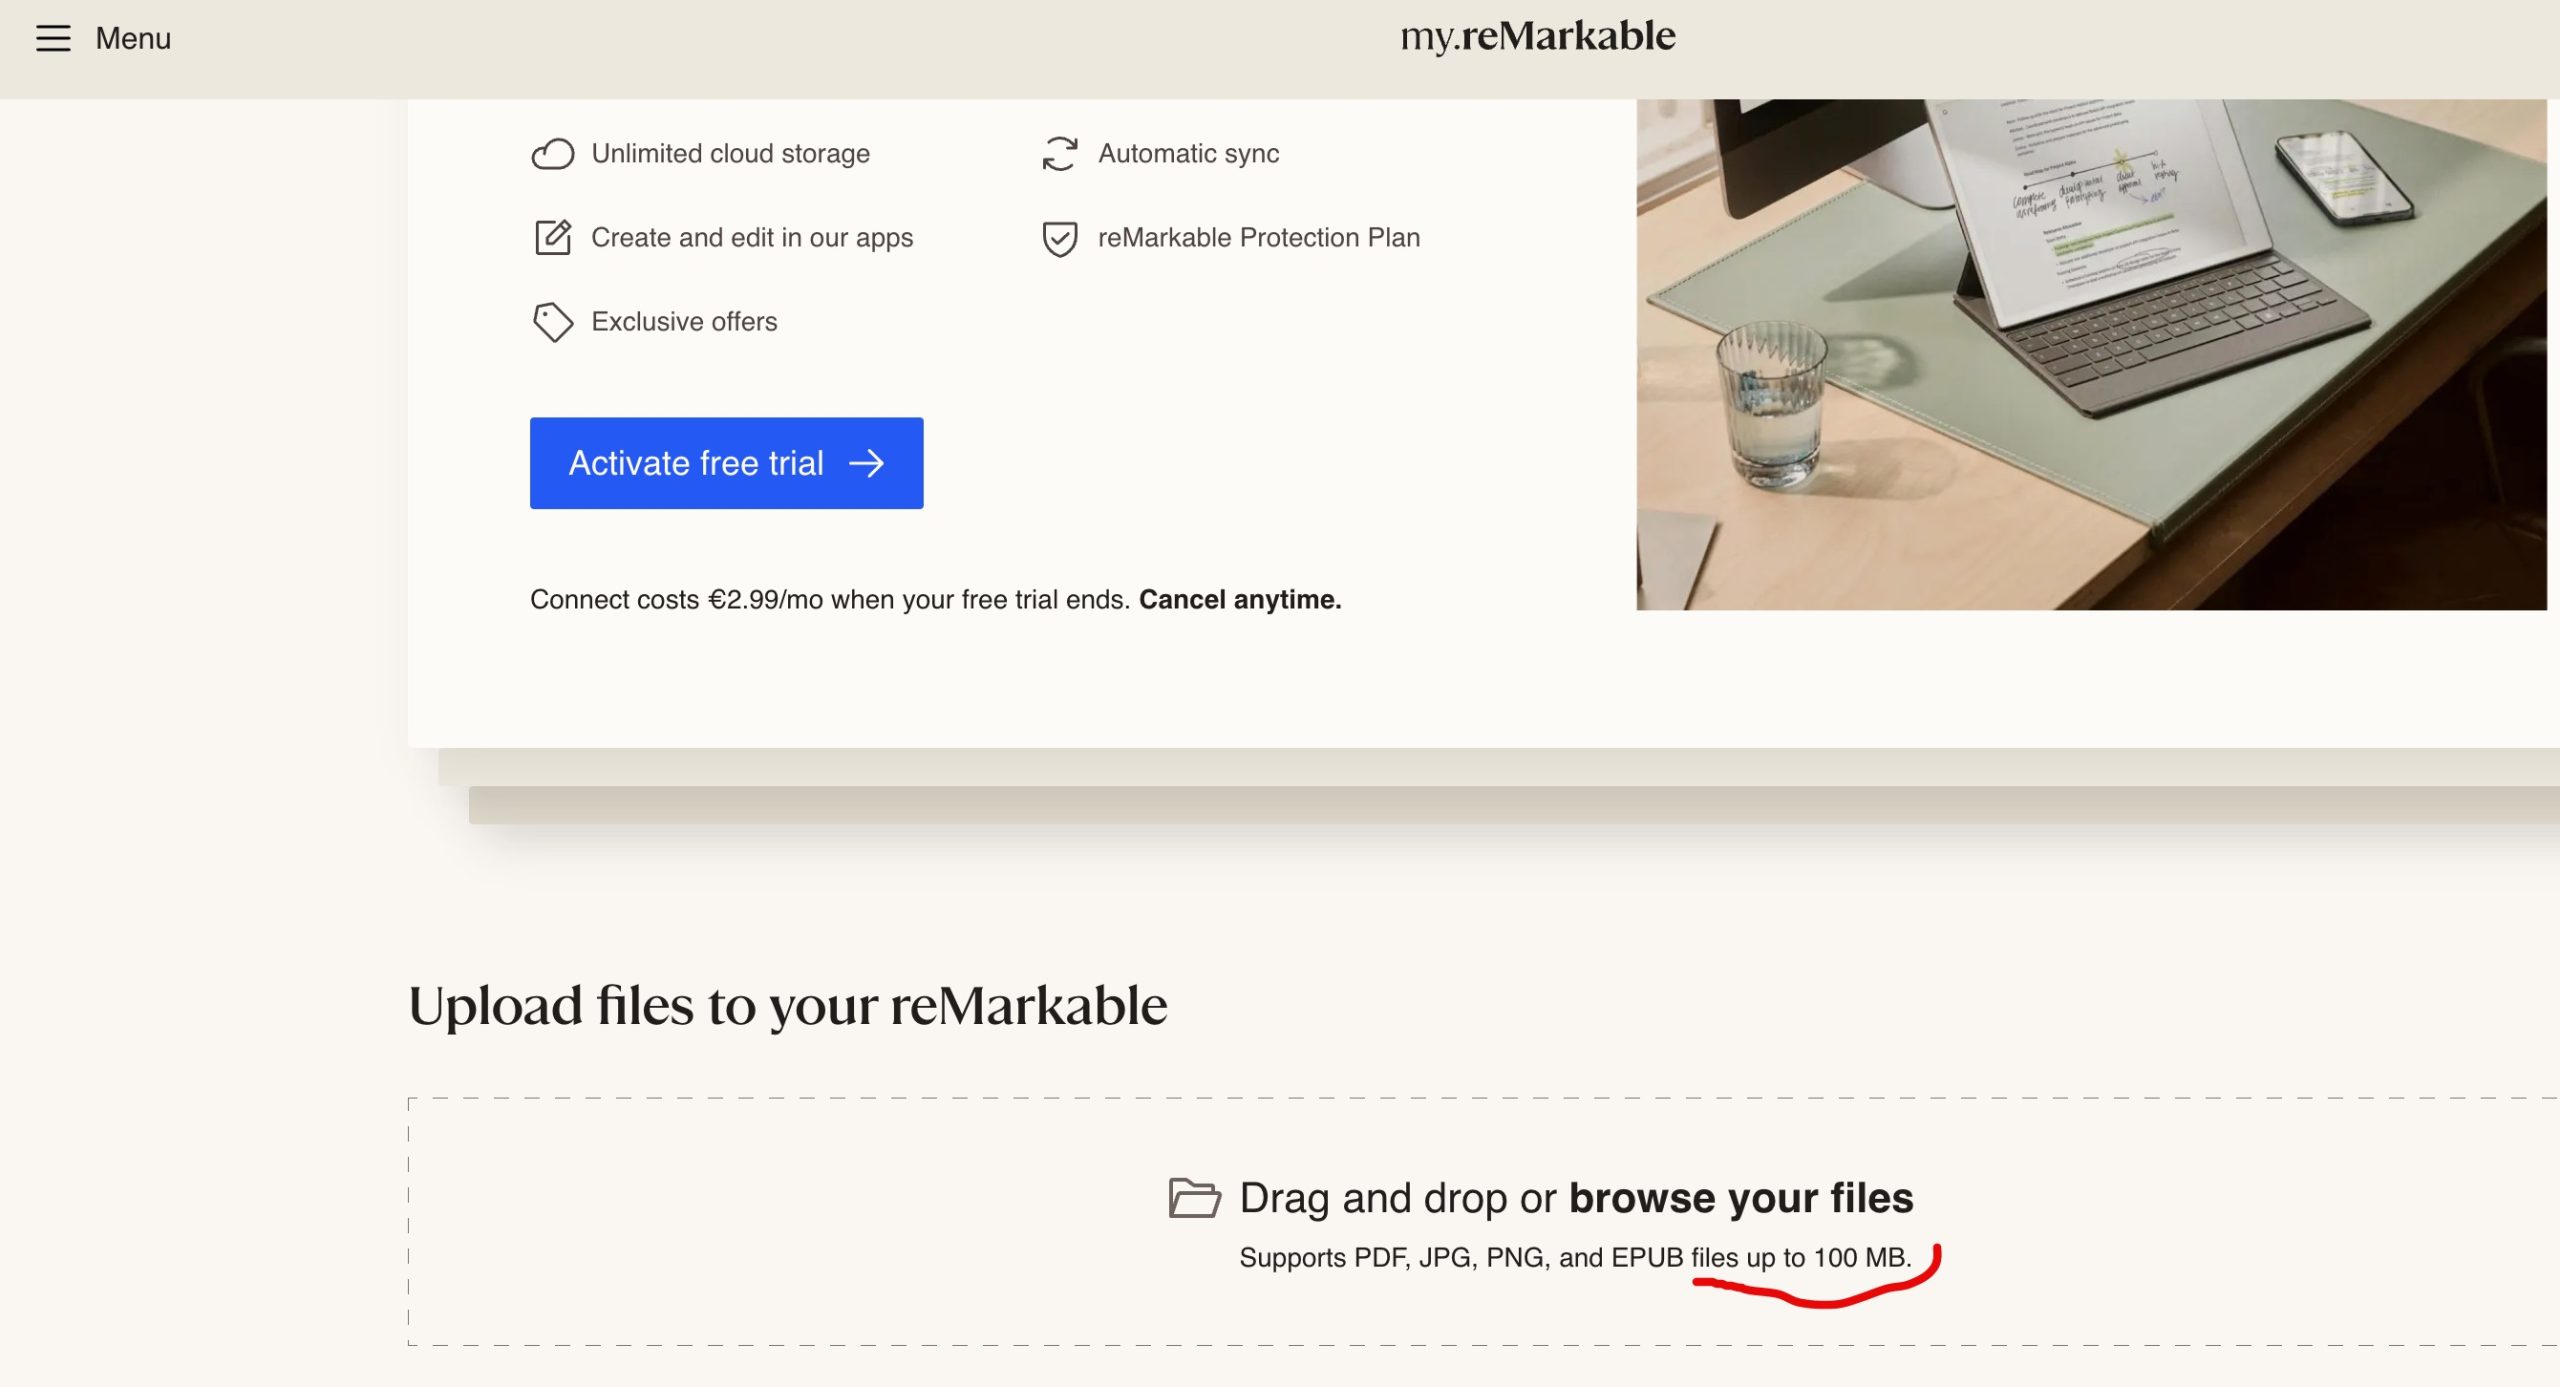
Well, for a start, reMarkable feels like it was designed around cloud and companion apps for it, so have that in mind. If you don’t plan to use cloud, and don’t like subscriptions, there will be some challenges in using this, since some features evolve around cloud connectivity. You will need to use Onedrive/Dropbox or Google Drive to upload files larger than 100MB to your device, reMarkable cloud support files only up to 100MB.
Cloud solution is also not optimal if you have confidential documentation or notes. Some companies have strict security policies on the topic.
Document transfer and backup is also a bit cumbersome if you are not using cloud. Attaching external drives to the reMarkable doesn’t work, and uploading large PDF (larger than 100MB) files through USB via browser is not possible. All is doable, but far from elegant, and it will require some effort to get around limitations of document transfer and backup.
As an ebook reader, you have option to upload PDF and ePUB formats. Enough, but if you are thinking about adding your comics or word documents, that won’t be possible in native format. You can convert everything to PDF, but that is not always convenient. If you plan to listen to audiobooks, reMarkable is also not device for you. Night mode and bookmarks are some of the things that are missing from reading experience on Paper Pro.
As a writing tool reMarkable is obviously great, but things like table of contents or content linking inside notes is missing. If you used something like Supernote or Boox, and have specific writing workflow, check if Paper Pro fits your needs.
Obviously, because of the minimalistic philosophy, you are not able to add third party apps (without modding it) browse internet, or use it as tablet, as I see many people asking this.
How to enable Developer Mode on reMarkable Paper Pro?
I’m not intending to use reMarkable Paper Pro with cloud services. I understand the philosophy behind service, and I get that reMarkable has to live from something that can help them develop new products and improve current lineup.
In general, I don’t like to use cloud services for documentation, and like to have control of the devices I use. So, I will enable Developer Mode on my Paper Pro.
Pairing Paper Pro with cloud service will give you extra storage, syncing with desktop/mobile app, screen sharing option and optional integration with google docs, onedrive or dropbox if you wish. So, have that in mind, these are convenient features.
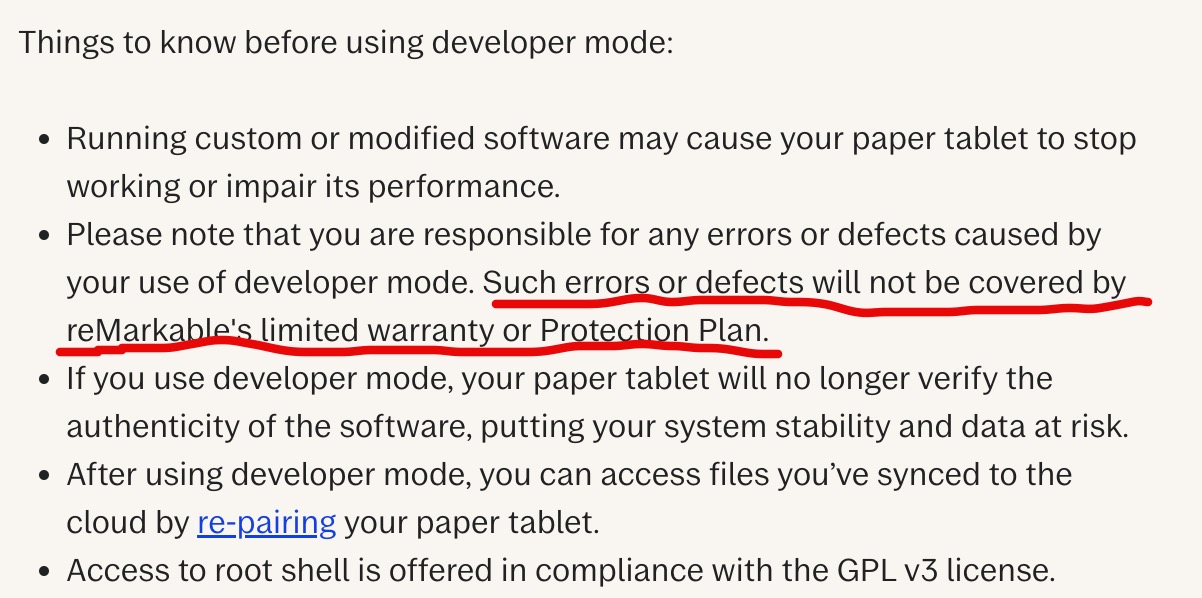
Setting Developer Mode will DELETE ALL THE CONTENT FROM YOUR REMARKABLE PAPER PRO. Backup all the data from your device before starting this procedure.
Also, cloud features will work after you enter Developer Mode, you will need to repair your device with your account. Screen sharing, doc syncing, all will work again after resyncing.
Be aware about responsibilities that entering Developer Mode holds, one of them being warranty voidance – read more here – https://support.remarkable.com/s/article/Developer-mode
Ok, now that we have all of this out of the way, let’s start with the process.
But, before we begin – MAKE SURE YOU HAVE BACKUP OF ALL YOUR DATA ON REMARKABLE PAPER PRO!!
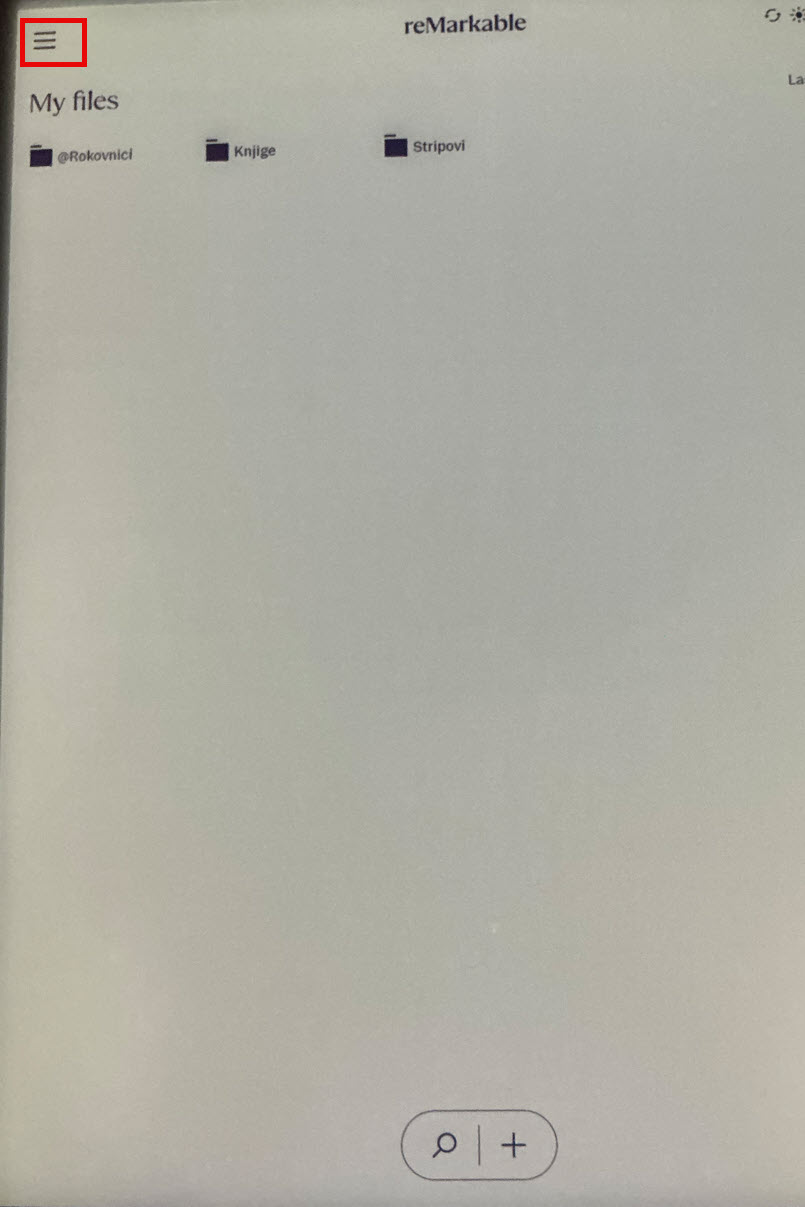
Ok, let’s start. On main screen, click on little “hamburger” menu on top left part of the screen.
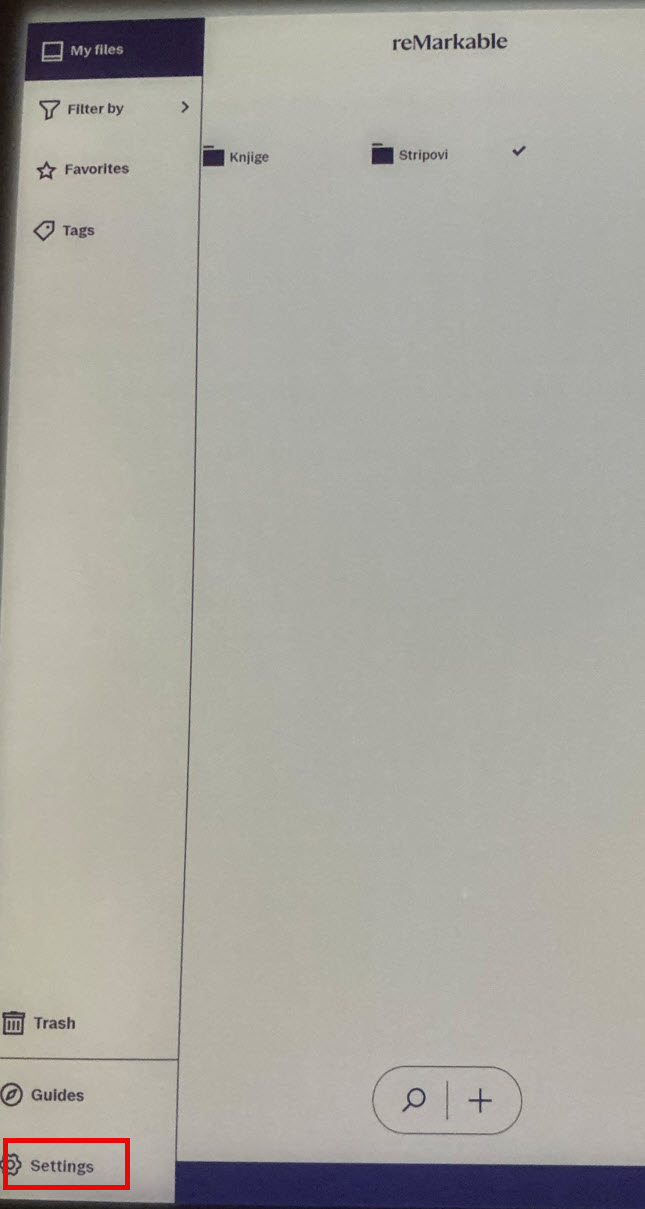
Menu will open, press Settings
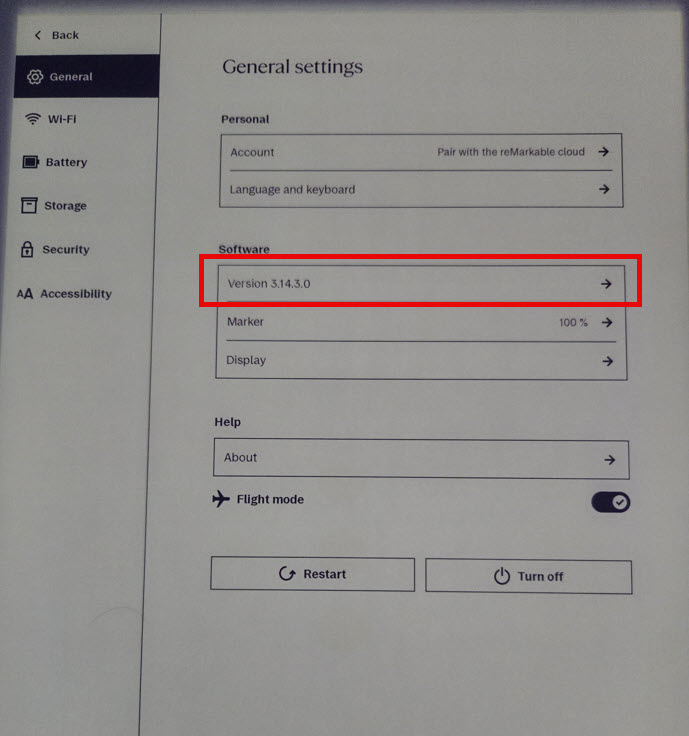
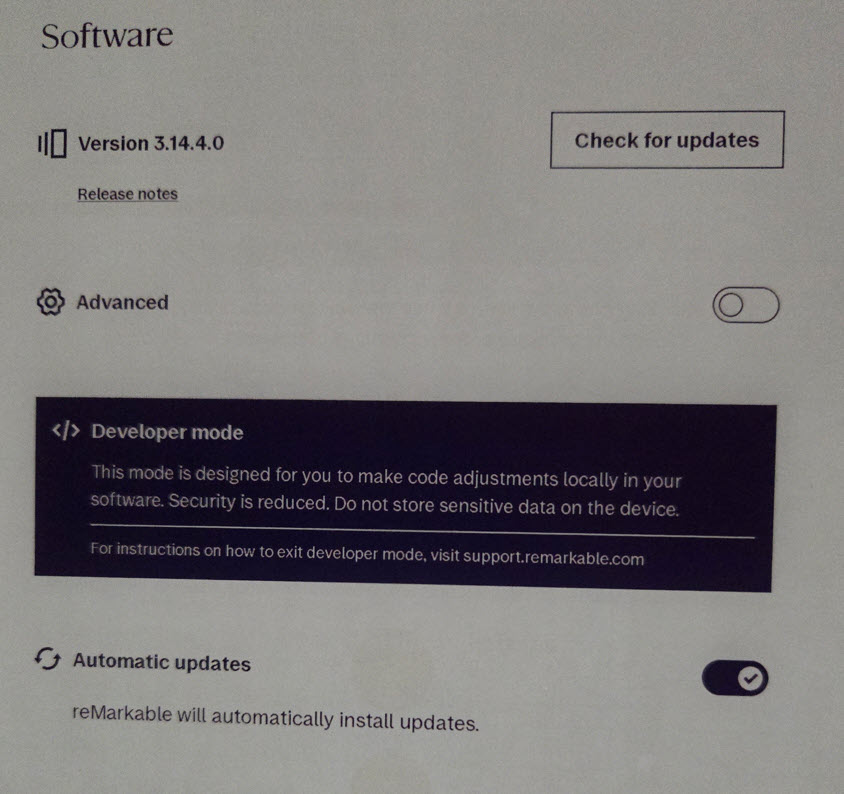
In General menu, under Software section, click on Version 3.14.3.0 (this was version that was actual at the time of writing this guide).
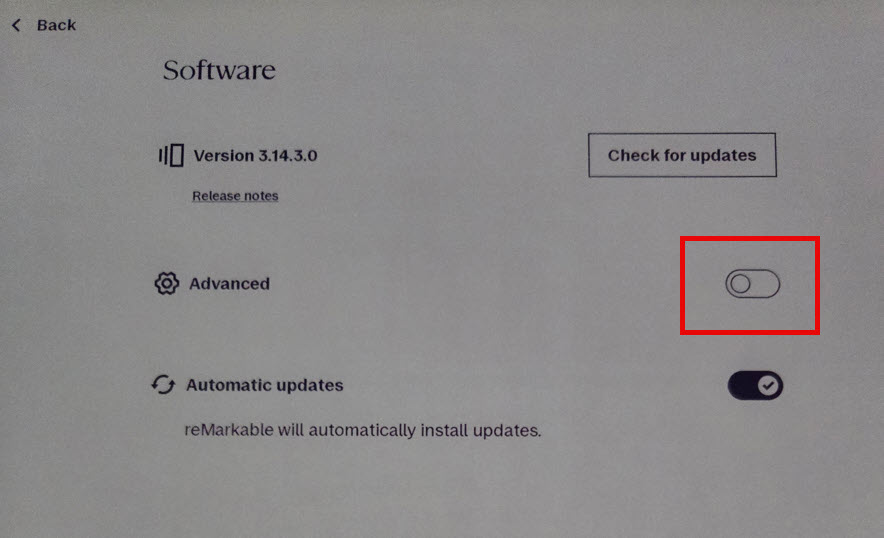
Press button next to Advanced
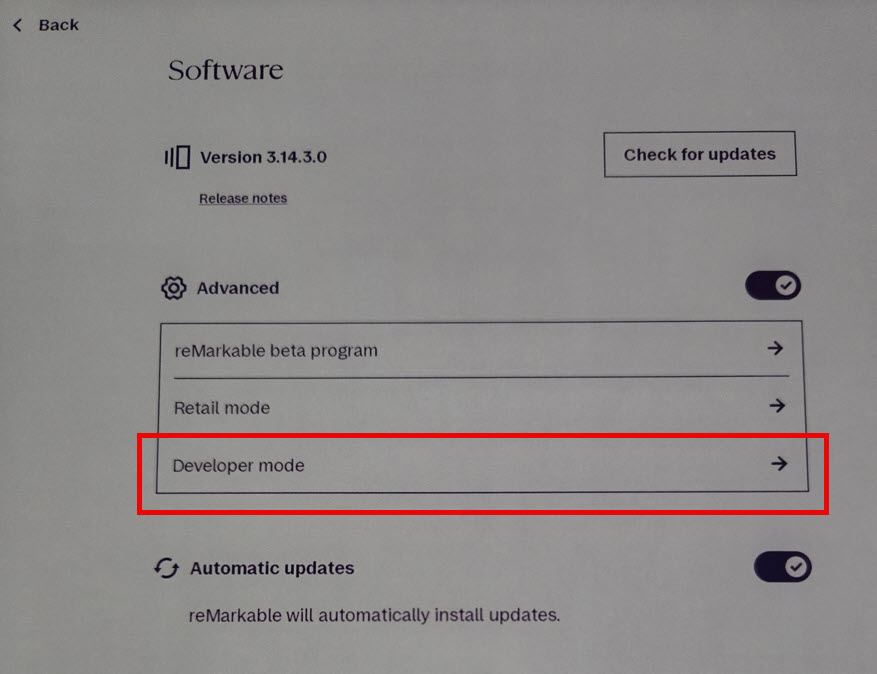
Select Developer Mode
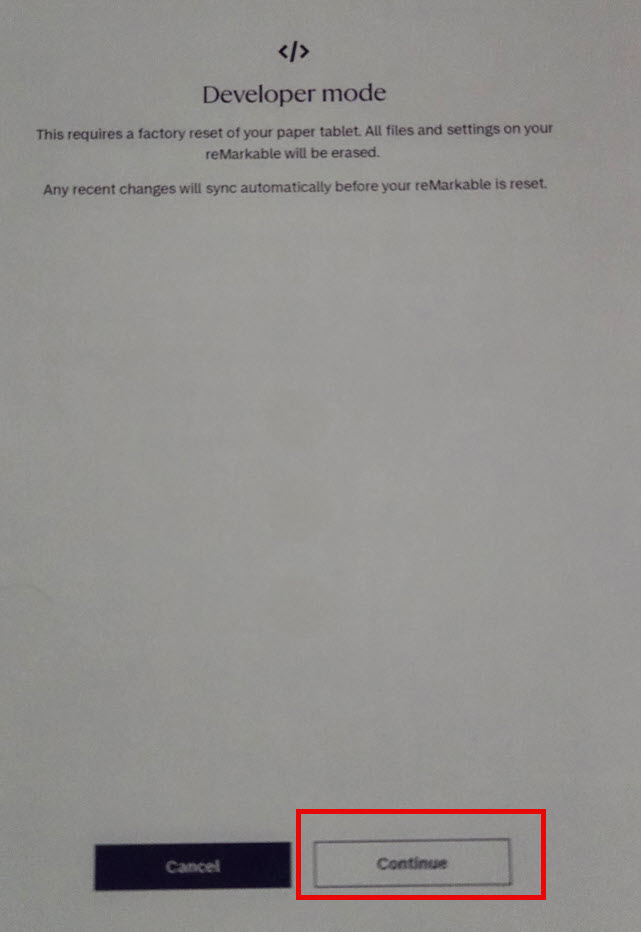
Read carefully everything that is written on this page – especially THIS WILL DELETE ALL FILES part. Press Accept
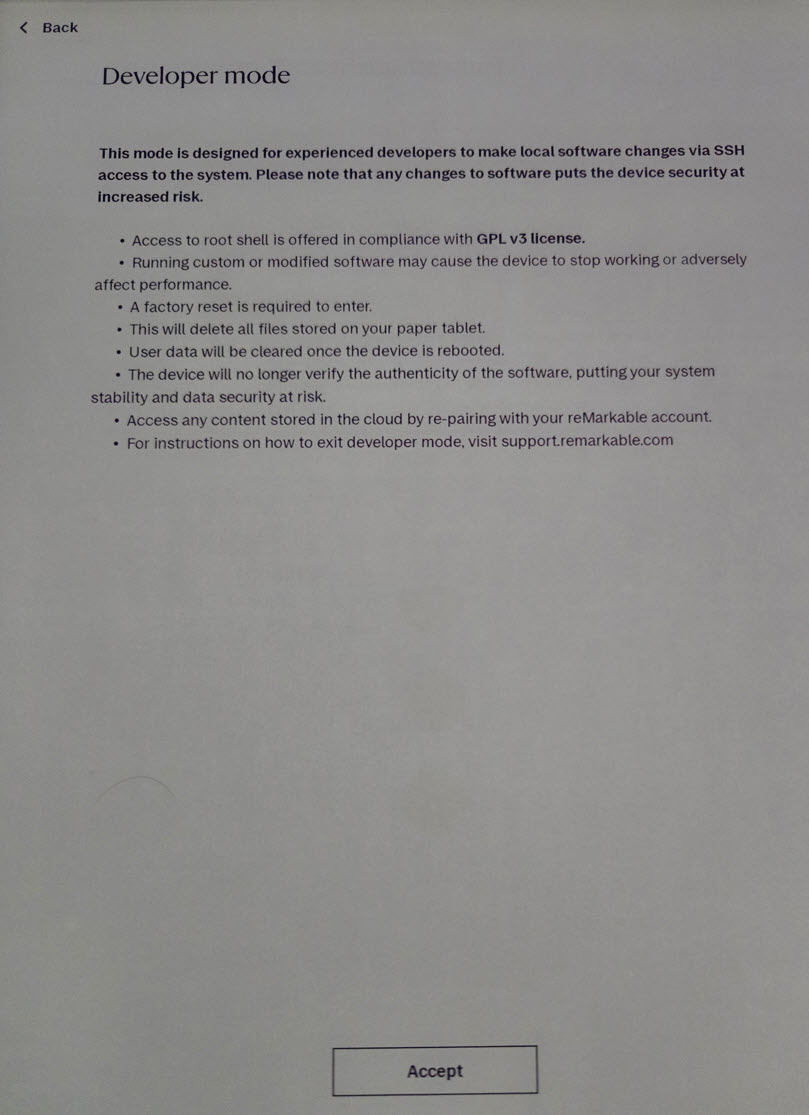
BACKUP YOUR DATA/DOCUMENTS IF YOU HAVEN’T ALREADY. Again, this will factory reset your Paper Pro, everything will be lost. Continue.
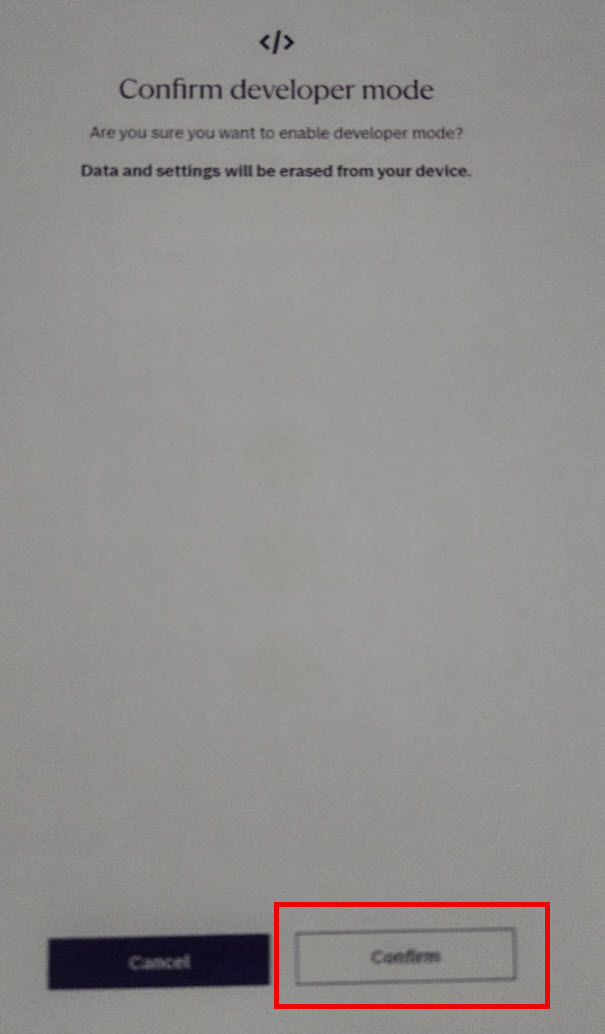
Once again you are reminded that your data will be lost, and developer mode enabled – Confirm
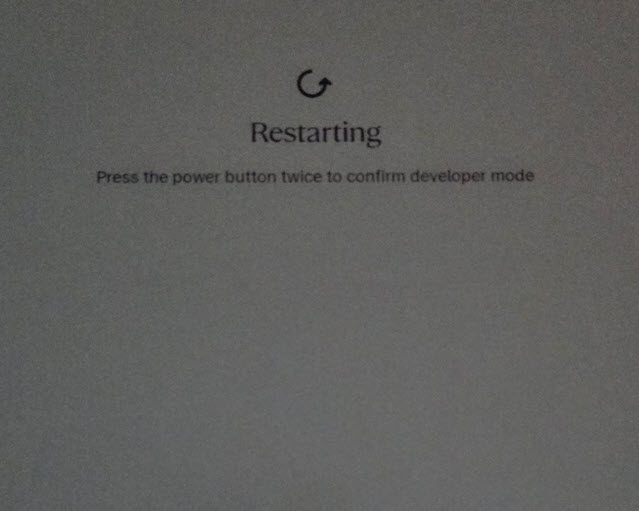
Press the power button twice to start the process
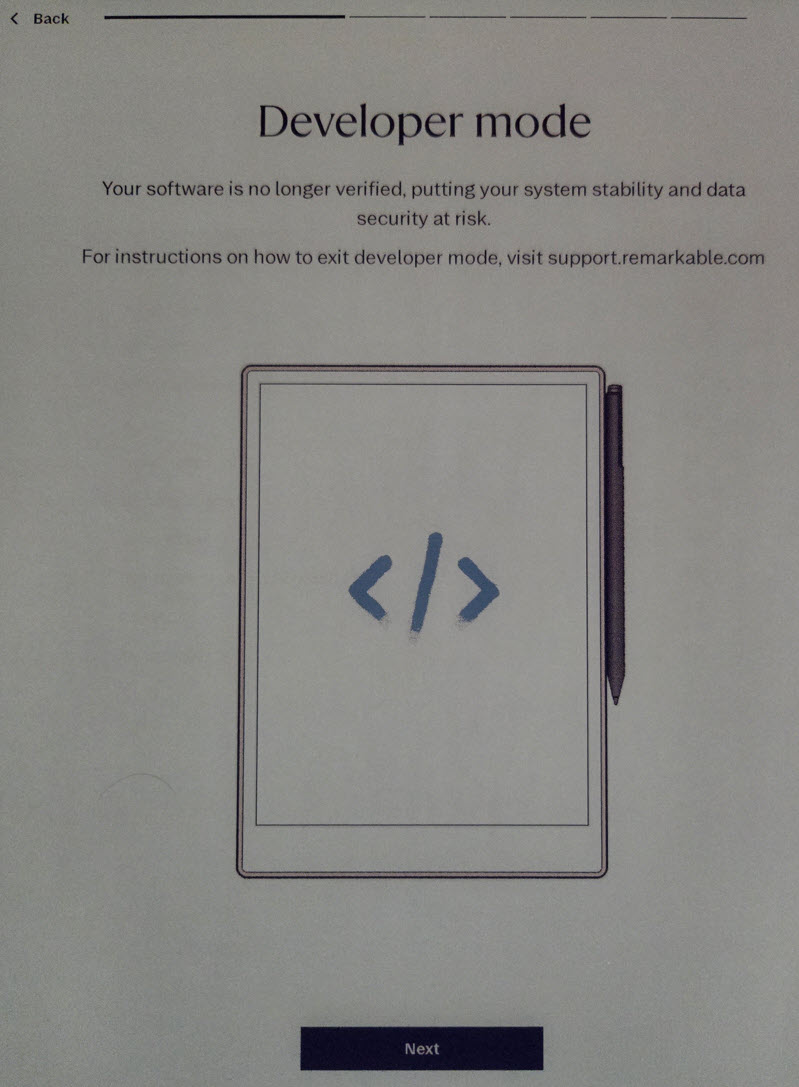
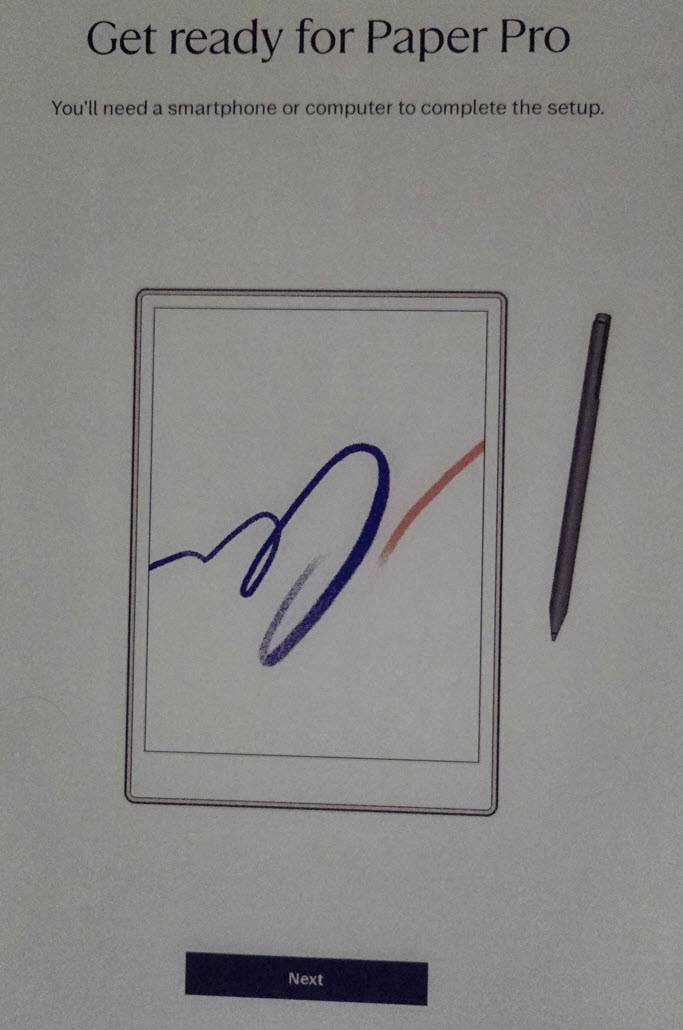
Next time your Paper Pro is booted it will have Developer Mode enabled. You will need to go through initial setup again..
Developer mode is enabled – Next
Next
Next
Next
On next screen you will select your WiFi and connect to it
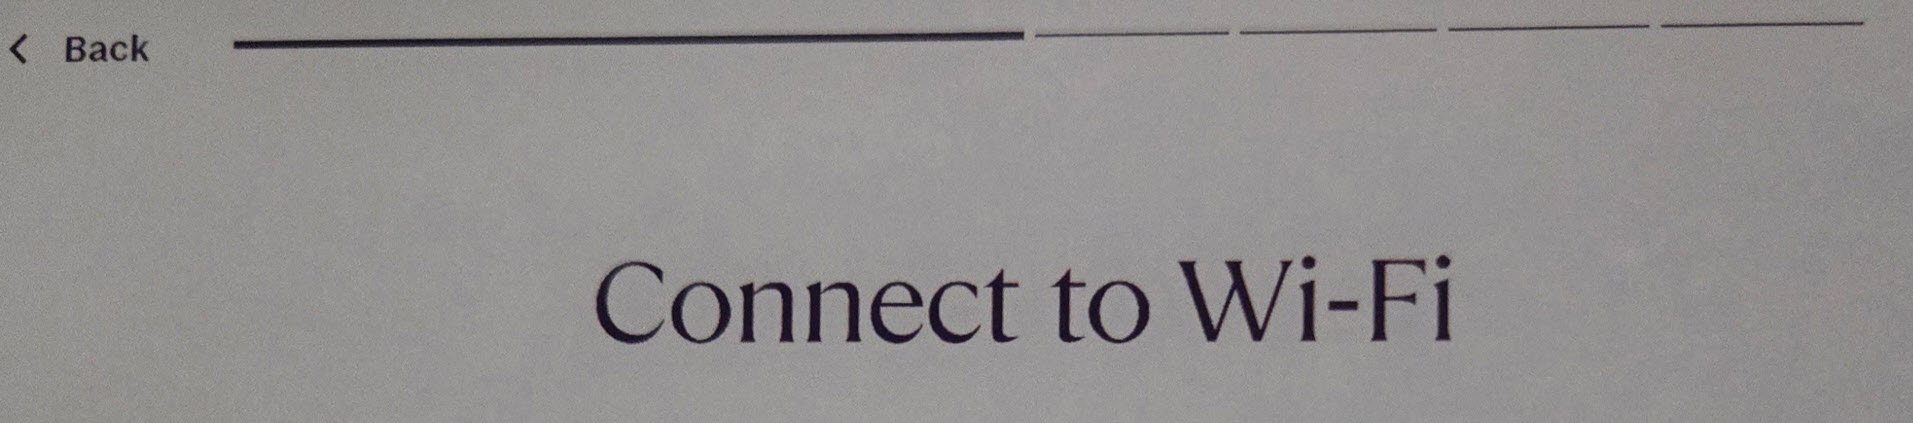
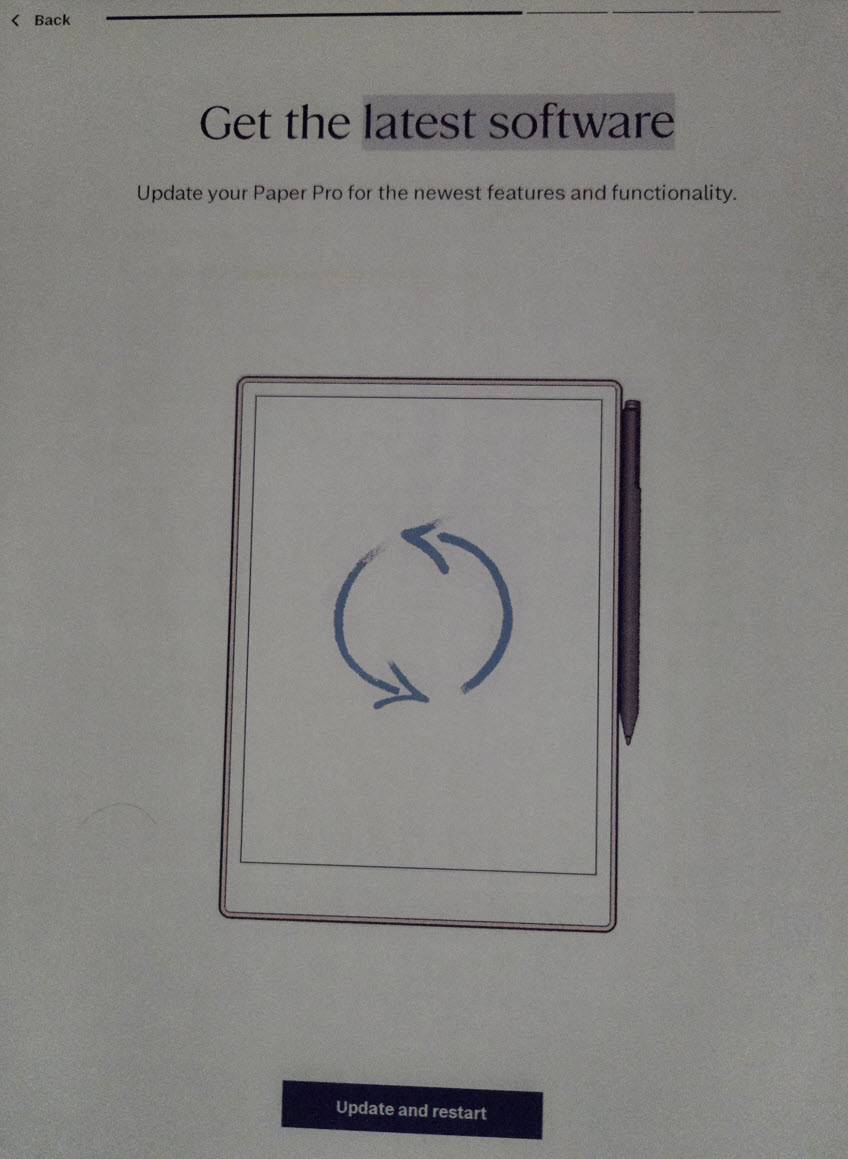
After you are connected to WiFi, Paper Pro will look for software updates, download them and install them. Update and restart
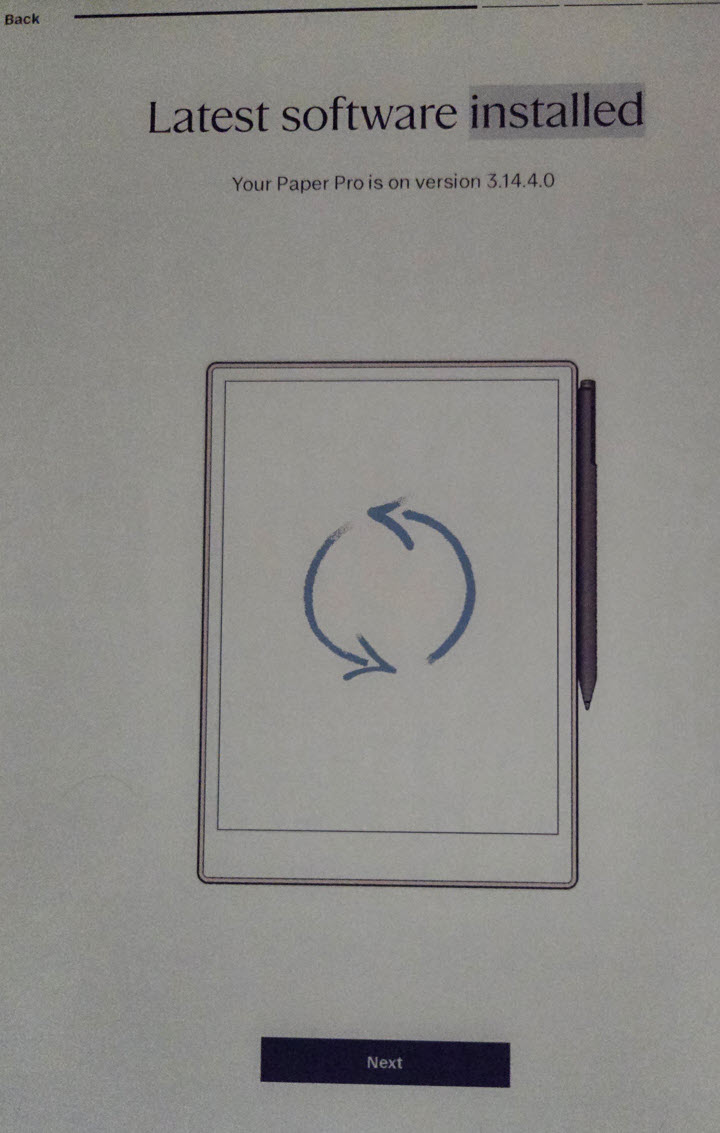
After some time, it will be done, and your Paper Pro will be up to date. Next
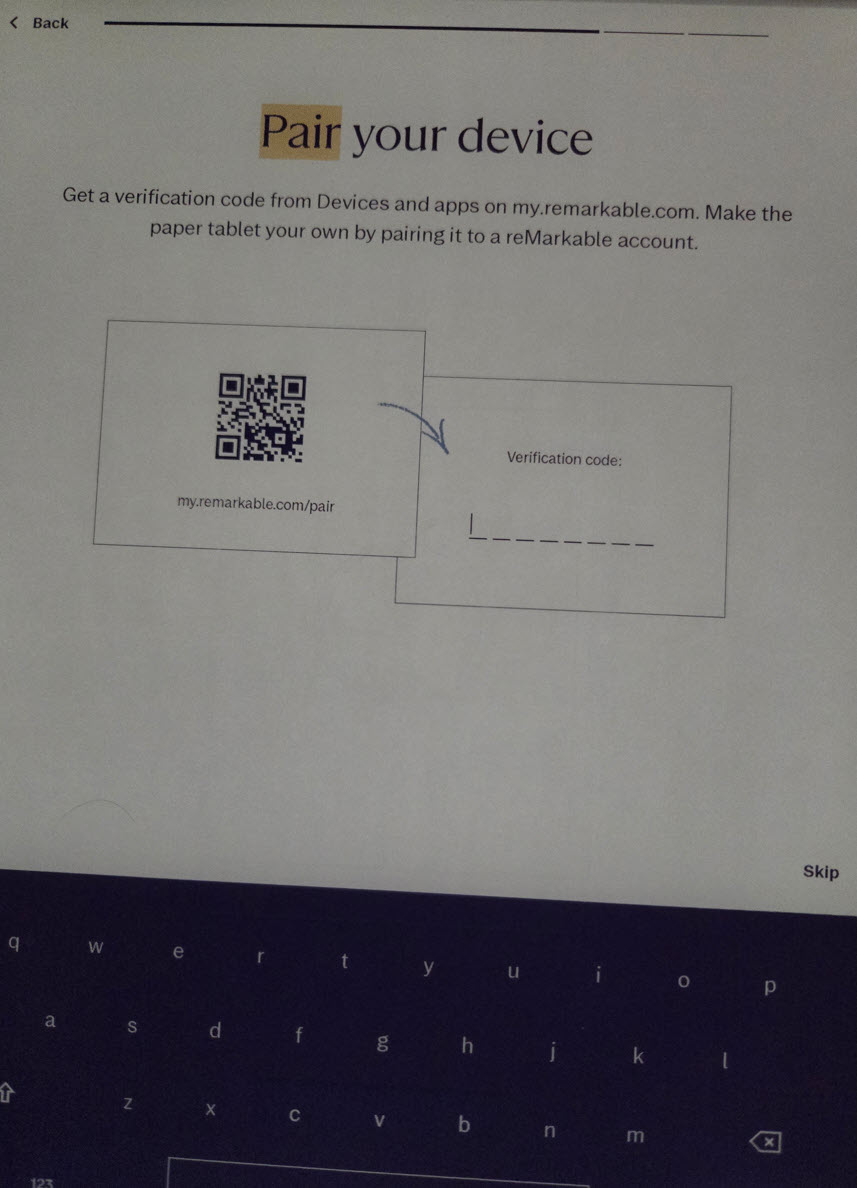
You can pair your device with cloud services, I skipped this part
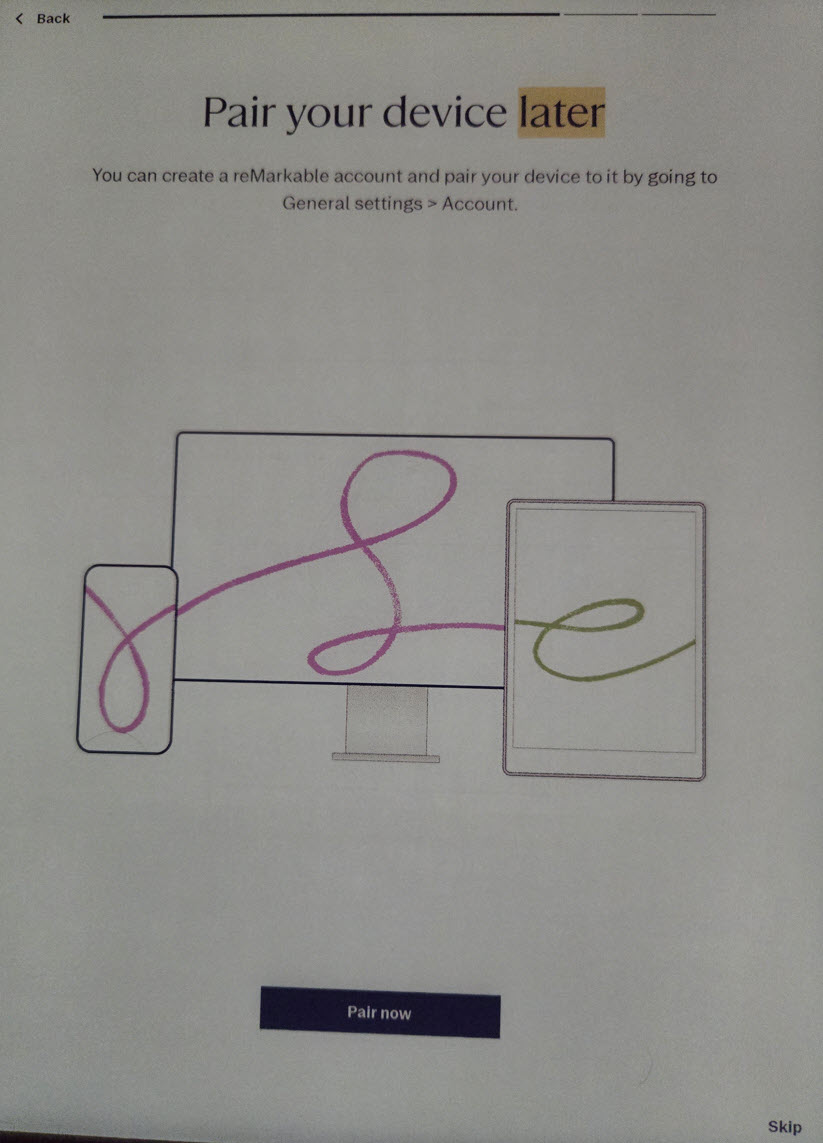
I again pressed – Skip
I can highly recommend for you to set password for your device
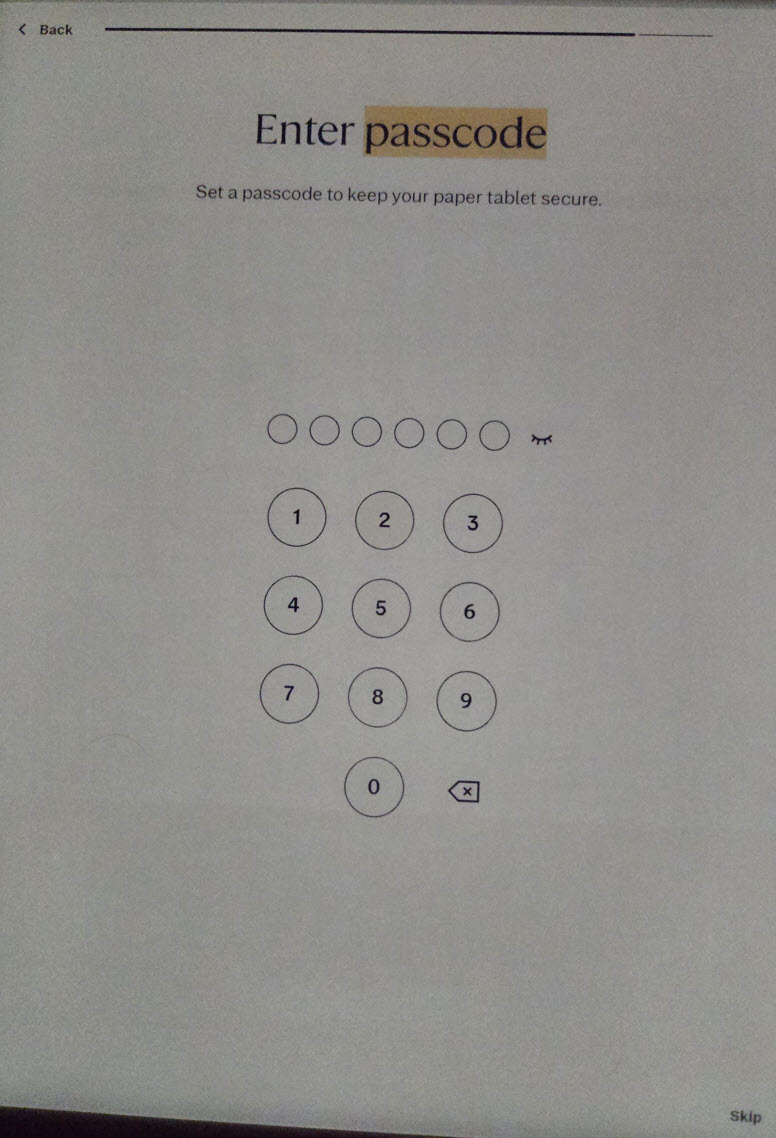
And repeat it

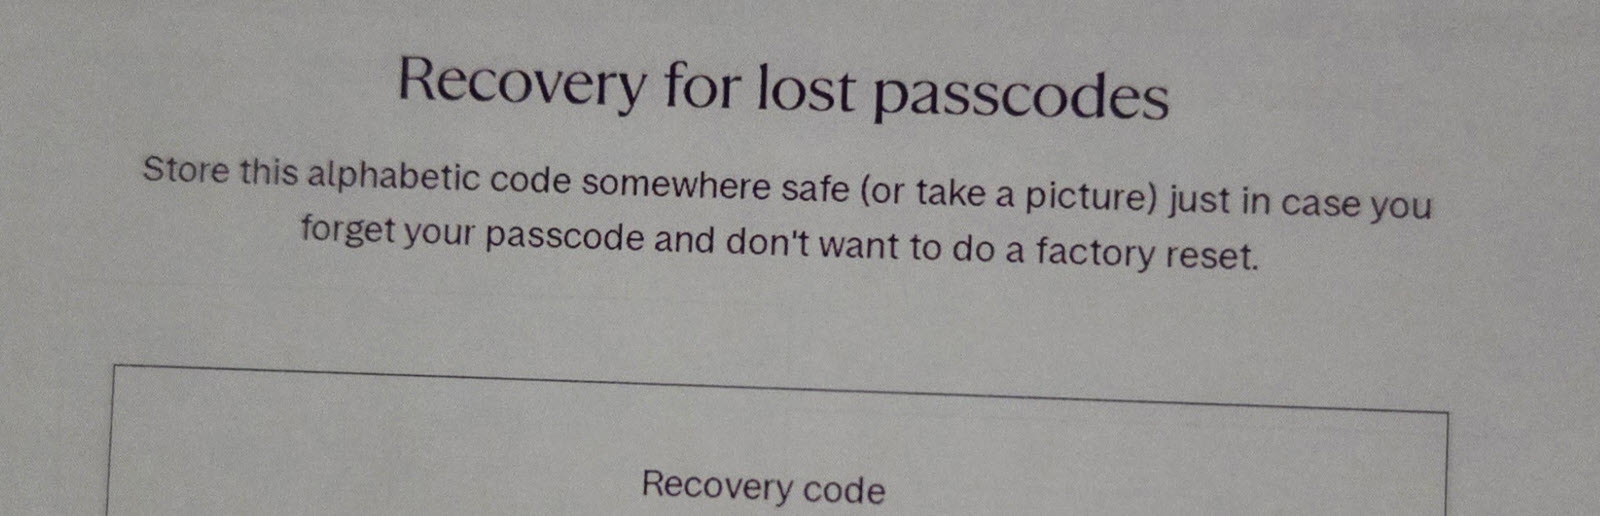
On next screen you’ll get recovery code for your password. Write it down, and keep it secret and safe.
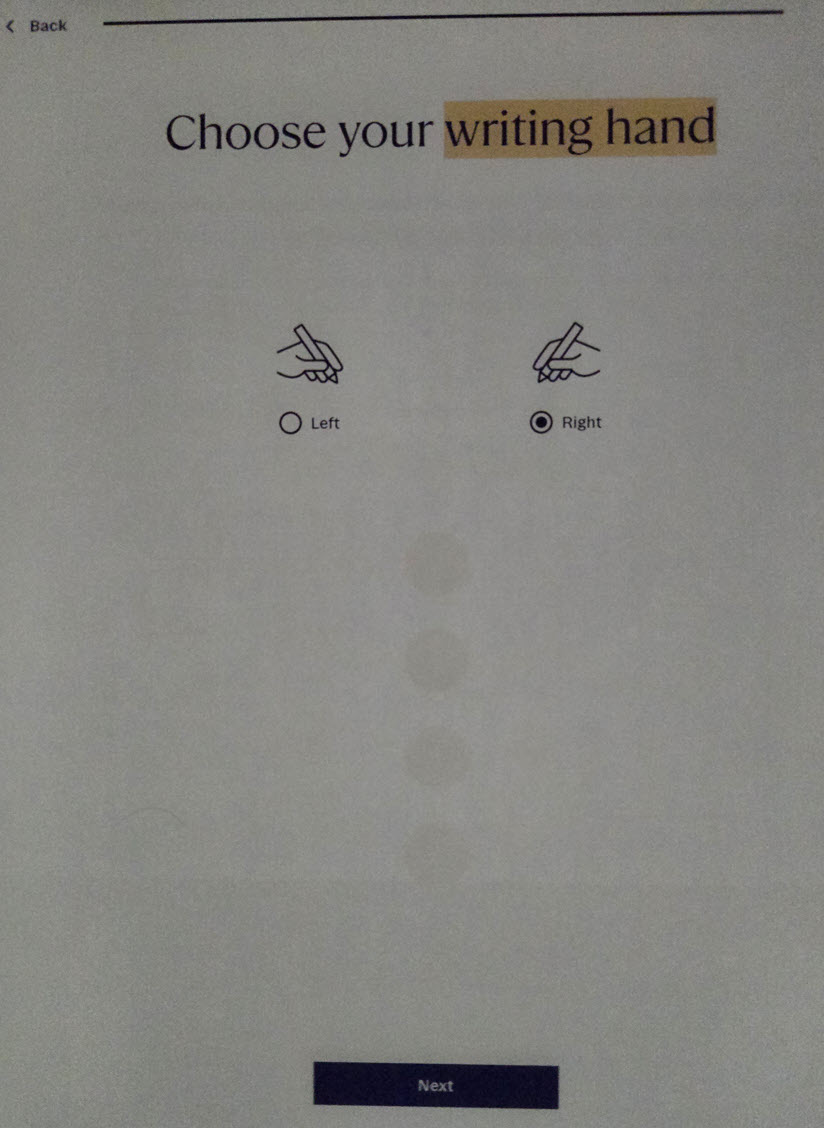
Select a hand with which you write. Next
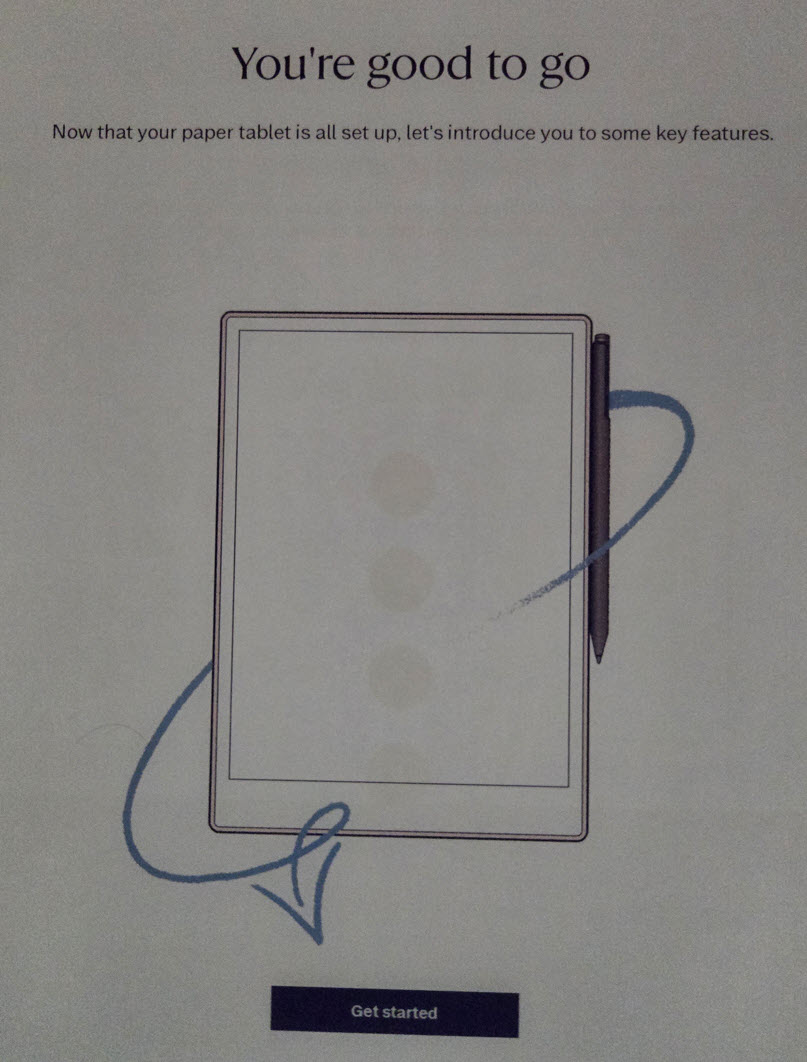
And we are done, our Paper Pro is set once again.
If we go back to Settings, we can now see that we have Developer Mode enabled.
Ok, we are done, Developer Mode on our Paper Pro is now enabled. Since this quide/review is already too long, I will show basic things for reMarkable in other guides.
reMarkable Paper Pro guides
Remarkable Paper Pro – how to enable Developer Mode
How to connect to reMarkable Paper Pro via SSH
How to transfer files to reMarkable Paper Pro (without cloud)
How to backup (and restore) files on reMarkable Paper Pro (without cloud)
How to change is sleeping screen on reMarkable Paper Pro